

How to Secure IoT Devices on Your Home WiFi Network (Practical Guide)
Your smart thermostat, your Ring doorbell, your robot vacuum, your smart TV- each one is a computer connected to your home network.
And unlike your laptop or phone, which receive regular security updates and have OS-level protections, most IoT devices ship with weak default passwords, outdated firmware, and little to no built-in security. Many have known vulnerabilities that their manufacturers never patch.
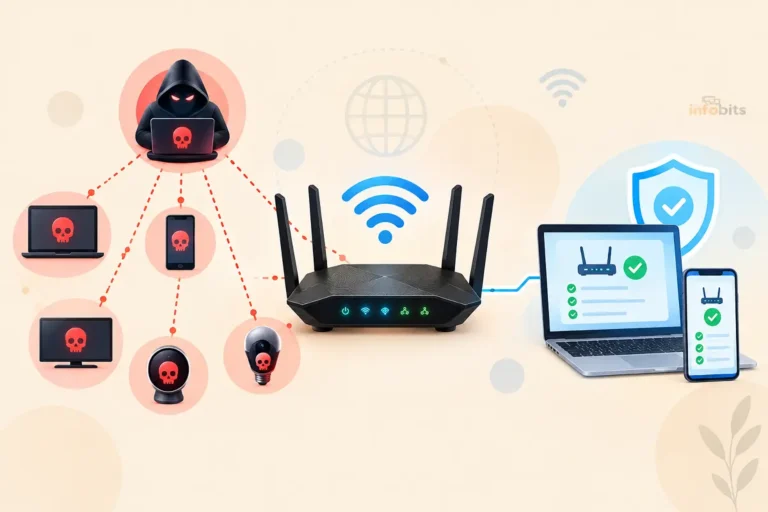
This matters because a compromised smart device isn’t just annoying; it can become a bridge for an attacker to reach everything else on your network: your laptop, your NAS drive, your work computer, your personal files.
The good news is that protecting your IoT devices doesn’t require an IT background or expensive hardware. This guide walks through every meaningful step, from five-minute quick wins to more advanced network isolation, clearly explained for non-technical users and veterans alike.
Quick Answer : How to Secure IoT Devices on Home WiFi
The four highest-impact steps, in order of effort:
- Put IoT devices on a separate WiFi network (guest network or dedicated SSID) , this is the single most effective thing you can do
- Change default usernames and passwords on every device and your router
- Keep firmware updated on all devices
- Disable features you don’t use (UPnP on the router, remote access on cameras, voice features on smart TVs)
Done together, these four steps close the vast majority of real-world IoT attack vectors.
Why IoT Devices Are a Unique Security Risk
To understand why IoT security requires specific attention, it helps to understand what makes these devices different from your phone or laptop.
Poor default security. Most IoT devices ship with default credentials, often “admin/admin” or the device model name, that are publicly documented. Attackers use automated scanners to find devices with unchanged defaults constantly.
Infrequent or no updates. A smartphone OS gets monthly security patches. A smart plug or budget security camera might receive one firmware update in its lifetime, or none at all. Vulnerabilities discovered after that point remain permanently unpatched.
Long deployment lifecycles. People keep smart home devices for years. A camera bought in 2019 may still be running on its original firmware in 2025 with half a decade of unpatched vulnerabilities.
Weak network behaviour. Many IoT devices communicate constantly, sending telemetry to manufacturer servers, advertising their presence on the local network, and accepting inbound connections. This creates a much larger attack surface than a laptop that mostly initiates outbound connections.
Real consequences of compromise. The Mirai botnet, one of the largest DDoS attacks in internet history, was built entirely from compromised IoT devices (IP cameras and routers).
The devices themselves weren’t damaged, but they became unwilling participants in attacks on major internet infrastructure. Closer to home, a compromised camera can expose your home’s interior; a compromised router can intercept your banking traffic.
Related: Is Your Router Part of a Botnet? How to Check and What to Do
Step 1: Isolate IoT Devices on a Separate Network (Most Important Step)
This is the single most effective security measure you can take for your IoT devices, and it’s the one most home users skip.
The concept is called network segmentation: placing IoT devices on a separate network from your personal devices so that even if an IoT device is compromised, the attacker cannot pivot to your laptop, NAS, or work computer.
Option A: Guest Network Isolation (Easiest – Any Router)
The simplest approach is to connect all IoT devices to your router’s guest network rather than your main WiFi. A properly configured guest network keeps devices isolated from your main network by default.
Set up your guest network:
- Log in to your router’s admin panel (
192.168.1.1or192.168.0.1) - Find Guest Network settings.
- Enable a guest SSID with a separate name (e.g., “SmartHome_Devices”)
- Set WPA2 or WPA3 encryption with a strong password
- Ensure “Allow access to local network” or “Access Intranet” is OFF
- Enable client isolation – prevents IoT devices from seeing each other
Connect all smart home devices – smart TVs, cameras, smart plugs, voice assistants, thermostats – to this guest network. Leave your laptops, phones, and tablets on the main network.
What this achieves: If your smart TV is compromised, the attacker is trapped on the guest network. They cannot reach your laptop, your NAS, or your home server because the guest network is firewalled from your main network.
Related: Is Guest WiFi Safe? How to Create a Secure Guest Network
Option B: Dedicated IoT SSID (Better – Supported Routers)
Some routers (particularly ASUS, TP-Link, and those running DD-WRT/OpenWrt) allow you to create a third SSID dedicated to IoT, separate from both your main network and your guest network.
This is cleaner than using the guest network for IoT because it leaves your guest network available for actual guests.
On ASUS routers: Wireless > Guest Network; create a second guest network and label it clearly for IoT devices.
On TP-Link with HomeShield: Advanced > HomeShield > IoT Device Isolation; some newer models have a dedicated IoT network option.
Option C: VLAN Segmentation (Most Powerful – Intermediate Skill)
For users who want the most control, a VLAN (Virtual Local Area Network) provides the strongest isolation. With VLANs, you create separate logical networks on the same physical hardware, each with its own subnet, its own firewall rules, and its own access controls.
A practical home VLAN layout:
- VLAN 10 – Trusted: Laptops, phones, NAS, work computers
- VLAN 20 – IoT: Smart TVs, cameras, thermostats, smart plugs, voice assistants
- VLAN 30 – Guest: Visitor devices
Firewall rules for the IoT VLAN:
- IoT devices can access the internet
- IoT devices cannot initiate connections to the Trusted network
- IoT devices cannot reach each other (client isolation)
- IoT devices can be controlled by apps on the Trusted network (allow return traffic only)
Hardware requirements for VLAN setup:
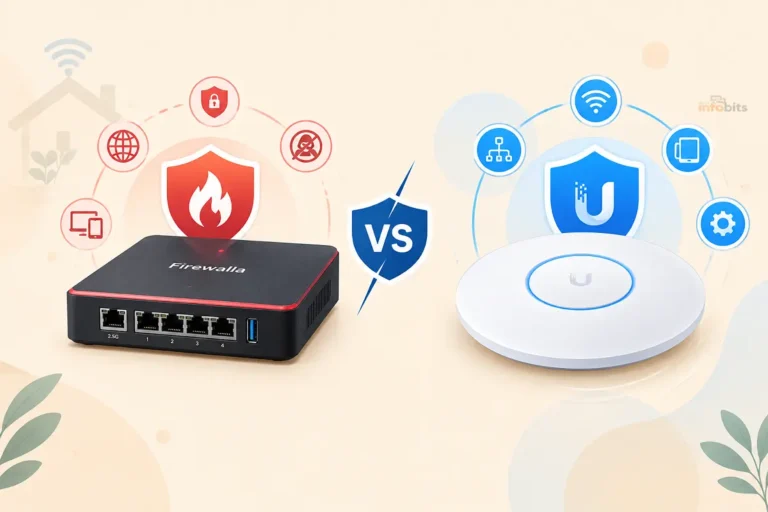
- A router that supports VLANs; UniFi Dream Machine, Firewalla Gold, pfSense, OPNsense, or consumer routers with DD-WRT/OpenWrt
- A managed switch (supports 802.1Q VLAN tagging) for wired IoT devices ; TP-Link TL-SG108E (~$30) is a popular budget option
VLAN setup is more complex than a guest network but provides more granular control. For most homes with 10–20 IoT devices and no wired smart home infrastructure, a guest network provides adequate isolation with far less complexity.
A TP-Link TL-SG108E managed switch (available on Amazon) is the most affordable entry point for wired VLAN segmentation; it supports 802.1Q VLAN tagging, costs less than $50, making proper IoT network segmentation accessible without enterprise hardware costs.
Related: How to Block Specific Devices from Accessing Your Router
Step 2: Change Default Credentials on Every Device
This is the lowest-effort, highest-impact security step, and the most commonly skipped.
Every IoT device comes with default credentials set by the manufacturer. In many cases, these are the same across every device of that model, publicly documented in manufacturer manuals and in default credential databases that attackers use.
An IP camera with unchanged default credentials can be found and accessed by anyone who knows the model name.
Change these credentials on every IoT device:
- Router admin username and password
- Security camera login
- Smart doorbell app credentials
- NVR/DVR login
- Smart home hub (SmartThings, Home Assistant) admin password
- Baby monitor login
- Network-attached printer admin access
Best practices for IoT device passwords:
- Use a unique, strong password for each device (12+ characters, mixed case, numbers, symbols)
- Never reuse passwords across devices
- Use a password manager to keep track; there’s no realistic way to remember unique passwords for 15+ devices without one.
A password manager subscription like 1Password or Bitwarden makes maintaining unique passwords for every IoT device practical; both offer family plans and are available directly via their sites or through app stores, with Bitwarden offering a generous free tier.
Step 3: Keep Firmware Updated on All Devices
Firmware updates are the primary way manufacturers fix security vulnerabilities. An unpatched IoT device is a device whose known weaknesses remain exploitable indefinitely.
Enable Automatic Updates Where Available
Most modern smart home devices from reputable manufacturers- Amazon Echo, Google Nest, Philips Hue, Ring, Eufy – update firmware automatically. Verify that automatic updates are enabled in each device’s app.
Check and Update Manually for Devices Without Auto-Update
For devices that don’t update automatically:
- Open the device’s companion app
- Go to Settings or About → look for Firmware Version or Software Update
- Check the manufacturer’s support site for the latest firmware version
- If your current version is older, download and apply the update
Set a calendar reminder to check firmware on all IoT devices quarterly. This is especially important for:
- Security cameras (primary target for hackers)
- Smart doorbells (video surveillance devices)
- Smart locks (physical security implications)
- Network-attached storage on the network
- Your router itself
When to Stop Trusting a Device
If a manufacturer has stopped releasing updates for a device, especially a security-related device like a camera or lock, consider whether to continue using it.
A camera that hasn’t received a firmware update in two years is a liability, particularly if security vulnerabilities have been publicly disclosed for that model.
Step 4: Disable Features You Don’t Use
IoT devices are often shipped with many features enabled by default, features that expand the attack surface without providing you any benefit if you’re not using them.
On Your Router
Disable UPnP (Universal Plug and Play); UPnP allows devices on your network to automatically open ports on your router, convenient but potentially dangerous, as malicious software can use UPnP to open inbound connections without your knowledge. Disable it unless a specific device requires it.
- Log in to your router’s admin panel
- Go to Advanced > UPnP or WAN > UPnP
- Toggle it off
- Save
Disable remote management unless you actively use it. Remote management allows you to access your router’s admin panel from the internet, a feature that also creates an internet-exposed login page for attackers.
On IoT Devices
Security cameras:
- Disable UPnP or P2P remote access if you use a local NVR rather than cloud access
- Disable audio monitoring if you don’t need two-way audio
- Disable RTSP access if you’re not using a local video recorder
Smart TVs:
- Disable ACR (Automatic Content Recognition) – a feature that identifies what you’re watching and sends it to the manufacturer for advertising purposes; usually in Settings > Privacy
- Disable HbbTV / interactive services if you don’t use them
- Disable DLNA server mode unless you actively stream local media to the TV
Smart speakers and voice assistants:
- Review and disable always-on microphone features if using them only for music playback
- Disable purchasing capabilities if you don’t want accidental or unauthorised purchases
- Review app permissions periodically
Any device:
- Disable SSH, Telnet, or FTP server features if present and not needed; these are remote access protocols that significantly expand the attack surface if left open
Related: Top Routers with Built-in VPN for Ultimate Security
Step 5: Use WPA3 or WPA2-AES Encryption on All Networks
All three of your networks- main, guest/IoT, and any additional SSIDs- should use strong encryption.
WPA3 is the current gold standard. It improves on WPA2 by providing stronger encryption and making brute-force attacks significantly harder, even against shorter passwords. Enable it if your router and devices support it.
WPA2 with AES is a solid fallback for devices that don’t support WPA3. Never use TKIP (an older, weaker cipher) or WEP (completely broken and should never be used).
How to check and change your encryption settings:
- Log in to your router’s admin panel
- Go to Wireless Settings for each SSID (main and guest/IoT)
- Find Security Mode or Authentication Type
- Select WPA3 or WPA2 (AES only)
- Save and reconnect devices if needed
Related: Understanding WPA3 Encryption: Why Your Router Needs WPA3
Step 6: Use DNS Filtering to Block Malicious Domains
DNS filtering is a network-wide security layer that blocks connections to known malicious domains before they can reach any device. When set at the router level, it protects all devices, including IoT devices that have no built-in security software.
How to set up free DNS filtering:
- Log in to your router’s admin panel
- Go to WAN Settings > DNS or Internet Connection > DNS
- Set the DNS server to one of these free, security-focused options:
- Cloudflare for Families; Primary:
1.1.1.2, Secondary:1.0.0.2(blocks malware + adult content) - CleanBrowsing Security ; Primary:
185.228.168.9, Secondary:185.228.169.9(malware/phishing only) - Quad9; Primary:
9.9.9.9, Secondary:149.112.112.112(blocks malicious domains, privacy-focused)
- Cloudflare for Families; Primary:
- Save and apply
You can also apply different DNS servers to your IoT guest network for additional content filtering there specifically.
Related: How to Set Up Parental Controls on Your Router
Step 7: Monitor Your IoT Devices Regularly
Once your security measures are in place, ongoing monitoring helps you catch anything unexpected.
Check Connected Device Lists Monthly
Log into your router’s admin panel and review the connected device list. Any device you don’t recognise is worth investigating. If you put all IoT devices on a named guest network, an unknown device appearing there may indicate someone has your guest password; update it.
Use Network Scanning Apps
The Fing app (iOS/Android, free) scans your network and lists every connected device with its name, manufacturer, and IP address. Run it monthly to audit your network and identify any unexpected connections.
Watch for Unusual Bandwidth Usage
IoT devices should have relatively predictable, low-bandwidth usage patterns. A smart plug has no reason to upload large volumes of data. If your router shows a device consuming unexpectedly high bandwidth, particularly upload bandwidth, investigate it.
Related: How to Monitor Network Traffic on Your Home Router
Step 8: Buy from Reputable Manufacturers and Know When to Replace
Security is built into a device (or not) long before you buy it. Choosing devices with good security track records significantly reduces your workload.
What to Look for Before Buying
- Update history: Does the manufacturer have a record of releasing firmware updates and security patches? Check the product page or support site for firmware release notes.
- Clear update policy: Some manufacturers publish their support commitment (e.g., “security updates for 5 years from purchase date”). This is a positive signal.
- Data handling transparency: Does the manufacturer clearly describe what data the device collects and how it’s used?
- Security certifications: Matter (formerly CHIP), the smart home interoperability standard, includes security requirements. Devices with Matter certification have passed baseline security tests.
- No known public vulnerabilities with unpatched status: Search “[device model] vulnerability” before buying. A device with known unpatched CVEs (Common Vulnerabilities and Exposures) should be approached with caution.
When to Replace an IoT Device
- The manufacturer has ended software/firmware support
- A significant, unpatched security vulnerability has been publicly disclosed
- The device hasn’t received a firmware update in over a year for a security-critical device (cameras, locks, doorbells)
- The manufacturer has gone out of business with no successor providing updates
The average smart home device lifecycle for security support at reputable manufacturers is typically 3–5 years. Budget devices often have shorter (or no defined) support windows.
IoT Security Quick-Reference Checklist
Use this monthly to stay on top of your smart home security:
Network Isolation:
- All IoT devices are on a separate guest or IoT SSID (not your main network)
- Guest/IoT network has “allow access to local network” turned OFF
- Client isolation is enabled on the IoT network
- WPA3 or WPA2-AES encryption is set on all networks
Credentials:
- Default username and password changed on every IoT device
- Router admin password is strong and unique
- All IoT device passwords are unique (no reuse)
Updates:
- Router firmware is current
- All IoT device firmware is current (auto-update verified, or manual check done)
Feature Hygiene:
- UPnP disabled on router (unless specifically needed)
- Remote management disabled on router
- Unused features disabled on IoT devices (ACR on TV, two-way audio on camera, etc.)
Monitoring:
- Connected device list reviewed this month
- No unknown devices on any network
- No unusual bandwidth usage from IoT devices
Related: What Are AI Agents? What They Actually Do(Beyond the Hype)
Common IoT Security Mistakes
| Mistake | What to Do Instead |
|---|---|
| Keeping default admin/password on devices | Change every default credential before connecting to the network |
| Putting IoT devices on the main network | Isolate them on a guest or dedicated IoT SSID |
| Ignoring firmware updates for months | Enable auto-update; do a manual check quarterly |
| Using the same password across multiple devices | Use unique passwords via a password manager |
| Leaving UPnP enabled on the router | Disable it; very few home users need it |
| Buying cheap cameras with no update policy | Check manufacturer update history before purchase |
| Never reviewing the connected device list | Monthly audit catches intruders and rogue devices |
| Trusting “smart home” branding to imply security | Security is not a given; verify it actively |
Myth vs. Fact: IoT Device Security
Myth: My smart home devices are too insignificant to be targeted. Fact: Attacks on IoT devices are largely automated; scripts constantly scan the internet for devices with default credentials or known vulnerabilities, regardless of brand or size. Your smart plug doesn’t need to be specifically targeted; it just needs to be discoverable.
Myth: I’m safe because my network is password-protected. Fact: Your WiFi password protects against unauthorised external access, but a device that joins your network (even legitimately) can probe and attack other devices on the same network. Network isolation protects you from threats that originate inside the network.
Myth: Only cheap or unknown brands have IoT security problems. Fact: Major brands including Amazon, Google, Philips, and Ring have all had published security vulnerabilities in their devices. Reputable manufacturers respond more quickly with patches; the risk is managed, not eliminated.
Myth: Isolating IoT devices on a guest network breaks smart home functionality. Fact: Most smart home functions work perfectly from a guest network. Voice assistants, app control, and cloud-based automations all function via internet access, which the guest network provides. The one exception is local discovery (mDNS/Bonjour); some devices need to be on the same network segment as the controlling app. For these, enable mDNS bridging on your router if supported, or use the app’s cloud control instead.
Myth: Firmware updates are optional if the device seems to be working fine. Fact: A device can be “working fine” while running with known, exploitable vulnerabilities. Firmware updates fix security issues that aren’t visible in normal operation. Skipping them is analogous to not updating your laptop’s OS because it “seems fine.”
Conclusion
Securing your IoT devices comes down to a few consistent principles: isolate them from your personal devices, change every default credential, keep firmware updated, and disable what you don’t need.
Network isolation is the cornerstone. When IoT devices are properly separated from your main network, a compromised device is contained. The convenience of smart home technology remains fully intact; everything still works through the internet, but an attacker who gets into your smart TV can’t reach your laptop or your files.
The rest of the steps- firmware updates, strong passwords, disabling UPnP, DNS filtering- are layers that each reduce a specific risk. Together, they make your smart home meaningfully safer without requiring expertise or expensive hardware.
Start with the guest network. Get every smart home device moved over. Change the default credentials. Enable firmware auto-updates. Those four steps put you well ahead of the average home network when it comes to IoT security.
Frequently Asked Questions
Why do IoT devices need special security measures compared to other devices?
IoT devices are uniquely vulnerable because they typically ship with weak default credentials, receive infrequent or no security updates, run continuously in the background, and often accept inbound network connections. Unlike phones and laptops that have OS-level security, most IoT devices have minimal built-in protection and run for years without patches.
What is the most important thing I can do to secure my IoT devices?
Network isolation, putting all IoT devices on a separate WiFi network from your personal devices, is the single most impactful step. Even if an IoT device is compromised, network isolation prevents the attacker from reaching your laptops, phones, and personal data.
Should IoT devices be on my main WiFi or a guest network?
IoT devices should be on a separate network from your main devices, either your router’s guest network (with “allow access to local network” turned OFF) or a dedicated IoT SSID. This is the most effective way to limit the damage a compromised device can do.
Can a compromised smart device affect other devices on my network?
Yes, if devices share the same network. A compromised device on a flat (unsegmented) network can scan, probe, and attack other devices. This is why network segmentation is so important. With proper isolation, a compromised IoT device is contained to its own network segment.
How do I change default passwords on IoT devices?
In the device’s companion app, go to Settings → Account or Device Settings → look for Login Credentials, Admin Password, or Change Password. For devices without an app, access the admin interface via a browser using the device’s IP address (found in your router’s device list) and change credentials there.
Do IoT devices need antivirus software?
No, IoT devices run on embedded operating systems that don’t support traditional antivirus software. The equivalent protection comes from network-level measures: isolation, DNS filtering, firewall rules, and keeping firmware updated.
What is UPnP and why should I disable it?
UPnP (Universal Plug and Play) allows devices on your network to automatically open ports on your router to accept inbound connections. This is convenient for some applications but creates a security risk; malware can use UPnP to open inbound access for attackers without your knowledge. Disable it in your router’s admin panel unless a specific device requires it.
What is a VLAN and do I need one for IoT security?
A VLAN (Virtual Local Area Network) creates a separate logical network on the same physical hardware, with firewall rules controlling what each network can reach. It provides stronger, more granular isolation than a guest network. Most home users don’t need VLANs; a guest network provides adequate isolation. VLANs are valuable for users with many IoT devices, wired smart home infrastructure, or specific security requirements.
How often should I update IoT device firmware?
Enable automatic updates whenever the device supports it. For devices without automatic updates, check manually every 3 months and before any significant events (travel, house guests). Always check firmware immediately after buying a new IoT device; it may have shipped with outdated firmware.
Is it safe to use smart cameras if I can’t fully secure them?
Somewhat, but take steps to minimise risk. Change default credentials, keep firmware updated, put the camera on an isolated network, and disable remote access features if you use local storage or a local NVR. If a camera’s manufacturer has stopped providing updates, consider replacing it, particularly if it covers sensitive areas of your home.
Can smart home devices work normally on a guest network?
Yes, in most cases. Devices that rely on cloud services (Amazon Echo, Google Nest, Ring, Philips Hue) work perfectly from a guest network because they connect via the internet. The exception is local device discovery (mDNS); some devices need to be on the same subnet as the controlling app. If you encounter this, check if your router supports mDNS bridging between networks.
What should I do if I find an unknown device on my IoT network?
Look up its MAC address prefix at macvendors.com to identify the manufacturer. If you recognise it as one of your devices, name it in your router for future reference. If you genuinely don’t recognise it, change your IoT network password immediately and monitor whether the device reappears.
Does DNS filtering protect IoT devices?
Yes, DNS filtering set at the router level applies to all devices, including IoT devices. When an IoT device attempts to connect to a known malicious domain, the DNS server returns a blocked response before any connection is made. Services like Cloudflare for Families (1.1.1.2) and Quad9 (9.9.9.9) provide free malware-blocking DNS.
Should I buy IoT devices that support the Matter standard?
Matter (formerly Project CHIP), backed by Apple, Google, Amazon, and Samsung, is a smart home standard that includes baseline security requirements. Devices with Matter certification have passed security testing and work across ecosystems. It’s a positive signal when buying new devices, though it doesn’t guarantee ongoing security; firmware updates still matter.
What data do IoT devices collect about me?
This varies widely by device and manufacturer. Smart TVs with ACR collect viewing habits. Smart speakers log voice commands. Smart doorbells store video footage in the cloud. Smart appliances often collect usage patterns. Review each device’s privacy policy and disable data collection features you don’t want in the device’s settings.
Found this guide useful? Share it with a friend who just set up their first smart home. Follow us on Facebook and Twitter, and subscribe to our free newsletter for more home networking and smart home security guides.
We also ask that you bookmark this page for future reference, as we are constantly updating our articles with new information.
Please share this article with your friends and relatives if you find it useful.
Disclosure: Some links in this article are affiliate links. If you purchase through them, we may earn a small commission at no additional cost to you.

)