
How to Set Up a Router at Home: A Complete Beginner’s Guide
Setting up a router for the first time can feel like stepping into unfamiliar territory. Cables, blinking lights, IP addresses, firmware- it sounds more complicated than it actually is.
The truth is, most people can get a home network up and running in under 30 minutes, even with zero technical experience.
This guide walks you through every single step clearly and practically, from choosing the right router for your home to locking it down securely.
By the end, you’ll not only have working Wi-Fi, but you’ll also understand why each step matters.
What Is a Router, and Why Does Your Home Need One?
Before diving into the setup, it helps to understand what a router actually does. Knowing this makes the whole process click into place.
Your internet service provider (ISP) delivers internet to your home through a single connection, typically via a modem (a device that translates your ISP’s signal into a usable format).
The router’s job is to take that single connection and share it across all the devices in your home: your phone, laptop, smart TV, gaming console, tablets, smart speakers, and anything else that connects to the internet.
Think of the modem as the front door to the internet, and the router as the hallway inside your home, directing traffic to each room.
Beyond sharing your connection, a router also:
- Acts as a security firewall, blocking unsolicited traffic from the internet before it reaches your devices
- Creates a local network (LAN), so your devices can talk to each other, useful for printing wirelessly or streaming to a TV
- Manages bandwidth, giving priority to the devices and applications that need it most
- Enables wireless connectivity (Wi-Fi), so you’re not running cables to every device
Quick Answer: Router vs. Modem vs. Modem-Router Combo. A modem connects you to the internet. A router shares that connection wirelessly. A modem-router combo (often called a gateway) does both in one box, commonly provided by ISPs. If you’re renting your ISP’s gateway, you can still connect your own router to it for better performance and control.
Step 1: Choose the Right Router for Your Home
You don’t need the most expensive router on the market, but you do need the right one for your situation. Here’s how to think about it.
Router Types to Know About
Single wireless routers are what most people picture: one box that broadcasts Wi-Fi from a central location. They work well for apartments, smaller homes, and single-story layouts.
Modern Wi-Fi 6 and Wi-Fi 6E models offer excellent speeds, better handling of many simultaneous devices, and improved range.
Mesh Wi-Fi systems use multiple devices (called nodes) spread around your home to create a single, seamless network.
If your home is large (over 1,800 sq ft), multi-story, or has thick walls, a mesh system eliminates dead zones without the hassle of range extenders. The trade-off is higher cost and a slightly more complex setup.
ISP-provided routers/gateways are often the simplest option since your ISP sets everything up. The downside is they’re typically basic, offer limited control, and may have older Wi-Fi standards.
What Wi-Fi Standard Should You Choose?
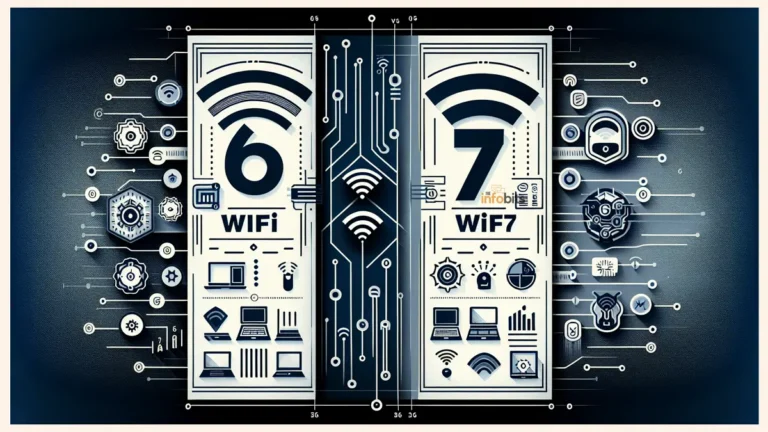
| Standard | Also Known As | Speed | Best For |
|---|---|---|---|
| Wi-Fi 5 | 802.11ac | Up to 3.5 Gbps | Budget pick; still fine for most homes |
| Wi-Fi 6 | 802.11ax | Up to 9.6 Gbps | Homes with 10+ devices; best value in 2025 |
| Wi-Fi 6E | 802.11ax (6 GHz) | Up to 9.6 Gbps | Power users; less interference |
| Wi-Fi 7 | 802.11be | Up to 46 Gbps | Future-proofing; large homes; heavy streaming |
For most households in 2026, Wi-Fi 6 is the sweet spot; great performance, widely available, and reasonably priced. If you’re in a smaller space, even a solid Wi-Fi 5 router will serve you well.
Factors to Consider Before Buying
- Home size: Smaller homes (under 1,200 sq ft) do fine with a single router placed centrally. Larger or multi-story homes benefit from mesh systems.
- Number of devices: If you have more than 15–20 connected devices, look for routers with MU-MIMO and OFDMA support (both come with Wi-Fi 6).
- Internet plan speed: There’s no point paying for a router that supports 6 Gbps if your internet plan is 200 Mbps. Match the router to your plan, with room to grow.
- Future-proofing: If you plan to upgrade your internet plan or add more smart home devices soon, spending a little more on a Wi-Fi 6 or Wi-Fi 6E router is a smart move.
A reliable mid-range Wi-Fi 6 router like the TP-Link Archer AX55 (available on Amazon) covers most homes confidently and costs a fraction of premium options, a solid starting point for first-time buyers.
Related: Must-Have Router Features: What to Look for Before You Buy
Step 2: What’s in the Box? Understanding Your Router’s Components
When you unbox your router, don’t skip the manual. It often contains your router’s default IP address, admin credentials, and model-specific setup notes that you’ll need shortly.
Here’s what you’ll typically find:
- The router itself: the main device with status indicator lights on the front/top
- A power adapter: usually a specific voltage; don’t substitute with a different adapter
- One or two Ethernet cables: for wired connections
- External antennas (on some models): these screw into ports on the back
- A quick-start guide or setup card
Expert Tip: Before plugging anything in, look at the back and bottom of the router. You’ll usually find a sticker with the default Wi-Fi name (SSID), default Wi-Fi password, default admin IP address, and default admin username/password. Take a photo of this; you’ll need it during setup.
Step 3: Where Should You Place Your Router?
Router placement has a massive impact on your Wi-Fi performance, arguably more than the router brand or model. Many people tuck their router away in a cabinet or corner and then wonder why the signal is weak in half their home.
Best Placement Practices
Place it centrally. Wi-Fi signals radiate outward in all directions. A router in the center of your home gives the most balanced coverage. A router in a corner wastes most of its signal on outdoor areas.
Elevate it. Place the router on a shelf or table, ideally 5–7 feet off the ground. Routers broadcast signals slightly downward at an angle, so elevation helps reach more of your living space.
Keep it in the open. Avoid cabinets, closets, entertainment centers, and enclosed shelving units. Even a thin wooden door around the router can noticeably reduce signal strength.
Avoid interference sources. Microwaves, cordless phones, baby monitors, and Bluetooth devices all operate on similar frequencies and can cause interference. Keep your router at least 3–4 feet away from these.
Avoid physical obstructions. Thick concrete or brick walls, metal furniture, and fish tanks (water absorbs Wi-Fi signals) all reduce coverage. If you have any of these between your router and the rooms you use most, consider repositioning.
Dealing with Multi-Story Homes or Large Spaces
If your home has multiple floors, placing the router on the middle floor (or centrally on the main floor) usually gives the best overall coverage. For homes over 2,000 sq ft or with challenging layouts, this is where a mesh system or a Wi-Fi range extender becomes worth considering.
Related: Mesh System vs Wi-Fi Extender: Which Is Better?
Step 4: Physically Setting Up Your Router
Now you’re ready to start connecting things. Here’s the exact sequence to follow.
What You’ll Need
- Your new router
- An Ethernet cable (usually included)
- Your modem (provided by your ISP)
- Access to a power outlet
Step-by-Step Physical Setup
1. Power off your modem. If your modem has a power button, press it. If not, unplug it from the wall. Wait 30 seconds.
2. Connect the router to the modem. Take one end of the Ethernet cable and plug it into your modem’s Ethernet/LAN port. Plug the other end into the WAN port on your router. The WAN port is usually labeled “WAN,” “Internet,” or colored differently (often blue or yellow). It’s the one that’s separate from the numbered LAN ports.
3. Plug in and power on the modem first. Wait about 60 seconds for it to fully boot up and establish a connection with your ISP.
4. Plug in and power on the router. Give it another 60–90 seconds to fully initialize.
5. Watch the status lights. Most routers have LED indicators that tell you what’s happening:
- Power light (solid): Router is on ✓
- Internet/WAN light (solid or blinking): Connected to your ISP ✓
- Wi-Fi light (solid): Wireless network is active ✓
- Any red or amber lights: Usually indicate a problem; check the manual
6. Attach external antennas (if your router has them). Point them upward vertically for general coverage, or angle one horizontally if you have a multi-story home (this helps signal travel between floors).
Step 5: Accessing Your Router’s Settings
With the hardware connected, you now need to log into the router’s admin panel to configure it. This is where most beginners feel uncertain. But it’s straightforward once you know the steps.
How to Access the Router Admin Panel
Option A: Via web browser (works on any device)
- Connect a laptop, phone, or tablet to the router, either via Wi-Fi (using the default network name and password on the router’s sticker) or via an Ethernet cable
- Open a web browser (Chrome, Firefox, Safari, Edge; any will do)
- Type the router’s IP address into the address bar. Common default addresses are:
192.168.1.1192.168.0.110.0.0.1- Or sometimes a web address like
routerlogin.net(Netgear) ortplinkwifi.net(TP-Link)
- Press Enter. A login screen will appear.
Not sure which IP to use? On Windows, open Command Prompt and type ipconfig. Look for “Default Gateway” under your active connection. That’s your router’s IP. On Mac, go to System Preferences → Network → Advanced → TCP/IP tab and check “Router.”
Option B: Via a mobile app. Many modern routers (especially mesh systems from Eero, Google, Orbi, and newer TP-Link and ASUS models) have dedicated smartphone apps that guide you through setup without needing to touch the web interface. If your router has an app, this is often the easier path for beginners.
Logging In
Once the login screen appears, enter the default username and password. These are printed on the sticker on your router or in the manual. Common defaults:
| Brand | Default Username | Default Password |
|---|---|---|
| TP-Link | admin | admin |
| ASUS | admin | admin |
| Netgear | admin | password |
| Linksys | admin | admin |
| D-Link | admin | (blank) |
Important: These default credentials are publicly known. Change them immediately after your first login. This is covered in the security section below.
Step 6: Configuring Your Router’s Basic Settings
Once inside the admin panel, the exact layout will vary by brand, but you’ll need to complete the same core tasks on any router.
Set Your Network Name (SSID)
Your SSID is the Wi-Fi network name that appears when people search for networks. Navigate to the Wireless settings section and change it to something memorable. A few tips:
- Keep it unique, but don’t include your name, address, or personal details
- If your router supports both 2.4 GHz and 5 GHz bands, give them different names (e.g., “HomeWiFi_2G” and “HomeWiFi_5G”) so you can manually control which band your devices use
- Avoid revealing the router brand in the network name. Default names like “NETGEAR_5G” advertise the hardware model to potential attackers.
Set a Strong Wi-Fi Password
Choose a password that’s at least 12 characters long and mixes letters, numbers, and symbols. Avoid obvious choices like your address, pet’s name, or phone number. Write it down somewhere safe; you’ll need it when connecting devices.
Choose the Right Security Protocol
In your wireless security settings, select the encryption type. In order of security:
- WPA3: Most secure; choose this if available (most routers from 2019 onward support it)
- WPA2-AES : Very good; acceptable if WPA3 isn’t available
- WPA/WPA2 mixed: Acceptable for older device compatibility
- WEP or open: Never use these; they offer no real protection
Configure the Frequency Bands
Most modern routers are dual-band, broadcasting on both 2.4 GHz and 5 GHz. Here’s when to use each:
2.4 GHz band:
- Longer range, better at penetrating walls
- Slower speeds
- Best for: smart home devices, IoT gadgets, devices far from the router
5 GHz band:
- Faster speeds, lower latency
- Shorter range
- Best for: streaming, gaming, laptops, and phones near the router
Some routers offer “Smart Connect,” which automatically assigns devices to the best band. This is convenient but can sometimes cause issues with specific devices. If you experience problems, disabling Smart Connect and managing bands manually gives you more control.
Wi-Fi 6E and Wi-Fi 7 routers also have a 6 GHz band, even faster, but with the shortest range. Best used for devices in the same or adjacent room as the router.
Update the Firmware
Before finishing setup, check for firmware updates. Manufacturers regularly release updates that fix security vulnerabilities and improve performance.
Look for “Firmware Update,” “Software Update,” or “Router Upgrade” in your admin panel’s Advanced or Administration section. If an update is available, install it and let the router reboot.
Pro Tip: Enable automatic firmware updates if your router supports it. This keeps your router current without requiring manual checks.
Related: Router Firmware Update Checklist: How Often Should You Really Update?
Step 7: Securing Your Router
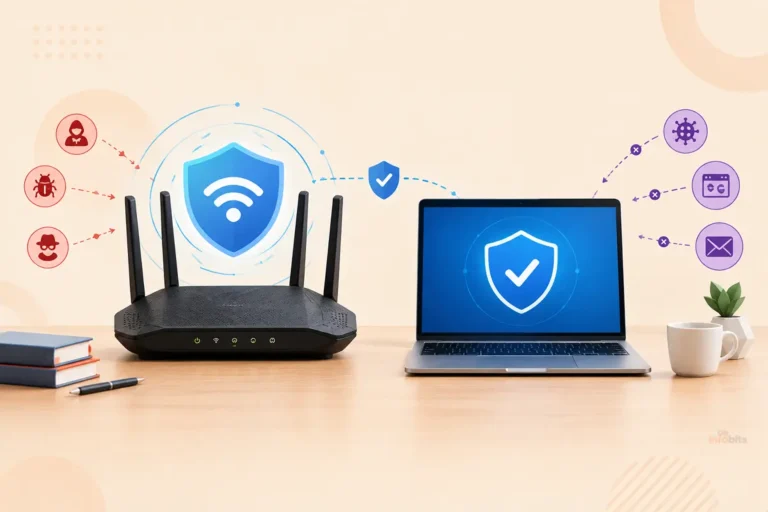
This is the step most beginners skip, and it’s one of the most important. An unsecured or poorly configured router is an open invitation to anyone nearby.
Essential Security Steps
1. Change the admin panel password. The first thing to do after logging in is to change the router’s admin credentials. Go to Administration or System settings and set a new, strong password. This is separate from your Wi-Fi password.
2. Disable WPS (Wi-Fi Protected Setup). WPS is a feature that lets devices connect with a button press, but it has known security vulnerabilities. Look for WPS in your wireless settings and turn it off.
3. Disable remote management. Unless you specifically need to access your router’s admin panel from outside your home, keep remote management turned off. This prevents anyone outside your network from attempting to log in.
4. Enable the firewall. Most routers have a basic firewall built in. Make sure it’s enabled in your security settings.
5. Set up a guest network. If you frequently have visitors who need Wi-Fi access, create a separate guest network. This isolates guests from your primary network, protecting your devices and smart home gear from any security issues that might come through a visitor’s device.
If you want an extra layer of security for your entire home network, a router with built-in VPN support like the ASUS RT-BE88U (available on Amazon) lets you route all traffic through a VPN without configuring each device individually, a genuine upgrade for privacy-conscious households.
Related: Top 5 Routers with Built-in VPN for Ultimate Security
Step 8: Connecting Your Devices
With the router configured and secured, it’s time to connect your devices.
Connecting via Wi-Fi
- On your device, open the list of available Wi-Fi networks
- Select your new SSID (the network name you set)
- Enter your Wi-Fi password
- Done; you’re connected
For smart home devices, IoT gadgets, and anything that rarely moves, consider connecting them to the 2.4 GHz band for better range and compatibility.
Connecting via Ethernet (Wired)
For devices that stay in one place – desktop computers, smart TVs, gaming consoles, NAS drives – wired connections via Ethernet are almost always better than Wi-Fi. They’re faster, more stable, have lower latency, and don’t suffer from interference.
Plug an Ethernet cable into one of the numbered LAN ports on the back of your router (not the WAN port) and into the device’s Ethernet port.
If you need a longer Ethernet cable to reach your TV or desktop, a flat Cat6 cable (like those from Jadaol on Amazon) runs neatly along walls and under carpet without creating a tripping hazard. The flat design makes routing cables around doorframes and baseboards much easier.
Running a Speed Test
Once connected, verify everything is working as expected. Visit your ISP’s speed test page or a tool like Fast.com or Speedtest.net. Compare the result to your internet plan’s advertised speeds.
If Wi-Fi speeds are significantly lower than wired speeds, that’s normal; wireless always has some overhead. But if both are far below what you’re paying for, it’s worth calling your ISP to check the signal at your modem.
Common Router Setup Mistakes (And How to Avoid Them)
Even with the best intentions, a few missteps are extremely common. Here’s what to watch out for:
Leaving default passwords unchanged. Factory credentials are public knowledge. Change both your Wi-Fi password and the admin panel password immediately.
Placing the router in a bad location. A router in a cabinet, closet, or far corner of the home will perform poorly regardless of how good it is. Central, elevated, open placement matters enormously.
Skipping firmware updates. Outdated firmware is one of the most common causes of security vulnerabilities and performance issues.
Not disabling WPS. The convenience of WPS isn’t worth the security risk. Turn it off.
Using only one frequency band. If your router is dual-band, make sure both 2.4 GHz and 5 GHz bands are active and named separately. This lets your devices choose the best connection.
Plugging the modem cable into the wrong port. The modem always connects to the WAN/Internet port on the router. The numbered ports (LAN 1–4) are for other devices.
Not running a speed test after setup. You won’t know if there’s a problem until you check. Always verify your speeds after configuring your router.
Troubleshooting Common Router Problems
Even after a clean setup, issues can come up. Here’s how to diagnose and fix the most common ones.
No Internet Connection
Check the basics first:
- Are all cables plugged in firmly?
- Is the modem powered on and showing a solid internet light?
- Is the WAN cable in the router’s WAN port (not a LAN port)?
Try restarting in the right order:
- Power off both the router and modem
- Wait 30 seconds
- Power on the modem and wait 60 seconds
- Power on the router and wait another 60 seconds
If still no connection, log into the router’s admin panel and check the WAN/Internet section to see if the router is detecting a connection from the modem. If not, contact your ISP.
Slow Wi-Fi Speeds
- Run a wired speed test first to rule out an ISP issue
- Check how many devices are connected; bandwidth saturation from too many active devices slows everything down
- Move the router; even shifting position by a few feet can make a difference
- Switch frequency bands; if you’re on 2.4 GHz, try 5 GHz and vice versa
- Check for interference; neighboring Wi-Fi networks on the same channel can cause slowdowns. Log into your router and try manually changing the Wi-Fi channel (channels 1, 6, or 11 are best for 2.4 GHz)
- Update the firmware; performance improvements are often included in updates
Wi-Fi Dead Zones in Parts of Your Home
- First, try repositioning the router more centrally
- If walls or distance are the issue, consider a Wi-Fi range extender (simpler, cheaper) or a mesh system (better performance, seamless roaming)
The TP-Link RE615X Wi-Fi 6 range extender (available on Amazon) is a cost-effective way to eliminate dead zones in specific rooms without replacing your existing router. Just plug it into an outlet midway between the router and the problem area.
Related: How to Use a Router as a Wi-Fi Extender
Can’t Access the Router Admin Panel
- Make sure you’re connected to the router’s network (not a neighboring network)
- Try different IP addresses:
192.168.1.1,192.168.0.1,10.0.0.1 - Check the sticker on the router for the correct default IP
- Try a different browser
- If you’ve forgotten the admin password, you’ll need to factory reset the router (usually a small pinhole button on the back; hold for 10–15 seconds). Note: this wipes all your settings.
Devices Keep Dropping Connection
- Check if a specific device or all devices are affected
- If all devices drop at the same time, the issue is likely the modem or ISP connection
- If only one device drops, the issue is usually that device’s Wi-Fi adapter or settings
- Try setting a static IP for the problematic device in your router’s DHCP settings
Understanding Your Router’s Advanced Features
Once you’re comfortable with the basics, these features are worth exploring. They can make a real difference in your day-to-day experience.
Quality of Service (QoS)
QoS lets you prioritize specific devices or types of traffic. For example, you can tell your router to always prioritize your work laptop over the streaming TV in the living room. This is especially useful if your household bandwidth is limited.
Look for QoS in Advanced Settings or Traffic Management in your admin panel.
Parental Controls
Most modern routers include built-in parental controls that let you block specific websites, set internet usage schedules, and monitor connected devices.
This is far more reliable than app-based parental control tools because it works at the network level, covering every device connected to your Wi-Fi.
Related: Latest Router Security Features You Should Know About
Guest Network
A guest network creates a separate Wi-Fi network for visitors with its own password. Guests can get online, but they’re isolated from your main network and can’t see your shared devices (printers, NAS drives, etc.).
Most routers offer this; it’s worth setting up even if you only have occasional visitors.
Related: Is Guest Wi-Fi Safe? How to Create a Secure Guest Network
DNS Settings
Your DNS (Domain Name System) translates website names into IP addresses.
Your ISP provides default DNS servers, but switching to alternatives like Cloudflare (1.1.1.1) or Google Public DNS (8.8.8.8) can slightly improve browsing speeds and, in some cases, security. You can change DNS settings in the WAN or Internet section of your admin panel.
When to Consider Replacing Your Router
Your router isn’t a permanent fixture. Here are signs it might be time for an upgrade:
- It’s more than 5–6 years old: older routers lack modern security standards and Wi-Fi capabilities
- It doesn’t support WPA2 or WPA3: this is a significant security gap
- Your internet plan has been upgraded, but speeds haven’t improved: the router may be the bottleneck
- You regularly experience drops, dead zones, or slowdowns that repositioning and firmware updates haven’t fixed
- You’ve added a lot of smart home devices: older routers struggle with many simultaneous connections
Related: How Long Do Routers Last and When Should You Replace Them?
Quick Router Setup Checklist
Use this checklist to make sure you haven’t missed anything:
- [1] Choose a router appropriate for your home size and device count
- [2] Place the router centrally, elevated, and away from obstructions
- [3] Connect the modem cable to the WAN port (not a LAN port)
- [4] Power on the modem first, then the router
- [5] Access the admin panel and log in with default credentials
- [6] Changed the admin username and password
- [7] Set a custom SSID (Wi-Fi name)
- [8] Set a strong Wi-Fi password
- [9] Selected WPA3 or WPA2-AES encryption
- [10] Disabled WPS
- [11] Updated router firmware
- [12] Set up a guest network (recommended)
- [13] Ran a speed test to confirm everything is working
Myth vs. Fact: Common Router Misconceptions
Myth: More antennas = better Wi-Fi. Fact: Antenna count matters less than placement and design. A single well-placed router with good internal antennas can outperform a router bristling with external ones.
Myth: Your ISP’s router is good enough. Fact: ISP-provided routers are often budget hardware with limited control and older Wi-Fi standards. An aftermarket router frequently offers better performance, security, and features.
Myth: Resetting your router regularly improves performance. Fact: Occasional restarts can help clear memory and reconnect dropped devices, but frequent resets (more than once a week) usually indicate an underlying problem that needs to be diagnosed, not worked around.
Myth: Wi-Fi is just as fast as wired Ethernet. Fact: Wired connections are almost always faster, more stable, and lower-latency than Wi-Fi. For gaming, video calls, and large file transfers, Ethernet is worth the cable run.
Myth: A more expensive router always means faster internet. Fact: Your internet speed is limited by your ISP plan. A premium router won’t give you faster internet than your plan allows; it improves the distribution of that speed within your home.
Summary
Setting up a home router doesn’t require a networking degree.
The process boils down to a few clear steps: choose the right hardware, place it well, connect the modem to the WAN port, log into the admin panel, set a strong network name and password, enable WPA3 or WPA2, disable WPS, and update the firmware.
Do those things, and you’ll have a faster, more secure home network than the majority of people out there.
If you run into problems along the way, the troubleshooting section above covers the most common issues and their solutions. And if you’re ready to take things further, the advanced features section gives you a roadmap for getting even more out of your router.
Frequently Asked Questions (FAQ)
Do I need a router if my ISP already gave me a modem?
Yes, unless your ISP provided a combined modem-router (gateway). A standalone modem only provides a single connection. A router is needed to share it across multiple devices wirelessly.
What’s the difference between a modem and a router?
A modem connects your home to the internet via your ISP. A router distributes that internet connection to all the devices in your home via Wi-Fi or Ethernet. They’re separate devices, though many ISPs provide a combined unit.
How do I find my router’s IP address?
On Windows, open Command Prompt and type ipconfig Look for “Default Gateway.” On Mac, go to System Preferences → Network → Advanced → TCP/IP. Common defaults are 192.168.1.1, 192.168.0.1, or 10.0.0.1.
What should I do first after setting up my router?
Change the default admin username and password, set a strong Wi-Fi password, select WPA3 or WPA2-AES encryption, disable WPS, and update the firmware. In that order.
Should I use 2.4 GHz or 5 GHz Wi-Fi?
Use 5 GHz for devices near the router where you need speed (laptops, streaming devices, gaming consoles). Use 2.4 GHz for devices farther away or those that only need basic connectivity (smart plugs, sensors, older gadgets).
How do I know if my router has been hacked?
Signs include unknown devices showing up in your connected device list, slower-than-usual speeds without explanation, router settings that have changed on their own, and your ISP flagging suspicious traffic. Log in to your admin panel and check the connected devices list regularly.
What is WPS and should I leave it enabled?
WPS (Wi-Fi Protected Setup) lets devices connect to your Wi-Fi with a button press, bypassing the password. It has known security vulnerabilities and should be disabled in your router’s wireless settings.
Can I set up a router without a computer?
Yes. Many modern routers can be fully configured using a smartphone app (Eero, Google Nest, TP-Link Tether, ASUS Router, and others all have apps). Some can even be set up using a tablet connected via Wi-Fi.
Why is my Wi-Fi slower on one side of the house?
Distance and physical obstructions (walls, floors, appliances) weaken Wi-Fi signals. Try repositioning the router more centrally, or use a Wi-Fi range extender or mesh system to cover the weak area.
How often should I restart my router?
A router restart once a month is generally healthy. It clears memory and resets connections. If you need to restart more frequently to maintain performance, there may be an underlying issue (firmware update needed, overheating, or failing hardware).
Is it safe to name my Wi-Fi network with my address or name?
No. Your SSID is visible to anyone in range. Using your name, address, or apartment number is a privacy risk and can also tell potential attackers which network belongs to you.
What does the WAN port do, and where does the modem cable go?
The WAN (Wide Area Network) port is where your modem connects. It’s usually colored differently or labeled “Internet.” The numbered LAN ports are for connecting other devices (computers, game consoles, etc.) via Ethernet.
Should I use my ISP’s router or buy my own?
Buying your own router usually means better performance, more control, and long-term cost savings (since ISPs often charge a monthly rental fee). The trade-off is you’re responsible for setup and troubleshooting.
What is a guest network and do I need one?
A guest network creates a separate, isolated Wi-Fi connection for visitors. It keeps guests off your main network, protecting your devices and shared resources. It’s worth setting up even for occasional visitors. Most routers include this feature for free.
How do I update my router’s firmware?
Log into your router’s admin panel, navigate to Advanced, Administration, or Maintenance settings, and look for a Firmware Update option. Download and install the latest version. Enable automatic updates if available.
My router says it’s connected, but I have no internet; what’s wrong?
This usually means the router is connected to the modem, but the modem isn’t getting a signal from your ISP. Try restarting the modem first (wait 60 seconds), then the router. If it persists, contact your ISP to check the line signal.
Do I need a different router for fiber internet?
Not necessarily; most modern routers work with fiber. However, if your fiber provider uses specific connection types (like VLAN tagging or PPPoE), make sure your router supports them. Check your ISP’s documentation or compatibility list.
What is the difference between a router and a mesh system?
A router is a single device that broadcasts Wi-Fi from one location. A mesh system uses multiple nodes spread around your home, creating one seamless network with consistent coverage. Mesh is better for large or multi-story homes; a single router is fine for smaller spaces.
Can I use two routers in my home?
Yes, but it requires specific configuration. The second router should be set up in “access point mode” (not router mode) to avoid double NAT issues. This creates a second Wi-Fi access point on the same network without conflicting with the first.
How long should a router last?
A quality router typically lasts 5–7 years before hardware limitations or discontinued firmware updates make replacement sensible. If it’s more than 5–6 years old, it likely doesn’t support WPA3 or Wi-Fi 6, and may have unpatched security vulnerabilities.
Found this guide helpful? Share it with someone setting up their first home network. This is exactly the kind of step-by-step walkthrough most beginners never find. And bookmark this page; we update it regularly as router technology and best practices evolve.
Sign up for our free newsletter as well to receive fresh information immediately in your inbox and keep technically up to date.
We hope you found this post informative, and do like and follow us on Facebook and Twitter for regular updates.
Disclosure: Some links in this article are affiliate links. If you purchase through them, we may earn a small commission at no additional cost to you.