
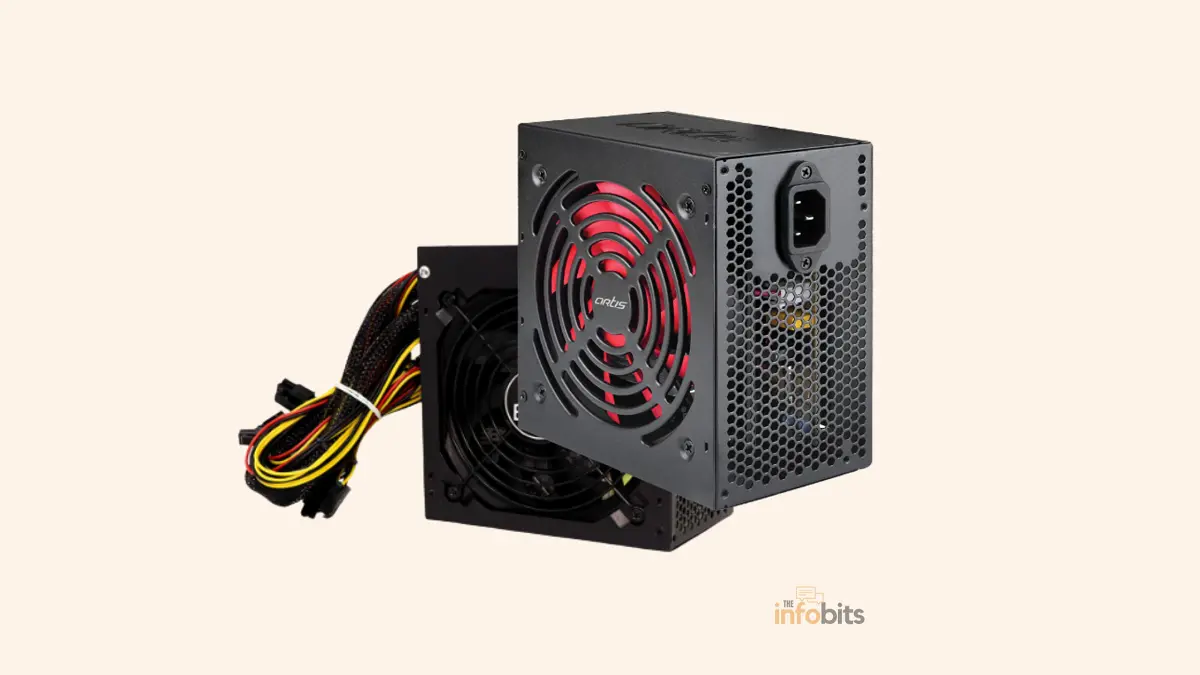
How to Check What Power Supply (PSU) Your PC Has: 6 Easy Ways
Quick answer: The fastest way to check your PSU is to open your case and read the label on the side of the unit; it lists the brand, model, and wattage. If you’d rather not open your PC, check the manufacturer’s spec sheet for your exact model (for prebuilt PCs), your order receipt, or your original box/manual. There’s no built-in Windows tool that shows PSU details directly, since Windows doesn’t expose that information the way it does for your CPU or GPU.
Whether you’re planning a GPU upgrade, troubleshooting random shutdowns, or just curious what’s powering your rig, here’s every reliable way to find out; ranked from easiest to most hands-on.
Why You Need to Know Your PSU’s Specs
Your power supply unit (PSU) converts wall AC power into the regulated DC power every component in your PC actually uses.
If it can’t deliver enough wattage, or enough current on the right rails, you’ll see symptoms ranging from random reboots and freezes under load to a system that won’t boot at all with a new GPU installed.
Knowing your PSU matters most in three situations:
- Before a GPU or CPU upgrade– modern graphics cards can draw 300–600W on their own, and an underpowered PSU is one of the most common reasons a new GPU won’t run stably.
- When troubleshooting instability– sudden shutdowns during gaming or heavy loads often trace back to a PSU that’s aging, undersized, or failing.
- When replacing a dead or dying unit, you’ll want to match (or exceed) your current wattage, form factor, and connector set so the replacement actually fits and works.
Related: Things to Upgrade on PC to Improve Its Performance
6 Ways to Check What Power Supply You Have
1. Open the Case and Read the PSU Label (Most Accurate)
This is the only method guaranteed to give you the exact brand, model number, wattage, and efficiency rating, because manufacturers are required to print this information directly on the unit.
Steps:
- Shut down the PC completely and unplug the power cable, along with any other connected cables.
- Ground yourself by touching an unpainted metal part of the case to avoid static discharge.
- Remove the side panel. Usually a few screws or a clip release, depending on your case.
- Locate the PSU. It’s typically mounted at the top-rear or bottom-rear of the case, directly behind the power cord input.
- Look for the label on the top or side of the unit. It lists the brand, model number, maximum wattage, output rails, and 80 Plus efficiency rating (e.g., “650W, 80 Plus Gold”).
- If the label faces the case wall or is hard to read in place, use your phone’s camera and flash to snap a photo, or carefully slide the PSU out to check.
Safety note: Never open the PSU’s outer metal casing itself. Capacitors inside can hold a dangerous electrical charge even when the unit is unplugged. Reading the external label is completely safe; opening the shell is not, and there’s no reason to do it.
2. Check the Manufacturer’s Spec Sheet (Prebuilt PCs)
If you have a prebuilt system from Dell, HP, Lenovo, ASUS, or a similar brand, you often don’t need to open the case at all.
- Find your exact model number. It’s usually on a sticker on the back or bottom of the case.
- Go to the manufacturer’s support site and search for that model.
- Look for a “Specifications” or “Power Supply” section in the listed documentation.
Keep in mind manufacturers sometimes swap PSU suppliers mid-production run for the same model, so this method gives you a reliable starting point but isn’t always 100% precise. If you need certainty, pair it with a physical check.
3. Look Up the UL Listing (When You Have a Model Number)
Every PSU sold in the US carries UL certification, and the UL database can confirm specifications tied to a listed model or file number.
- Note the UL file number printed on the PSU or system label (often formatted like “E123456”).
- Search the UL Product iQ database using that file number.
- Cross-reference the listing against your model to confirm wattage and safety ratings.
This is most useful as a verification step once you already have a model number from the label or documentation, rather than a first stop.
4. Check Your Purchase Receipt or Order History
If you built your own PC or bought a PSU as a separate component, your order history is often the fastest route.
- Check your email for order confirmations from retailers like Amazon, Newegg, or your local computer store.
- If you hired someone to build your PC, check your invoice. Most builders itemize every part, including the exact PSU model.
- Check the original packaging if you kept it; the box lists full specifications on the exterior.
5. Estimate Your Power Needs With a PSU Calculator (Without Opening the Case)
This method won’t tell you your PSU’s exact model, but it’s genuinely useful when you can’t access documentation and don’t want to open your case yet. It tells you roughly what wattage your system needs, which you can then compare against how your system behaves.
- Use a free tool like the OuterVision PSU Calculator or Cooler Master Power Supply Calculator.
- Enter your CPU, GPU, RAM, storage drives, and case fans. You can find your CPU and GPU names in Task Manager → Performance if you’re not sure.
- The calculator returns an estimated minimum wattage requirement for your build.
- If your system runs stable under load (gaming, rendering, benchmarks), your current PSU is very likely rated at or above that number.
Pairing this with a monitoring tool like HWiNFO64 to check whether your voltage rails stay stable under load adds another layer of confidence, though it still won’t confirm the exact model.
6. Use Software to Check Power Draw (Not PSU Identity)
Windows has no built-in equivalent of Device Manager for your power supply. There’s no native tool that reports PSU brand, model, or wattage directly. What software can do is show you how much power your components are drawing, which helps you sanity-check whether your existing PSU has enough headroom.
- HWiNFO64: shows detailed voltage and power draw per component, plus flags voltage instability that can hint at a struggling PSU.
- HWMonitor: a simpler tool for a quick read on CPU and GPU power consumption.
- MSI Afterburner: shows real-time GPU power draw as a percentage of its power limit, useful during gaming sessions.
None of these will name your actual PSU. For that, you still need one of the first four methods.
How to Read a PSU Label Once You Find It
The label can look intimidating at first glance, but you only need to focus on a few numbers.
| Label Item | What It Means |
|---|---|
| Model number | Identifies the exact unit. Use this to search for a full spec sheet or manual online |
| Total wattage | The maximum continuous power the unit can supply (e.g., “650W”) |
| +12V rail (amps) | The current available on the rail that powers your CPU and GPU; multiply amps × 12 to get watts on that rail |
| 80 Plus rating | The efficiency certification. Higher tiers waste less power as heat (see below) |
| UL file number | Used to verify the listing in UL’s certification database |
Understanding 80 Plus Efficiency Ratings
You’ll almost always see an 80 Plus badge on the label or box, and it’s worth understanding what it actually tells you.
The certification measures how much of the power your PSU draws from the wall actually reaches your components, versus how much is wasted as heat.
| Certification | Efficiency (at 50% load) | Typical Use Case |
|---|---|---|
| 80 Plus (White) | ~85% | Budget builds, basic office PCs |
| Bronze | ~85% | Entry-level gaming, budget-conscious builds |
| Silver | ~88% | Less common; sits between Bronze and Gold |
| Gold | ~90% | The sweet spot for most gaming and workstation PCs |
| Platinum | ~92% | High-end builds where efficiency and heat matter |
| Titanium | ~94% | Premium builds and systems running near-continuously |
A higher rating means less wasted energy, lower electricity costs over time, and typically less internal heat, which can mean quieter fan noise and better long-term reliability.
For most gaming PCs, an 80 Plus Bronze or Gold unit from a reputable brand hits the right balance of cost and quality.
PSU Form Factors and Cable Types (Quick Reference)
If you’re checking your PSU ahead of a case swap or replacement purchase, form factor and cable type matter as much as wattage.
| Form Factor | Typical Use |
|---|---|
| ATX | The standard size for most mid-tower and full-tower desktop cases |
| SFX / SFX-L | Compact units for small form factor (SFF) and mini-ITX builds |
| TFX | Thin, lower-wattage units for slim or media-center PCs |
Cable types also vary by build:
- Non-modular: all cables are permanently attached; cheapest option but can clutter your case with unused cables
- Semi-modular: core cables (24-pin, CPU power) are fixed, while GPU/SATA/peripheral cables detach
- Fully modular: every cable detaches, letting you use only what you need for the cleanest build and best airflow
Related: PWM vs DC Fans in Computer: Which Is the Best?
What to Do If Your PSU Isn’t Enough for a New Component
Once you know your PSU’s wattage, here’s how to decide whether it can handle an upgrade:
- Add up your target components’ power draw. Use a PSU calculator with your planned new GPU or CPU included.
- Add roughly 150W of headroom on top of the calculated total. This buffer accounts for power spikes during gaming and leaves room for future upgrades, rather than running your PSU at its absolute ceiling continuously.
- Check the connector types, not just wattage. A high-wattage PSU that lacks the right number of PCIe power connectors (or the newer 12VHPWR/12V-2×6 connector some recent GPUs require) still won’t work without an adapter.
- If it falls short, replace rather than push it. Running a PSU consistently near or above its rated capacity increases the risk of instability, and in worse cases, can damage the PSU or the components it powers.
If you’ve confirmed your current unit is undersized, a modular 80 Plus Gold power supply in the 650–850W range like MSI MAG A850GL PCIE5 (view on Amazon) covers the vast majority of single-GPU gaming builds with comfortable headroom for future upgrades.
Related: What Is a Normal GPU Temperature While Gaming?
Laptop Power Supplies: What’s Different
Laptops don’t have an internal PSU in the same sense. They use an external power brick (charger), and the “power supply” information you need is usually printed directly on that adapter, including its output voltage, amperage, and total wattage (e.g., “19.5V, 6.15A, 120W”).
If you’ve lost your original charger, matching those numbers, voltage in particular, is the most important step before buying a replacement, since using the wrong voltage can damage the laptop.
Common Mistakes to Avoid
- Assuming higher wattage always means better. A quality 650W Gold-rated unit will outperform a cheap, uncertified 750W unit in stability and lifespan.
- Ignoring the +12V rail limit. Total wattage matters less than how much current is available on the rail that actually powers your CPU and GPU.
- Opening the PSU casing to look inside. The external label tells you everything you need. There’s no safe reason to open the unit itself.
- Skipping the connector check. Especially with newer GPUs that require 12VHPWR/12V-2×6 connectors, wattage alone doesn’t guarantee compatibility.
- Trusting spec sheets over the physical label when precision matters. Manufacturers occasionally swap PSU suppliers mid-run for the same PC model. The physical label is always the most accurate source.
Related: How Long Do PC Power Supplies Last? PSU Lifespan Guide
Final Thoughts
Knowing which power supply is installed in your PC can save you time and money. It also helps you choose compatible upgrades and troubleshoot power-related problems with confidence. If software tools don’t show the information you need, a quick look inside your PC case usually gives you the answer.
Before buying a new graphics card or adding other hardware, always check your PSU’s wattage, efficiency rating, and available power connectors. A little preparation now can help you avoid compatibility issues later.
Frequently Asked Questions
How do I check what power supply I have without opening my PC?
Check your PC’s original documentation, look up your exact model on the manufacturer’s website, check your purchase receipt, or use a PSU calculator to estimate your power needs based on your components.
Is there software that shows my PSU model?
No. Windows doesn’t have a built-in tool that identifies your PSU the way Device Manager identifies other hardware, and no widely used third-party software reads PSU model information directly, since PSUs generally don’t report that data back to the system.
Where is the PSU label located?
It’s typically on the top or side of the unit itself, inside the case, near where the power cord plugs into the back of the computer.
How do I know if my PSU is powerful enough for a new GPU?
Use a PSU calculator with your full component list including the new GPU, then compare the result, plus about 150W of headroom, against your current PSU’s rated wattage.
What does the 80 Plus rating on my PSU mean?
It’s an efficiency certification showing how much power reaches your components versus how much is wasted as heat; ratings run from 80 Plus (White) up through Bronze, Silver, Gold, Platinum, and Titanium, with Titanium being the most efficient.
Can I open my PSU to check its internal parts?
No, you should never open the PSU’s outer casing. Internal capacitors can retain a dangerous electrical charge even when unplugged. The external label provides all the specifications you need.
How much power headroom should I leave when choosing a new PSU?
A common rule of thumb is to add roughly 150W above your calculated total system power draw, giving you a safety margin for power spikes and future upgrades.
What’s the difference between modular and non-modular PSUs?
Modular PSUs let you attach only the cables you need, reducing clutter and improving airflow. Non-modular PSUs have all cables permanently attached, which is cheaper but can leave unused cables inside your case.
Does a prebuilt PC’s spec sheet always match the exact PSU installed?
Not always. Manufacturers sometimes change PSU suppliers between production batches of the same model, so a physical check is more reliable when precision matters.
How do I find the power supply for a laptop?
Check the label on the external power brick (charger) itself. It lists the output voltage, amperage, and wattage, which is the information you need for a replacement.
What’s the difference between total wattage and +12V rail wattage?
Total wattage is the PSU’s overall maximum output, while the +12V rail specifically powers your CPU and GPU, the components that draw the most power, so its available current matters more in practice than the total number alone.
Can a PSU that’s too weak damage my computer?
Yes. An undersized or failing PSU can cause unstable voltage delivery, which in worse cases can damage the motherboard, GPU, or other connected components, not just cause shutdowns.
What connector do I need for a modern GPU?
Many recent high-end GPUs use the 12VHPWR or updated 12V-2×6 connector in addition to, or instead of, traditional 6+2-pin PCIe connectors. Check your specific GPU’s requirements before assuming your existing cables will work.
How long does a typical PSU last?
Most quality PSUs last 7–10 years under normal use, though this varies with build quality, load levels, and how consistently the unit runs near its rated capacity.
Is it safe to run a PSU at close to its maximum rated wattage constantly?
It’s not recommended. Running a PSU near its ceiling continuously increases heat, stress, and the risk of instability. Sizing up with headroom is safer for long-term reliability.
We hope this guide helped you identify the power supply in your PC. If you found it useful, please share it with your friends and family.
Also, follow The Infobits on Facebook and X (formerly Twitter) for more PC hardware guides, troubleshooting tutorials, buying advice, and practical tech tips.
Do sign up for our free newsletter for more PC hardware guides, and bookmark this page for future reference.
Disclosure: If you follow our links to a retailer’s website and make a purchase, we will get an affiliate commission on some, but not all, of the items or services we promote. This will cause no price change for you.



%20Your%20PC%20Has:%206%20Easy%20Ways)