
How to Fix Windows Unexpected Kernel Mode Trap Error in Simple Steps?
The UNEXPECTED KERNEL MODE TRAP error is one of many annoying blue screen occurrences in Windows. Furthermore, as the name implies, it occurs unexpectedly.
As with other blue screen problems, this is never a pleasant experience. It will crash your computer and take your work with it.
The most common cause is hardware failure caused by faulty or mismatched memory. There may be occasions when your computer has defective software that creates an error.
The error code appeared before Windows 8. Kernel-mode trap error in Windows 11 and Windows 10 is displayed as UNEXPECTED_KERNEL_MODE_TRAP.
Related: 6 Simple [solved] fixes for the Kernel Mode Heap Corruption Error on Windows 10
So, let us understand what an unexpected kernel-mode trap BSOD is and how to fix it.
What Is Meant by An “Unexpected Kernel Mode Trap Error”?
This is a Blue Screen of Death Error (BSOD) that happens when hardware dies or a driver is incompatible with the operating system.
If you didn’t have any of these issues with previous versions of Windows on the same PC, the issue is most likely due to driver incompatibility.
The unexpected kernel mode trap Windows 10 error, which is frequently connected to your system drivers or system memory, is commonly followed by the 0x0000007F stop code.
The unexpected kernel-mode trap error is annoying, but it is not a difficult problem to resolve. When an error is identified, Windows shuts down the computer as a precautionary measure.
What Are the Causes of Unexpected Kernel Mode Trap Errors in Windows?
This issue might be caused by several factors. The most common reason is hardware failure, which is frequently caused by defective or mismatched memory.
This faulty RAM module causes read/write issues at unpredictable intervals. If this is the case, you must run a system diagnostic and replace the faulty RAM module.
A corrupted or out-of-date driver might be the next root of the problem. One or more device drivers may be misconfigured, corrupted, or simply out of date.
This may occur after updating Windows or downgrading from new system hardware to an older one, particularly if you are using an older version of Windows.
This issue might potentially be caused by corrupted software that is currently installed on your computer.
The problem in kernel mode is usually caused by one of two things: either the CPU generated a condition that the kernel isn’t permitted to record, or the situation is an unrecoverable error.
How to Fix an Unexpected Kernel Mode Trap or Error Code
You’ll have your computer up and running in no time if you follow the steps below.
1. Run the BSOD Troubleshooter
Windows 10’s built-in troubleshooting tool may be used to solve a range of system issues, including BSODs. It may also help with the UNEXPECTED KERNEL MODE TRAP Windows 10 fix.
=> Select Settings from the Start menu.
=> Navigate to the Settings app’s Update & Security section.
=> Select Troubleshoot from the left-hand menu.
=> Choose BSOD from the right pane (this option is only accessible if a BSOD issue occurs during your working session) and then execute the Troubleshooter.
=> Follow the on-screen directions to complete the troubleshooting.
Related: How to Resolve the Windows 10 System Service Exception Error?
2. Remove Any Newly Installed Hardware or Software
If the error occurs shortly after a recent hardware installation, that hardware is almost certainly causing this error. To repair this, remove the new hardware and restart your computer.
If the problem began after you installed the driver for the new hardware, uninstall the recently installed drivers.
If the stop code unexpected kernel mode trap 0x0000007F appears soon after installing new RAM, shut down your computer, remove the RAM, and restart it to check if the problem has been fixed.
According to several reports, this problem also occurred shortly after installing new software. So, if you’ve just installed new software, remove it and see whether the issue persists.
3. Restart Your Computer
Restart your computer if you are viewing this stop error page for the first time. Windows 10 occasionally faces problems, but not all of them need an in-depth fix.
Sometimes, restarting your computer is the best and quickest option. Restarting your computer clears all of your system processes and minor glitches in the software, which may resolve the issue.
If the problem screen appears again, try one of the other alternatives listed below.
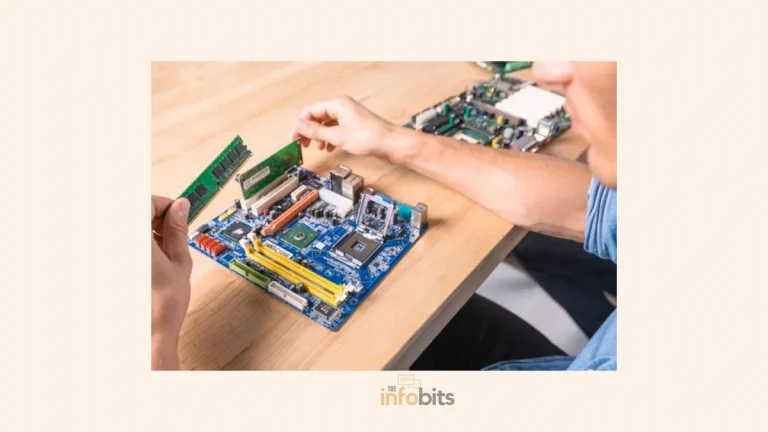
4. Reseat the Possible Hardware Units
Because the unexpected kernel mode trap problem is associated with drivers and system memory, something within your computer’s casing may have come loose.
Some users stated that the UNEXPECTED KERNEL MODE TRAP was caused by their hardware. Their connectors weren’t firmly in place, but the issue was resolved by appropriately connecting the loose wires.
Aside from the wiring, make sure your RAM is firmly positioned in its slot. RAM has been reported as a problem by a few folks, so double-check it to ensure it’s properly installed.
This error may occur if your component connectors are clogged with dust. Therefore, you must remove them and thoroughly clean them before reconnecting them. Dust buildup within your computer’s case is a hardware killer!
Cleaning your computer is, therefore, a smart idea. That doesn’t mean you should use a sponge and hot, soapy water to clean the motherboard.
Using an air duster, blow the dust out of the case, then wipe the surfaces clean with a lint-free cloth. PC maintenance may help you save money by extending the life of your hardware by years!
5. Update Windows 10
Before proceeding to the more complicated fixes, perform a last check for any pending Windows 10 updates.
To access Windows Update, click Windows Key + I and then navigate to Updates & Security > Windows Update.
Before restarting your computer, any outstanding updates should be downloaded and installed.
6. Update Faulty Drivers
Windows 10 handles driver updates for you, ensuring that everything is up to date. Driver updates can occasionally fall between the cracks, or you may receive a faulty update, or your drive may become corrupt for a variety of reasons.
You may manually update your drivers in this case. To manually update a driver, follow these steps:
In the Start menu search bar, type Device Manager and choose the Best Match option.
As you move down the list, look for a yellow error symbol.
If there isn’t anything, a faulty driver is unlikely to be the cause. However, you may still update the driver for any questionable device.
To update the driver, select Update Driver Software. Windows will find the correct driver for your device and install it.
Disable and Uninstall options are also available here for their respective functions.
To run an automatic driver update, follow these steps:
=> Select Settings from the Start menu.
=> Navigate to Devices.
=> In Related Settings, go to Devices and Printers.
=> Make right-clicks on your PC name.
=> Select Device Installation Settings.
=> Choose Yes, and do this automatically.
=> Click the Save Changes button.
=> Continue the procedure by doing the appropriate steps.
When updating drivers, make sure you have adequate space on your hard drive. Disable any drivers mentioned in the stop notification, or contact the manufacturer for driver upgrades.
This issue can be caused by a variety of drivers; however, some users recommend that uninstalling your Bluetooth, Wireless, and Intel RST (Intel Rapid Storage Technology) drivers will help.
It should be noted that this issue might be caused by any driver; it does not have to be related to Bluetooth or Wireless drivers, but they are commonly the offenders.
Finding drivers on your own may take a long time. As a result, we propose that you use a tool that will do this process automatically for you.
Using an automated driver updater saves you the time and effort of manually searching for drivers and ensures that your system is always up to date with the most recent drivers.
A professional tool will aid you in automatically upgrading drivers and preventing PC damage caused by incorrect driver version installation.
7. Execute the Windows 10 Memory Diagnostic Tool
Windows 10 has a Memory Diagnostic tool. It scans your RAM for errors and then generates a system log for more insight. While you’re attempting to repair a probable RAM issue, save any important files and restart your computer as soon as possible.
In the Start Menu search bar, type “Windows Memory” and choose the Best Match option. Choose to Run as an Administrator.
You now have two options: running the software right away or scheduling it to run after your next reboot.
Following a reboot, the Windows Memory Diagnostic tool is launched.
Windows 10 will restart again once the operation is completed.
Press Windows Key + X to return to Windows 10 and choose Event Viewer from the menu. Go to Event Viewer (Local) > Windows Logs > System in the Event Viewer.
In the right-hand column, click Find and type MemoryDiagnostic into the box. Then, click the Find button.
The results of your diagnostic will be shown at the bottom of the window. If an error occurs, conduct a comprehensive investigation and troubleshooting using an online search.
8. Disable or Uninstall Your Antivirus Software
This error is occasionally triggered by third-party antivirus software. Antivirus software may cause issues with your Windows installation. Therefore, you must disable it to resolve the issue.
If turning off the antivirus does not cure the problem, it may be necessary to uninstall it. To completely uninstall your antivirus, it is recommended that you download a particular removal application from the developer’s website.
It’s crucial to realize that almost any antivirus program can cause this problem. If removing the antivirus application addresses the issue, you can reinstall it or switch to another antivirus program.
You may use Windows Defender instead of a third-party antivirus. It is sufficient for the average user.
If you are an advanced user who conducts a large number of financial transactions on your machine, lightweight security software such as Eset Internet Security can be employed.
Related: How to Resolve the DISM Error 1910 in Windows 10?
9. Run MemTest86+
If the Windows Memory Diagnostic tool does not discover any faults, but you want to validate them, you can use the open-source application MemTest86+. MemTest86+ is a self-contained memory testing application.
To test your system RAM, MemTest86+ is run from a USB flash drive (or a bootable disc). From the MemTest86+ website, obtain the most recent version of the pre-compiled Bootable ISO.
The ISO file for MemTest86+ must now be burned to a USB flash drive. The Refus tool may be used to create a bootable USB flash drive from an ISO image.
Allow your computer to boot from the bootable USB device after it has been prepared. A memory test will begin immediately if you follow the onscreen instructions.
A MemTest86+ RAM check takes some time to complete; depending on how much RAM you have installed, an examination to identify it might take hours.
10. Disable the Memory Cache in the BIOS
If your device requires a BIOS update, try updating it via the manufacturer’s website. It should be noted that BIOS upgrades should be performed with extreme caution. If the BIOS update fails, your motherboard will be rendered worthless.
Disable memory settings such as caching and shadowing in the BIOS. In rare circumstances, disabling memory caching may aid in the resolution of the issue.
To accomplish this, restart your computer and enter the BIOS using the F2 or Del keys. From the Advanced Menu, choose Cache Memory.
Check to verify whether it is set to DISABLE. Use the F10 key to save and quit. Make sure you choose “Yes“.
11. Disable Overclocking in BIOS
Overclocking of the computer processor also causes the UNEXPECTED KERNEL MODE TRAP problem in the Windows computer.
If you have an overclocked CPU, that may be causing the problem. So, it is time to return the CPU to its default clock speed by deactivating overclocking.
You can follow the quick instructions below to disable it.
Step 1: During the computer booting process, hit the F2 or Del key to enter BIOS according to your computer model.
Step 2: Go to the settings page for overclocking configuration. It may be termed Overdrive or AI Tweaker.
Take note of the CPU configuration. Turn off the Speed Step option here.
Alternatively, you may go to the Exit page and select Load Setup Defaults. Overclocking is often deactivated in the configuration defaults.
This procedure may be different according to the various BIOS settings used in the different computer models.
12. Run SFC and CHKDSK
Another option is to use the built-in utility Windows System File Checker (SFC). This is a command-line program that looks for and performs possible corrections in system files if any mistakes are found.
So, this system program in Windows 10 can scan your drive and remove issues related to the 0x0000007F stop code.
Before performing the SFC command, it is necessary to double-check its functionality. To do this, the Deployment Image Servicing and Management tool ( DISM) is employed.
DISM, like SFC, is an integrated Windows utility tool with a wide variety of functions. In this instance, the DISM Restorehealth command ensures that our next repair is successful.
Working your way through the steps listed below.
Type Command Prompt (Admin) into the Start menu search box, then right-click and choose Run as administrator.
Enter the command:
DISM /online /cleanup-image /restorehealth
Allow for the completion of the command. Depending on the state of your system, the procedure might take up to 20 minutes. Wait for the process to finish, even though it appears to be stopped at times.
When the procedure is finished, type the following command at the command prompt to perform SFC and hit Enter.
sfc /scannow
CHKDSK
CHKDSK is another Windows system utility that analyzes your file structure. Unlike SFC, CHKDSK examines your whole hard drive for errors, whereas SFC just checks your Windows system files.
To restore your system, use the Command Prompt to run the CHKDSK scan, much like SFC.
Enter “command prompt” in the Start menu search box, then select the best result and pick “Run as administrator.” Or hold down Windows Key + X and select Command Prompt (Admin) from the menu.
Then, type chkdsk /r and press Enter.
The application will scan your system for problems and fix any issues it discovers.
After conducting these SFC scans and CHDSK operations, reboot your system and check for errors.
13. Uninstall Your Graphics Card Driver
This issue, according to some users, might be caused by the graphics card driver. Several users have reported having this problem with the current Nvidia drivers, and they believe that returning to older versions of the driver is the fix.
To achieve this, just uninstall the Nvidia driver from Device Manager. Windows will install the default driver when you restart your computer after deleting the driver.
Check to see whether the issue persists with the default driver as well. If the problem persists, remove the graphics card entirely and investigate the cause of the error.
Related: Why Does the Mic Keep Cutting Out in Windows 10? [Simple Fixes]
14. Reset Windows 10
If the problem persists, you may need to reset your computer’s Windows 10. Even while there is a way to reset your PC without losing your data, it is best to create a backup in advance.
=> Go to the Start Menu and select Settings.
=> Navigate to Updates & Security
=> Click on Recovery, available in the left pane.
=> Click on the Get Started button under the Reset this PC option
To complete the reset process, follow the on-screen instructions. After completing the reset, you should have a fresh installation of Windows 10, and your problem should be resolved.
15. Reinstall Windows 10
Your Windows installation may be corrupted in a way that the aforementioned solutions will not be able to restore.
In this circumstance, the only choice is to reinstall Windows. This is annoying and time-consuming, but it will not create much of a problem if you keep a backup.
In this case, you must boot the computer from the installation disc and pick the “install now” option. Follow the on-screen directions to perform a clean installation of Windows 10.
16. Motherboard Diagnostic Test
If none of the solutions described here have helped to resolve the issue, there might be a problem with your motherboard or CPU.
In this case, it is worthwhile to go through our article on Motherboard diagnostic tests and frequent motherboard problems.
If you are unable to resolve the issue, it is best to contact an authorized PC service personnel.
Conclusion
The 15 solutions provided above should resolve your unexpected kernel-mode trap issue. An Unexpected Kernel Mode Trap, commonly known as error number 0x0000007F, can cause a slew of difficulties and stress on your machine.
These issues should be addressed following the techniques outlined above. You must resolve the problem as soon as possible.
In fact, for almost any Windows 10 problem, you can apply some of these solutions as an initial point of error correction. That combination cleans your system, adjusts file structures, and scans for errors.
We hope you found this post informative, and do like and follow us on Facebook and Twitter for regular updates.
We also ask that you bookmark this page for future reference. Sign up for our free newsletter as well to receive fresh information immediately in your inbox and keep technically up to date.


