How to Test a PC Motherboard Common Problems?
A faulty computer motherboard or CPU can cause a variety of issues with your computer. You may not notice the performance of your motherboard during normal PC operation.
A faulty motherboard can affect your GPU, CPU, USB ports, and everything else in your PC, you may be tempted to blame it on something else entirely.
Therefore, it is crucial to test the motherboard to identify any issues if you suspect a computer’s motherboard is functioning improperly.
How to Know If Motherboard Is Bad?
There is no certain motherboard diagnostic test to verify motherboard health, but here is a list of common problems to keep an eye on that are governed by your motherboard.
How to determine whether a motherboard is dead is unknown to many people. Without a doubt, we need to test the motherboard to verify it.
But how to test the motherboard?
If POST is not successful and the computer does not boot or turn on after pushing the power button, hardware failure is virtually inevitable.
However, this does not imply that your motherboard is defective. A faulty PSU (Power Supply Unit), an overheated CPU, and other factors might also contribute to this condition.
You must double-check something critical.
We can conclude that a motherboard fault exists by analyzing these symptoms. Here are a few of the issues you might encounter with a faulty PC motherboard.
However, remember that the problems listed below might be caused by something other than a faulty motherboard or CPU.
1. General Symptoms
The computer does not boot. Instead, you will receive a set of beep sound codes. The error code is indicated by the beep sound, its meaning varies from motherboard to motherboard.
The computer randomly crashes or reboots, resulting in generic protection fault error messages, illegal actions, fatal exceptions, and so on.
The burning odor is one of the most visible signs of a failing motherboard. A component that strongly smells of burning is often overheated.
A component that is incompatible with another might occasionally cause overheating or failure. For instance, the motherboard may become damaged by an inappropriate graphics card or RAM.
Your motherboard cannot control all of the hardware in your computer if it is malfunctioning. This can increase application lag rates and shutdowns.
Although the Blue Screen of Death (BSoD), also known as a Windows Stop Error, can be an indication of a motherboard issue, it is not always the case.
The BSoD error often denotes a problematic driver or hardware issue. Keep in mind the error code, such as (0x000000), if you can. If you have one, try searching for “motherboard failure” to see if anything comes up.
There are several methods for testing and finding out faults in the motherboard and CPU.
2. PCI-E Devices Are Not Working
As previously stated, determining the root cause of a problem is difficult. The same holds in this case.
We mostly use GPU cards in PCI-E slots. If the PCI-E devices aren’t working, it could be due to a faulty PCI-E slot or the GPU itself.
Due to this problem, your GPU stops working or you notice unusual visual anomalies on the screen, especially if you use a GPU for gaming.
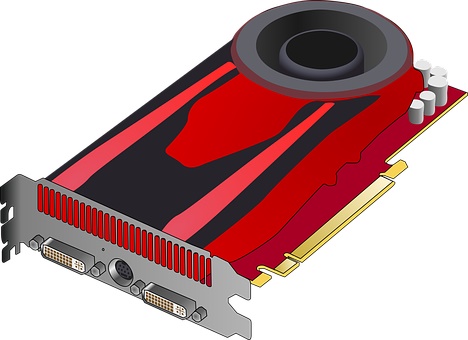
To ensure that it isn’t just a software problem with the graphics card, you should first update and reload your GPU drivers.
If that doesn’t work, try putting your GPU in a different slot to see if the problem persists. If it does work in the latter one, the slot from which you drew it is most likely faulty.
You could try upgrading the BIOS on your motherboard to see if that solves the problem, but if it doesn’t, you may need to replace the motherboard.
3. Broken USB Ports
If peripherals such as keyboards and mice aren’t working, try them in different ports before deciding.
Test the peripherals in different ports to see if they work properly. If they function effectively on these ports, we can conclude that we have a problem with the USB ports.
But, in the first step, don’t blame your motherboard. Open Device Manager on your computer, scroll down to “Universal Serial Bus controllers” and check to see if any of the ports have an error symbol next to them.
If you see any warning symbols, right-click them and choose “Update Driver“.
Even if no exclamation error mark appears, the Update Drivers option can be used to double-check. You can also right-click each USB port driver and select “Scan for Hardware Changes“.
Finally, try deleting each USB driver individually, then rebooting your computer to force it to reinstall. Hopefully, this will resolve the issue with the USB ports.
If none of these work, the problem is most likely with your motherboard’s electronic components.
4.RAM Slots Failed to Work
Next, if your computer beeps when you turn it on, then noticeably slows down over time during a single session, or crashes frequently, you may have a RAM issue.
It’s possible, however, that the problem isn’t with the RAM itself, but with the RAM slots. To test this, open your computer, remove a stick of RAM, and then restart the computer after putting back the RAM in its slot, to see if it works normally.
Continue in this manner until your computer breaks down again. If this occurs, replace the RAM stick you removed with another RAM slot, leaving the previous slot empty.
If the computer begins to malfunction again, you can be certain that the problem is with the RAM stick. If the computer works normally, you know the issue is with the RAM slot, and the only immediate solution is to replace the motherboard.
Related: Can We Use Different Brands or Sizes of RAM Together on a PC or a Laptop?
5. Video Ports That Are Not Working
If your video outputs, such as HDMI, VGI, or DVI, aren’t working when connected to your motherboard, the first thing to remember is that if your PC has a GPU, none of these will work.
This is because if there are GPU ports accessible by default, your PC will turn off the motherboard ports.
If you don’t have a GPU plugged in and your motherboard’s video ports were previously functional, experiment with different cables, making sure they fit securely and switching monitors if possible.
If the problem persists, launch Device Manager right-click “Generic PnP Monitor” under Monitors, and try each of the options – “Scan for hardware changes,” “Update Driver”, and “Uninstall device” – one at a time. After uninstalling your monitor, restart your computer to allow it to reinstall, and then test it.
If none of this works and you have a faulty motherboard, it’s time to replace it as soon as possible.
6. PC Startup Displays the BIOS Menu
You often have to manually set up your computer to access the BIOS menu.
Even with the correct settings, if it still appears automatically at startup, there may be software or hardware issues, such as a motherboard issue.
The BIOS menu shows at startup if the motherboard has trouble communicating with freshly installed components, such as a video card because it controls the hardware settings for your computer.
Additionally, the presence of a BIOS is a sign that a motherboard component has failed or been damaged.
7. Visual Abnormalities
You can look at the motherboard physically once or more times the computer has been accidentally turned off.
A faulty motherboard may display visual abnormalities such as arcing, burning, or component bulging. During a visual inspection of a motherboard, we can detect these types of faults.
Usually, leaky or swollen capacitors are the result of overheating, a material problem, or a design flaw.
Capacitors that have bulged or blown are a common cause of motherboard problems or failure. Check the top of each capacitor for bulging or leaking, which indicates a blown capacitor.
Any bulging or blown capacitors are almost certainly causing PC motherboard problems. A faulty capacitor may be replaceable, but installing a new capacitor necessitates precision soldering.
A visual examination of the CPU necessitates the removal of the CPU from the computer. Once the CPU has been removed, look for bent pins on the side of the CPU that is inserted into the motherboard.
If you find a bent pin, it means that the CPU and computer aren’t working properly. The bent pins of a CPU can be bent back into place, but only with extreme caution.
However, attempting to bend it back may cause it to break off, necessitating the replacement of the CPU.
If there are no obvious visible faults after a visual inspection, use a software program or dedicated motherboard testing kits to diagnose the issue.
8. Other Bad Motherboard Symptoms
In addition to the aforementioned issues, a defective motherboard may also present the following issues:
POST (Power-On Self-Test) is not performed by the motherboard.
It can take a while for your computer to start up.
Peripherals either cease operating for a few seconds or longer, stop being recognized, or stop appearing.
The monitor will display weird lines, or your PC won’t detect flash drivers (particularly if your video card is built into the motherboard).
You may run a test to find out the condition of your motherboard. Since every piece of the system that is linked to the motherboard must be ruled out, diagnosing motherboard issues may be challenging.
Motherboard Diagnostic Testing Tools
There are different motherboard diagnostic tools available on the market to test a motherboard.
A few software tools to test your computer’s motherboard and CPU are listed below. Due to the complexity and wide range of computer motherboards and CPUs, these motherboard diagnostic tools may not detect every possible flaw.
PC-doctor – A good, but not cheap, solution for diagnosing computer hardware problems, including common motherboard problems, that is widely used by service centers and professionals.
If you own an Intel CPU, the Intel Processor Diagnostic Tool is a fantastic free program for testing a wide range of Intel CPUs.
Ultra-X is a fantastic line of services for testing computer hardware, including motherboard tester.
Related: What Are Motherboard Standoffs and What Are They Used For?
Test a Motherboard With a Multimeter
When checking a motherboard, a multimeter is an essential instrument. By measuring the voltage, you can confirm that the motherboard is receiving the necessary voltage.
You can check for shorts and leaks as well.
We’ll go through how to use a multimeter to test your motherboard and ensure it is in working order.
Here’s a step-by-step method for testing a motherboard with a multimeter: If you are unsure about the state of your motherboard, use a reliable multimeter to ensure maximum performance and avoid damage.
You may get a high-quality multimeter from Amazon that can be used for a variety of measuring and maintenance tasks around the house or business.
A few crucial results from the multimeter testing might help you identify whether or not your motherboard is in excellent working order.
a) Voltage Testing
If your computer is having problems booting or randomly crashing, it might be due to a voltage issue on your motherboard.
The breakdown of motherboard components causes this voltage issue.
Testing the motherboard voltage is a straightforward technique that can be performed at home with a decent multimeter. Once you have your multimeter, proceed as follows:
- Disconnect your computer’s power supplies, including the wall power cable and UPS power supply.
- Locate the 20-pin ATX power connector on your motherboard, which connects the SMPS to the motherboard.
- Set your multimeter to measure DC voltage.
- Remove the connector from the motherboard and verify all of the SMPS supply voltages. If there is insufficient voltage, we may be certain that the issue is with the power supply unit.
- Reconnect the connector to the motherboard and test the essential motherboard voltages to see if the voltages are correct. Each motherboard’s specific voltage value is readily available over the internet.
- The voltage should be displayed on the display. If you don’t, double-check your connections and make sure the leads are connected to the right pins.
- If all of the measurements are within normal limits, your motherboard is most likely not the source of your computer’s problems. If one or more of the values are beyond the typical range, your motherboard may be faulty, and you should take it to a certified technician for additional evaluation.
Testing your motherboard’s voltage is a quick and straightforward technique to rule out hardware problems as the source of your computer’s troubles.
If you don’t feel comfortable testing the voltage yourself, take your computer to a skilled technician who can do it for you.
b) Test Capacitors
If your motherboard isn’t working properly, it might be due to a damaged capacitor. These components are in charge of conserving electrical energy and discharging it as needed, and if they malfunction, they can create a variety of issues on the motherboard.
Testing motherboard capacitors is a simple way to determine whether or not your capacitors are functioning correctly. You may also use your multimer here and get the results instantaneously.
- To begin, locate the capacitors on your motherboard. They are cylindrical and generally have the word “CAP” printed on them.
- Set your multimeter to ohms and touch the probes to the leads on either end of the capacitor once you’ve found them.
- If the reading is infinite, the capacitor is open and should be replaced.
- If the reading is 0, the capacitor has been shorted and then also it must be replaced.
- If you receive a reading that is between those two numbers, the capacitor is OK and does not need to be changed.
You may get replacement capacitors from an electronics store or online once you’ve established which ones need to be replaced.
Simply ensure that you obtain the proper type and size for your motherboard.
You can quickly test your motherboard’s capacitors and guarantee that they are in excellent working order, as we explained above, with a few basic tools and a little know-how.
Testing a motherboard with a multimeter is a basic operation that can be completed in a few simple steps.
By checking the motherboard’s different components, you can guarantee that it is working correctly and discover any potential problems.
You can keep your motherboard in perfect condition for years to come with a little patience and attention to detail.
Conclusion
Motherboards are complicated devices, and it will take a lot of tinkering and opening up your PC to determine whether the issue is with the board or with other components.
If you do open up your PC, double-check that all cables, cards, and other devices are correctly and firmly plugged in, because a loose connection in the motherboard is usually the source of the problem.
Keep in mind that the motherboard diagnostic process is a skilled job that necessitates experience, concentration, and patience.
Frequently Asked Questions
How do you diagnose a motherboard?
Diagnosing motherboard problems might be difficult. However, there are some general steps and tips to help you identify potential problems, such as observing physical signs of damage, ensuring the motherboard is receiving the correct power supply, listening for beep codes during booting, checking the motherboard LED indicators, swapping components, inspecting the CPU, running diagnostic software, and using diagnostic cards.
Can the motherboard be repaired?
Yes. Motherboards are repairable or replaceable. Repairing the motherboard is frequently less expensive and takes less time than replacing it. However, experts can repair the motherboard, which may include soldering or replacing specific components like capacitors, resistors, or chips.
We hope you found this post informative, and do like and follow us on Facebook and Twitter for regular updates.
We also ask that you bookmark this page for future reference. Sign up for our free newsletter as well to receive fresh information immediately in your inbox and keep technically up to date.
You May Be Interested to Read:
- How to Fix It When a PC Monitor Fails to Wake Up from Sleep?
- Why Is USB Tethering Not Working and How Can It Be Fixed?
- What Happens When Your Hardware Accelerated GPU Scheduling On or Off?
- How Long Does PC Power Supply Last and How Can It Increase Its Lifespan?
- What Are the Things to Upgrade on PC to Improve Its Performance?

