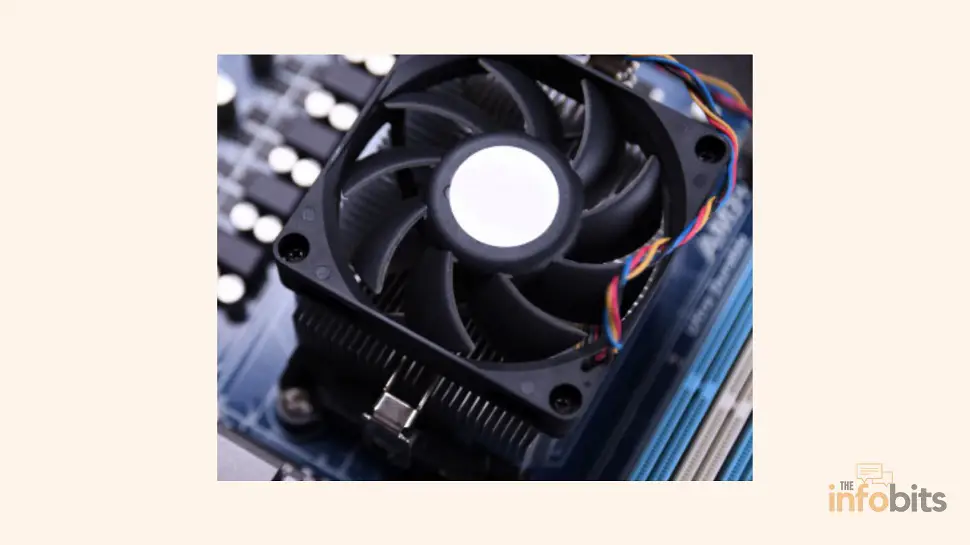
CPU Fan Error on Boot: 11 Fixes for “Press F1 to Resume”
You power on your PC, and instead of your usual boot sequence, you’re staring at a black screen with a message like “CPU Fan Error! Press F1 to Resume”, or some close variation of it.
The fans might be spinning right in front of you, which makes the message feel even more confusing: if the fan’s clearly running, why does the motherboard think it isn’t?
This error is your motherboard’s built-in safety system speaking up, and in a genuinely large share of cases it’s a five-minute fix rather than a sign your CPU is about to fry.
This guide walks through how to tell whether you’re looking at a real cooling problem or a false alarm, then covers every fix worth trying, roughly in order of how likely each one is to solve it.
Quick Answer:
A CPU fan error means your motherboard isn’t receiving a valid RPM signal from whatever’s plugged into the CPU_FAN header. It doesn’t necessarily mean the fan has failed. Start by confirming the fan is physically spinning and firmly seated in the correct header (not an auxiliary or pump header by mistake).
If it’s spinning normally, this is very likely a false positive caused by a fan speed reading below the BIOS’s minimum RPM threshold, fixable by lowering or disabling that threshold in BIOS under Hardware Monitor / Q-Fan Control. If the fan genuinely isn’t spinning at all, treat it as a real hardware issue and address that before doing anything else, since this warning exists specifically to prevent CPU damage.
What Does the CPU Fan Error Actually Mean?
Every modern motherboard monitors the CPU fan header for a tachometer signal. A pulse the fan sends back roughly twice per revolution, letting the BIOS calculate its RPM in real time.
If that signal drops below a threshold the BIOS considers safe (or disappears entirely), the motherboard assumes your CPU has no working cooling and halts the boot process before Windows or any other OS even starts loading.
This is a deliberate safety measure, not a bug. Modern CPUs can reach damaging temperatures within seconds under load with zero active cooling, so motherboard manufacturers built this check in specifically to stop that from happening silently. The message typically reads as some variation of:
- “CPU Fan Error! Press F1 to Resume”
- “CPU Fan Speed Error Detected”
- “CPU Fan Has Failed!”
All of them describe the same underlying situation: the motherboard isn’t getting a signal it trusts from the CPU_FAN header.
Important distinction: this error can appear even when your fan is spinning completely normally. It only means the reported speed or signal doesn’t match what the BIOS expects, which is why “confirm it’s real” is always the first step, not replacing parts.
What Causes a CPU Fan Error?
No signal at all; the fan genuinely isn’t spinning. This is the scenario the error is designed to catch, caused by a dead fan, a disconnected cable, or a failed fan motor.
Wrong header. The fan (or, more often, an AIO liquid cooler’s pump) is plugged into a header the motherboard isn’t monitoring as the primary CPU fan header; commonly a case fan header or an auxiliary “AIO_PUMP” header instead of “CPU_FAN.”
AIO pump reporting an unusual RPM curve. This is one of the most common and least understood causes on modern builds. Many all-in-one liquid coolers run their pump at a fixed high RPM that doesn’t ramp the way a traditional fan does, and some motherboards misread that steady, unusually-shaped signal as an error rather than normal operation.
PWM vs. DC header mismatch. A 4-pin PWM fan plugged into a 3-pin DC-only header (or vice versa) can produce an RPM signal the board can’t interpret correctly, even though the fan itself is working fine.
Dust buildup slowing the fan below the BIOS threshold. A fan clogged with dust can spin slowly enough at startup to register below the minimum RPM the BIOS expects, even if it speeds up once it’s been running a few seconds.
Overly strict or misconfigured BIOS fan speed threshold. Some boards ship with a default “Fan Speed Low Limit” that’s simply set too high for the specific fan installed, particularly quiet, low-RPM fans marketed for silence.
A loose or damaged connector. Cables that have worked loose from vibration, or pins bent during a build or upgrade, can interrupt the signal without stopping the fan from physically spinning.
Recent BIOS update or CMOS reset. Updating or resetting BIOS occasionally reverts fan monitoring settings to defaults that don’t match your specific hardware, triggering the error on an otherwise unchanged system.
Related: PWM vs DC Fans: Which Is Better for PC Cooling?
Step 1: Confirm Whether This Is a Real Problem or a False Positive
Before touching any settings, spend two minutes here. It determines which half of this guide actually applies to you.
- Look at the fan while the error is on screen, if your case is open or has a window. Is it spinning?
- If it’s not spinning at all, this is very likely a genuine hardware issue. Skip ahead to the hardware-focused fixes later in this guide (loose connections, header checks, and replacement) rather than the BIOS threshold fixes.
- If it is spinning normally, this is almost certainly a false positive. The fan is working, but the BIOS either isn’t reading its RPM signal correctly or has a threshold set too high for it. The BIOS-based fixes below are your starting point.
- Feel for airflow near the exhaust vents as an additional check. Warm air movement confirms the fan is doing its job even if the BIOS disagrees.
If you’re not confident opening the case is safe or practical right now (for example, on a laptop), move to the general troubleshooting steps below, which don’t require a visual check first.
How to Fix a CPU Fan Error: Step-by-Step
1. Restart and See If It Recurs
Occasionally this error is a one-off misread during a single boot cycle, particularly right after a BIOS update, CMOS reset, or a fan reaching full spin-up slightly slower than usual on a cold start. Restart once before assuming anything is actually broken.
2. Check the Fan Connection at the Header
Power off, unplug the PC, and open the case. Confirm the fan’s cable is firmly and fully seated in the header labeled CPU_FAN on your motherboard, not a case fan header, and not (if you’re running an AIO liquid cooler) an “AIO_PUMP” or “PUMP” header by mistake, unless your specific cooler and motherboard combination is designed to be wired that way.
If you’re not sure which header is which, check your motherboard’s manual. Headers are usually printed directly on the board itself in small text near each connector, though it can be easy to miss without a flashlight.
Related: How to Test a PC Motherboard: Signs of Failure, Diagnostic Tools & Fixes
3. Verify You’re Using the Correct Header for an AIO Cooler
This trips up more people than any other single cause on modern builds. AIO liquid coolers have two components that both need power and monitoring: the pump and the radiator fans.
Many motherboards expect the pump specifically connected to CPU_FAN (since that’s the header the boot-time safety check monitors), with the radiator fans connected to a separate CPU_FAN_OPT, AIO_PUMP, or case fan header.
If your pump is plugged into a header the BIOS isn’t checking, or your radiator fans are plugged into CPU_FAN instead of the pump, you can get exactly this error even though cooling is working perfectly. Check your cooler’s manual for the manufacturer’s recommended wiring, since this varies by brand.
4. Try a Different Header
If the fan doesn’t spin when connected to CPU_FAN, move it to a different case fan header temporarily and see if it spins there. If it does, the header itself ( not the fan) may be damaged or dead, which typically means a motherboard-level fix or replacement rather than a new fan.
5. Clean Dust from the Fan and Heatsink
Dust buildup is one of the most common causes of a fan spinning slower than the BIOS expects, especially at the initial startup ramp-up.
Power off and unplug the PC, then use a can of compressed air or a small air blower to clear dust from the fan blades, the heatsink fins beneath it, and the surrounding vents. Hold the fan blades still while blowing air across them to avoid spinning them faster than their bearings are rated for.
Avoid vacuum cleaners directly on internal components. The static charge they generate can damage sensitive electronics; if you use one, keep the nozzle a few inches away rather than touching components directly.
6. Reset BIOS to Default Settings
If a recent manual change to fan curves or thresholds might be the cause, resetting BIOS to its factory defaults is a fast way to rule that out. Enter BIOS (commonly Del, F2, or Esc during boot), look for an option like Load Optimized Defaults or Load Setup Defaults, usually on the Exit or Save & Exit screen, and confirm.
Reboot and see if the error clears. If it does, you can then reapply any custom settings you actually need, one at a time, to identify which one caused the problem originally.
7. Lower or Disable the Fan Speed Low Limit in BIOS
If you’ve confirmed the fan is genuinely spinning and cooling is working, but the error persists, the most direct fix is adjusting the RPM threshold the BIOS is checking against.
- Restart and enter BIOS setup.
- Navigate to Advanced Mode if your BIOS opens in simplified/EZ mode (often via F7).
- Look under Monitor, Hardware Monitor, or Q-Fan Control, depending on your motherboard brand.
- Find CPU Fan Speed Low Limit (naming varies by manufacturer).
- Lower the threshold; try 300 RPM or 200 RPM first, or set it to Ignore if your BIOS offers that option.
- Save and exit (commonly F10), then restart.
Important note: only use “Ignore” if you’ve already confirmed the fan is physically spinning and cooling normally. Disabling this check on hardware with a genuinely failed fan removes the one safeguard designed to stop your CPU from overheating silently.
8. Check for a PWM/DC Mismatch
If your fan is a 4-pin PWM model plugged into an older 3-pin DC-only header (or vice versa), the RPM signal can come through garbled or unreadable even though the fan spins fine.
Check your motherboard’s specifications for which header types support which fan types, and if there’s a mismatch, either swap to a compatible header or a fan matching your header type.
9. Update Your Motherboard’s BIOS
Fan monitoring behavior, particularly for how a board interprets AIO pump signals, occasionally gets refined in BIOS updates after a board’s initial release. Check your motherboard manufacturer’s support page for your exact model and current BIOS version, and update if a newer one is available.
Follow your manufacturer’s specific update instructions carefully, since an interrupted BIOS update can cause more serious problems than the fan error you started with.
10. Inspect for Physical Damage or a Bent Pin
With the PC powered off and unplugged, look closely at the CPU_FAN header pins on the motherboard and the connector on the fan cable itself for any bent pins, corrosion, or visible damage.
A bent pin can prevent proper contact even when the connector looks seated. Gently straighten a bent pin with a fine tool if you’re comfortable doing so, or consider professional help if it looks fragile.
11. Replace the Fan or Cooler
If you’ve worked through the steps above and the fan genuinely isn’t spinning, or spins intermittently and inconsistently even when clean and properly connected, it’s likely failed and needs replacing.
This is one of the more affordable PC repairs. A quality replacement CPU cooler is inexpensive relative to the CPU it protects, and swapping a standard air cooler is a beginner-friendly repair that typically takes well under an hour.
If you’re shopping for a replacement, a well-reviewed tower CPU air cooler like Noctua NH-U12S Redux in the mid-range price bracket on Amazon offers noticeably better thermal headroom and quieter operation than most stock coolers, and it’s a straightforward upgrade even for a first-time PC builder.
If the issue turns out to be an AIO cooler’s pump rather than a simple fan, replacement is more involved since it typically means swapping the entire cooling loop. In that case, it’s worth comparing the cost against switching to a traditional air cooler instead, especially on a mid-range build where the extra cooling headroom of liquid cooling may not be necessary.
Signs Your CPU Fan Is Actually Failing (Not Just Misread)
If you’re trying to figure out whether this error is the first sign of a real, worsening problem rather than a one-time misconfiguration, watch for these alongside it:
Unusual noise. A healthy fan runs quietly. Rattling, grinding, or an intermittent buzzing sound, especially one that changes with fan speed, often points to worn bearings nearing failure, not just a monitoring glitch.
Performance drops or thermal throttling. If your CPU-heavy tasks have gotten noticeably slower, or your system is hitting higher temperatures than it used to under the same workload, that’s consistent with a fan that’s losing effectiveness even if it hasn’t fully died yet.
Frequent unexplained shutdowns or BSODs. A cooling system on the edge of failure can cause the system to overheat and force a protective shutdown during normal use, not just at boot.
The error recurs after you’ve ruled out false positives. If you’ve confirmed proper connection, cleaned the fan, reset the BIOS, and adjusted the RPM threshold, and the error still comes back consistently, that pattern points toward genuine, worsening hardware failure rather than a one-off misread.
Related: How Long Do PC Power Supplies Last? PSU Lifespan Guide
Common Mistakes to Avoid
Immediately disabling the fan check in BIOS without confirming the fan actually works. This removes your CPU’s last line of defense against a real cooling failure. Always verify the fan is spinning first.
Assuming an AIO pump error means the whole cooler has failed. In many cases, it’s simply plugged into the wrong header, or the board is misreading a normal pump RPM signal it doesn’t expect. Check wiring before assuming a defective unit.
Using a vacuum cleaner directly against internal components. Static discharge from vacuum use can damage sensitive electronics; use compressed air or an electronics-safe blower instead, or keep a vacuum nozzle at a distance rather than touching parts directly.
Continuing to boot repeatedly by pressing F1 without investigating. If the fan genuinely isn’t spinning, each boot cycle you push through is additional time your CPU spends without proper cooling. It is worth pausing to actually diagnose rather than clicking past it out of habit.
Overlooking laptop-specific causes. On laptops, this same underlying issue often shows up as unexplained shutdowns or thermal throttling rather than a clean BIOS message, and dust buildup in narrow laptop vents is an especially common cause since airflow paths are smaller and harder to clean without professional disassembly.
Myth vs. Fact
Myth: “If I can press F1 and boot into Windows fine, there’s no real problem.” Fact: Pressing past the warning lets you boot, but it doesn’t mean cooling is actually adequate. If the fan genuinely isn’t running, your CPU is unprotected during that entire session, even though the system appears to work normally in the short term.
Myth: “CPU fan errors always mean the fan is broken.” Fact: In a substantial share of cases, especially on AIO-equipped or recently BIOS-updated systems, this is a monitoring or header mismatch issue with a fan that’s working completely normally.
Myth: “Disabling the fan speed check in BIOS is a safe permanent fix.” Fact: It’s only safe once you’ve confirmed cooling is genuinely adequate. Using it as a way to silence the warning without checking the fan first defeats the entire purpose of the safeguard.
Conclusion
A CPU fan error on boot looks alarming, but the first and most important step is simple. Look at the fan and confirm whether it’s actually spinning.
If it is, you’re almost certainly dealing with a BIOS misread, a wrong header, an unrecognized AIO pump signal, or an overly strict RPM threshold, all fixable in a few minutes without opening your wallet.
If it genuinely isn’t spinning, treat that as the real hardware issue it is, and address it before letting the system boot repeatedly. Either way, don’t make a habit of pressing past the warning without knowing which situation you’re actually in.
Frequently Asked Questions
Why does my CPU fan error show up even though the fan is clearly spinning?
The BIOS is reading an RPM signal it doesn’t recognize as valid. It is commonly from the fan being plugged into the wrong header, a PWM/DC mismatch, or (on AIO coolers) a pump signal shape the board isn’t expecting, not necessarily a real cooling failure.
Is it safe to press F1 and continue booting?
Only if you’ve confirmed the fan is actually spinning and cooling normally. If it isn’t, continuing to boot repeatedly leaves your CPU running without proper cooling each time.
How do I stop the CPU fan error from appearing every time I boot?
Once you’ve confirmed cooling is genuinely working, lower or disable the “Fan Speed Low Limit” setting in BIOS, usually found under Monitor, Hardware Monitor, or Q-Fan Control depending on your motherboard brand.
Why does my AIO liquid cooler trigger this error?
AIO pumps often run at a steady, high, non-ramping RPM that some motherboards misread compared to a traditional fan’s variable speed curve. Check that your pump and radiator fans are connected to the headers your cooler’s manual recommends.
What’s the difference between CPU_FAN and AIO_PUMP headers?
CPU_FAN is the header your motherboard’s boot-time safety check specifically monitors, while AIO_PUMP (where present) is typically meant for a liquid cooler’s pump and may not trigger the same boot-blocking check. Wiring varies by cooler and motherboard, so check both manuals.
Can dust really cause a CPU fan error?
Yes. Dust-clogged fans often spin slower at startup than a clean fan would, which can push the reported RPM below the BIOS’s minimum threshold even though the fan technically still works.
Should I just disable the CPU fan warning in BIOS permanently?
Only after confirming your cooling genuinely works. This setting exists specifically to protect your CPU from undetected cooling failure, so disabling it without verification removes that protection entirely.
How much does it cost to replace a failed CPU fan or cooler?
A basic air cooler replacement is generally inexpensive, and installation is a beginner-friendly repair most people can do themselves in under an hour; a technician typically charges a modest labor fee if you’d rather not do it yourself.
Can a CPU fan error happen on a laptop, not just a desktop?
Yes. The same underlying signal-detection issue applies, though on laptops it may present less clearly as a boot-time message and more as thermal throttling or unexpected shutdowns, since laptop firmware handles fan warnings differently across manufacturers.
Does updating BIOS fix CPU fan errors?
Sometimes. Manufacturers occasionally refine how their BIOS interprets fan and pump RPM signals in updates after a board’s release, particularly for AIO cooler compatibility, so checking for a newer BIOS version is worth doing if other fixes haven’t worked.
What does “CPU Fan Speed Low Limit” actually control?
It’s the minimum RPM the BIOS will accept as a valid signal before triggering the fan error. Lowering it (or setting it to Ignore) tells the BIOS to stop flagging fan speeds it currently considers too slow to be real.
My fan spins when I first turn on the PC, but the error still appears; why?
This can happen if the fan needs a moment to ramp up to a speed the BIOS considers valid, or if it’s spinning but the RPM signal itself isn’t being read correctly due to a header or cable issue rather than the fan speed itself.
Is a rattling or buzzing fan noise always a sign of failure?
Not always immediately, but it’s a strong early warning sign worth acting on. A fan making unusual noise is more likely to fail soon than one running silently, so cleaning and inspecting it promptly can extend its life or catch a failure before it causes a shutdown.
Can overclocking cause a CPU fan error?
Not directly through the fan signal itself, but overclocking increases heat output and fan demand, so a fan that’s borderline or already struggling is more likely to reveal problems (or trip thermal protections) under an overclocked load than at stock settings.
We hope you found this post useful, and please like and follow us on Facebook and Twitter for regular updates.
We also request that you bookmark this page for future use. Sign up for our free newsletter as well to receive new information in your inbox regularly and stay technically up to date.
Disclosure: If you follow some of our links for products or services mentioned in this article and make a purchase, we will receive an affiliate commission on some, but not all, of the products or services we mentioned without changing the price you pay.
You May Be Interested in Reading:
- How to Fix It When a PC Monitor Fails to Wake Up from Sleep?
- Why Is USB Tethering Not Working and How Can It Be Fixed?
- What Happens When Your Hardware Accelerated GPU Scheduling Is On or Off?
- How Long Does a PC Power Supply Last and How Can Its Lifespan Be Increased?
- How to Find the Power Supply of Your PC?