

Unmountable Boot Volume Error (Windows 10/11): 12 Real Fixes
Your PC restarts, and instead of your desktop, you’re staring at a blue screen with the words UNMOUNTABLE_BOOT_VOLUME. No login screen, no taskbar; just a stop code and a system that won’t go past it.
It’s a jarring error because it happens before Windows finishes loading, which means most of the “obvious” fixes such as running an antivirus scan, opening Task Manager, restarting in the usual way, aren’t even on the table. You’re locked out at the most basic level.
The positive thing is that one of the more fixable blue screens out there. In most cases it comes down to a damaged file system or a corrupted piece of the boot process, not a dead hard drive.
This guide walks through every method that reliably resolves it, starting with the fastest and moving toward the more involved fixes, plus how to get your files off the drive first if it ever comes to a reinstall.
Quick Answer:
UNMOUNTABLE_BOOT_VOLUME means Windows can’t read the partition it needs to start from, almost always because of file system corruption, a botched update, or a failing drive. Fix it by booting into the Windows Recovery Environment (WinRE) and running Startup Repair, then
chkdsk /r, later a Master Boot Record (MBR/GPT) rebuild withbootrec. If none of that works and a recent driver, BIOS change, or update lines up with when the error started, undo that first before assuming the drive itself is dying.
What Does “Unmountable Boot Volume” Actually Mean?
Every Windows PC has a boot volume – the partition on your SSD or hard drive that stores Windows itself and the files needed to start it. When Windows boots, one of its very first jobs is to “mount” that partition, essentially telling the system, “here’s where the operating system lives, read from it.”
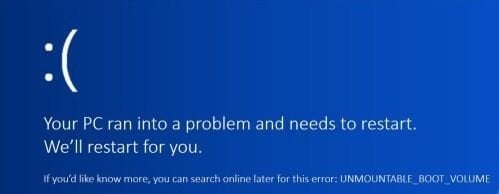
When that step fails, Windows throws the stop code UNMOUNTABLE_BOOT_VOLUME (bug check code 0x000000ED) and drops you into a Blue Screen of Death (BSOD) before the login screen ever appears. It’s classified as a “stop error,” which is Microsoft’s term for a crash so fundamental the operating system halts entirely rather than risk running with a broken core file system.
This is different from a regular freeze or app crash. Because it happens during the boot sequence, you can’t just open Task Manager or run a quick scan. You need to get into a special recovery environment first, which is why this error trips people up more than most.
If you were in the middle of unsaved work when this happened, there’s no way to recover it from within Windows at this stage. But your files elsewhere on the drive are almost always still intact, and later in this guide we’ll cover how to pull them off safely.
What Causes the Unmountable Boot Volume Error?
There isn’t one single cause. It’s a symptom that several different underlying problems can trigger. Knowing which one applies to you helps you skip straight to the right fix instead of working through all twelve.
File system corruption. This is the most common trigger by far. NTFS (the file system Windows uses) keeps a table of exactly where every file lives on disk. If that table gets damaged ( from a bad shutdown, a failing drive, malware, or a botched write), Windows can no longer trust it enough to mount the volume.
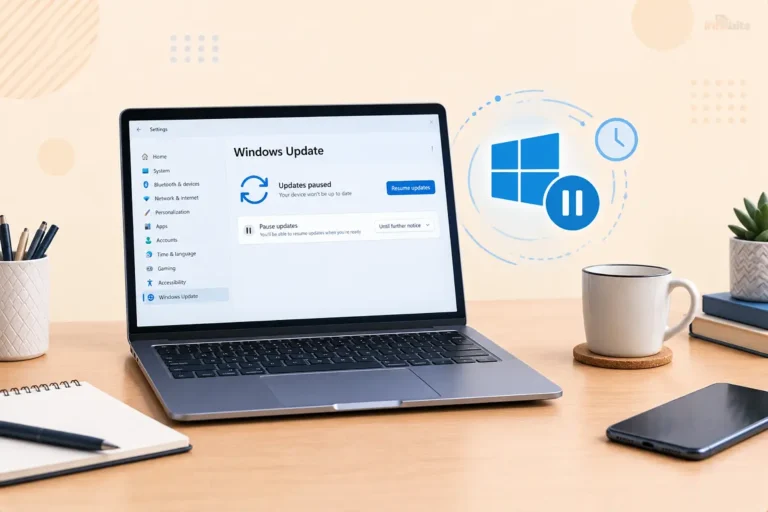
A recent Windows Update. Feature updates and cumulative updates occasionally leave the boot configuration in a bad state, especially if the PC lost power or was forced to restart mid-installation. If your error started right after Windows Update ran, this is worth checking first.
A corrupted or missing Boot Configuration Data (BCD) / MBR / GPT. The Master Boot Record (on older, MBR-style disks) or the GUID Partition Table (on modern GPT/UEFI disks) tells your firmware exactly where to find Windows on the drive. If either gets overwritten or corrupted, sometimes by dual-booting another OS, a partitioning mistake, or malware, the system can’t locate the boot volume at all.
Storage driver or SATA mode mismatch. If you (or a BIOS update) switched your storage controller mode between AHCI, RAID, and IDE after Windows was already installed, the boot-time driver Windows expects to load often won’t match the hardware anymore, and it fails before the OS can mount the drive. This is a frequently missed cause because it looks identical to file corruption from the outside.
Failing storage hardware. A drive with a growing number of bad sectors, worn-out NAND (on SSDs), or a loose/failing SATA or NVMe connection can eventually become unreadable at exactly the moment Windows tries to mount it.
RAM problems. Less common, but faulty memory can corrupt data mid-write, including the very system files Windows needs to boot. So if the error is intermittent rather than constant, it’s worth ruling out.
BIOS/UEFI misconfiguration. Rare on its own, but changes to boot mode (Legacy vs. UEFI) or Secure Boot settings can sometimes prevent the correct volume from being recognized.
Before You Start: What You’ll Need
Because this error blocks normal booting, most of the fixes below require the Windows Recovery Environment (WinRE). You can usually reach it two ways:
- Automatically, if Windows fails to boot three times in a row, it typically drops into Automatic Repair on its own.
- Manually, using a bootable Windows 10 or Windows 11 USB drive, which you’ll need if Automatic Repair doesn’t appear.
If you don’t already have installation media, you’ll need a spare USB flash drive (8 GB or larger) and access to a second working computer to build one using Microsoft’s Windows 10 Media Creation Tool or Windows 11 Media Creation Tool.
A reliable USB 3.0 flash drive (available on Amazon) makes this process noticeably faster than building installation media on an older USB 2.0 stick, since you’re writing several gigabytes of data to it. It is worth keeping one in a drawer for exactly this kind of situation.
How to Fix the Unmountable Boot Volume Error: 12 Methods
Work through these roughly in order. The first few take two minutes; later ones take longer but resolve more stubborn cases. You don’t need to do all twelve. Stop as soon as your PC boots normally.
1. Just Restart First
It sounds too simple, but it’s worth ruling out immediately: Windows occasionally throws this error after a one-off glitch, particularly following an interrupted shutdown or a temporary read error, without any lasting damage underneath.
Turn your PC off completely, wait about 10 seconds, and turn it back on. If Windows boots normally, the issue may have been a transient hiccup. But keep an eye out. If it comes back, move on to the recovery-based fixes below rather than restarting repeatedly.
2. Let Automatic Repair Do Its Job
If Windows fails to start two or three times in a row, it usually launches Automatic Repair on its own and attempts to diagnose and fix the boot problem without any input from you.
Let this run. It can take 15–20 minutes, and the screen may sit on a black screen with just a cursor, which is normal. If it succeeds, you’ll be taken straight to your desktop. If it reports that it “couldn’t repair your PC,” don’t worry; that just means you’ll need to work through the manual fixes below from the same recovery menu.
3. Boot from Windows Installation Media
If Automatic Repair never triggers, or it fails, you’ll need to boot from a USB installation drive to reach the same recovery tools manually.
Insert your Windows 10 or Windows 11 installation USB, restart your PC, and enter the boot menu (commonly F12, F11, or Esc, depending on your manufacturer; check your PC’s on-screen prompt during startup). Select your USB drive as the boot device.
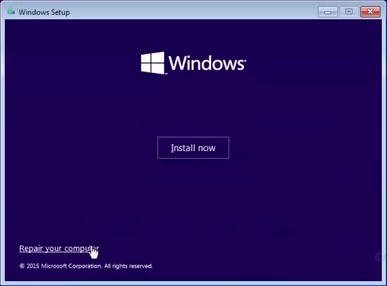
On the Windows Setup screen, skip the “Install now” button and instead click Repair your computer in the bottom-left corner. This gives you access to the same recovery tools Automatic Repair uses, but lets you run them one at a time and see exactly what’s happening.
4. Run Startup Repair Manually
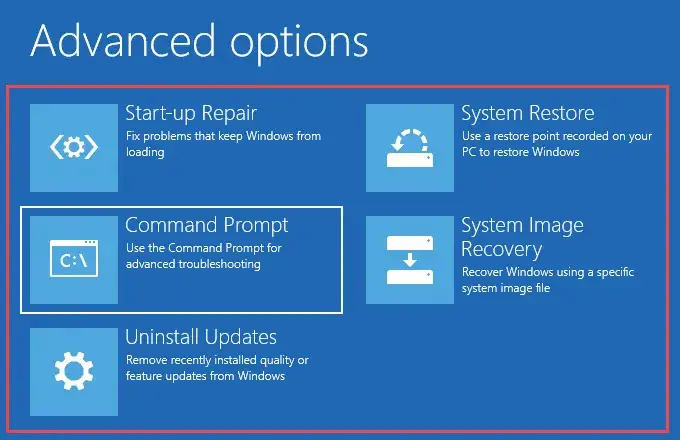
From the recovery menu, go to Troubleshoot → Advanced options → Startup Repair, and select your Windows installation when prompted.
This scans for common boot problems like missing or corrupted boot files, incorrect BCD entries, and fixes them automatically where it can. It’s essentially the same tool Automatic Repair runs, but triggering it manually here guarantees it actually executes, rather than potentially skipping if the automatic detection didn’t fire.
5. Repair the Master Boot Record or GPT
The Master Boot Record (MBR) on older disks, or the GUID Partition Table (GPT) on modern UEFI systems, stores the map your PC uses to find Windows on the disk at startup. If this gets corrupted, the drive itself can be perfectly healthy, and Windows will still fail to mount it.
From Troubleshoot → Advanced options, open Command Prompt, then run these one at a time, waiting for each to finish before entering the next:
bootrec /fixmbr
bootrec /fixboot
bootrec /scanos
bootrec /rebuildbcd
fixmbrwrites a fresh, compatible Master Boot Record without touching your partition table.fixbootwrites a new boot sector to the system partition.scanossearches all connected drives for Windows installations that aren’t currently listed in the boot menu.rebuildbcdrebuilds the Boot Configuration Data store from scratch using whateverscanosfound.
If rebuildbcd reports “0 Windows installations found,” your file system may be too damaged for it to see, in which case move on to CHKDSK next before trying this again.
Type exit and restart once these finish.
6. Run CHKDSK to Repair the File System
Since file system corruption is the single most common cause of this error, CHKDSK is often the fix that actually resolves it, even when the MBR/GPT repair above doesn’t change anything.
From the same Command Prompt, run:
chkdsk /r C:
The /r flag tells CHKDSK to locate bad sectors and recover readable information from them, not just report problems, which is exactly what you want here. If your Windows partition uses a different letter (check with diskpart and list volume if unsure), substitute it for C:.
This can genuinely take a long time on large or heavily fragmented drives, sometimes over an hour, so let it run to completion rather than assuming it’s frozen. If it asks to run again on the next restart, type Y and reboot to let it finish.
7. Run an SFC Scan
System File Checker (SFC) looks specifically for corrupted or missing Windows system files, which is a narrower but complementary check to CHKDSK’s disk-level scan.
Back in Command Prompt:
sfc /scannow
Since SFC normally runs against your live Windows drive, and you’re currently in the recovery environment, it needs to be pointed at the offline installation explicitly. If a plain sfc /scannow doesn’t work in WinRE, use:
sfc /scannow /offbootdir=C:\ /offwindir=C:\Windows
adjusting the drive letters to match your setup. Let it finish, then restart and see if Windows loads.
8. Rebuild Boot Files with Bcdboot (UEFI Systems)
If bootrec /rebuildbcd can’t find your Windows installation, or the boot files themselves are missing rather than just misconfigured, bcdboot rebuilds the boot environment from your existing Windows folder.
From Command Prompt, first confirm your drive letters with:
diskpart
list volume
exit
Note which letter holds your Windows folder (often not C: inside WinRE) and which holds the EFI System Partition. Then run:
bcdboot C:\Windows /s S: /f UEFI
replacing C: with your Windows partition and S: with your EFI partition. This rebuilds the boot files needed to start Windows without touching your personal files.
9. Roll Back a Recent Windows Update
If the error started immediately after a Windows Update installed, this is very likely the cause, and rolling it back is faster than any repair tool.
From Troubleshoot → Advanced options → Uninstall Updates, choose either Uninstall the latest quality update (for smaller monthly patches) or Uninstall the latest feature update (for the larger version upgrades, like moving from one Windows 11 build to the next).
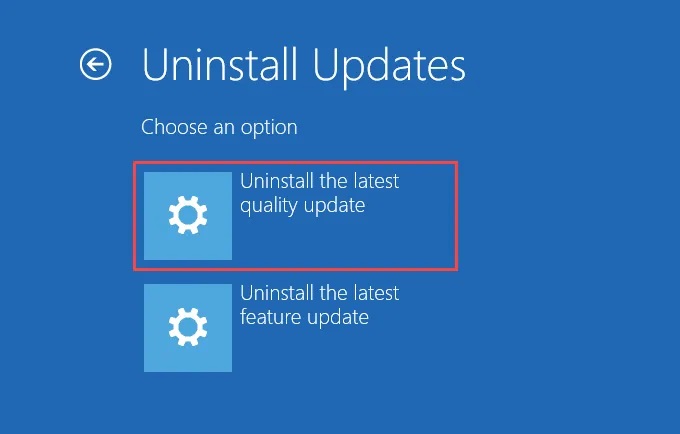
Try the quality update option first since it’s the more common culprit.
If you have a System Restore point from before the update, System Restore (also available from the Advanced options menu) can achieve a similar result by rolling your whole system configuration back to that point.
10. Check for a SATA Mode / Storage Driver Mismatch
This cause gets missed constantly because it produces the same blue screen as file corruption, but the fix is completely different, and none of the repair tools above will catch it.
If you (or a BIOS update, or a motherboard swap) recently changed the SATA controller mode in BIOS/UEFI, between AHCI, RAID, and IDE/Legacy, Windows may be trying to load a boot-time driver that no longer matches your hardware, and it will fail before it can mount the drive.
Restart into your BIOS/UEFI setup (commonly Del, F2, or Esc at startup), find the SATA Mode or SATA Operation setting, usually under Advanced or Storage settings, and set it back to whatever it was when Windows was originally installed. For most modern systems, that’s AHCI. Save and restart.
If you’re not sure what it was originally, try AHCI first, since it’s the default for the vast majority of Windows 10/11 installations on non-RAID setups.
11. Check the Hardware
If none of the software fixes above work, the problem is more likely sitting at the hardware layer.
Open your desktop case (laptops are trickier and usually best left to a technician) and confirm the SATA or NVMe connection to your drive is fully seated on both ends.
Listen for a repetitive clicking sound from a mechanical hard drive while it’s powered on. That’s a strong indicator of a failing drive, and you can read more in our guide on diagnosing a clicking hard drive.
It’s also worth ruling out RAM as the culprit, since corrupted memory can quietly damage the files Windows relies on to boot. Reseat your RAM sticks, or if you have more than one, try booting with just a single stick installed at a time.
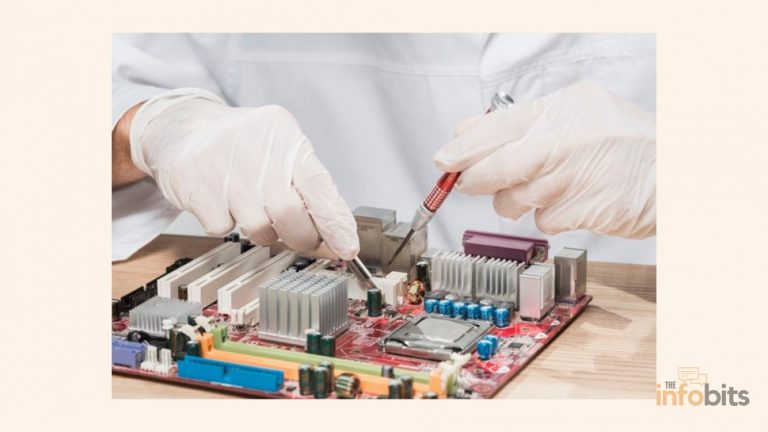
For a broader hardware check, our motherboard diagnostic tests guide walks through isolating faulty components methodically.
If your drive shows SMART warnings, physical damage, or keeps failing CHKDSK with the same errors after a repair, treat it as failing hardware rather than something to keep repairing. At that point, your priority shifts to recovering your data before it gets worse, covered next.
12. Recover Your Data, Then Reinstall Windows
If you’ve worked through the fixes above and the error persists, a clean reinstall is the most reliable remaining option. But there’s an important step to take first if your drive is even partially readable: get your files off it before you do anything else.
The safest method is to remove the drive from the affected PC and connect it to a different, working computer using a SATA-to-USB or NVMe-to-USB enclosure. This lets you browse and copy your files over using a healthy operating system, without touching the boot process at all.
A USB SATA/NVMe drive enclosure like SABRENT SATA SSD/HDD Enclosure or SABRENT USB-C NVMe Enclosure available on Amazon is genuinely worth owning even outside emergencies like this one. It turns any old internal drive into portable storage and is the fastest way to pull files off a PC that won’t boot.
If removing the drive isn’t practical (some laptops make this difficult), you can also boot from your installation USB, open Command Prompt, and copy files to an external drive using the copy or robocopy command, targeting whichever drive letter your Windows partition is mounted under.
Once your data is safe, reinstall Windows by booting from your installation media and selecting Install now. If you’re unsure whether to reformat the drive or keep your existing files, choosing a custom install and formatting the Windows partition (not your entire disk, if you have separate data partitions) gives you the cleanest, most stable result.
Windows 10 vs. Windows 11: What’s Different
The underlying error and most repair steps are identical between the two versions, but a few access points changed:
| Windows 10 | Windows 11 | |
|---|---|---|
| Enter Safe Mode without media | Hold Shift while clicking Restart, or repeatedly press F8 on older builds | Hold Shift while clicking Restart (F8 is disabled by default) |
| Automatic Repair trigger | 2–3 failed boot attempts | 2–3 failed boot attempts (same) |
| Recovery menu location | Troubleshoot → Advanced options | Troubleshoot → Advanced options (identical layout) |
| Installation media tool | Windows 10 Media Creation Tool | Windows 11 Media Creation Tool (requires TPM 2.0-compatible hardware to install fresh) |
If you’re troubleshooting a Windows 11 PC and need to check whether your hardware meets the requirements for a clean reinstall, see our guide on updating to Windows 11 without TPM 2.0.
Common Mistakes to Avoid
Running CHKDSK repeatedly without checking hardware health first. If CHKDSK reports the same bad sectors every time you run it, that’s a signal your drive is failing, not a reason to run it a fourth time.
Skipping straight to reinstalling Windows. A full reinstall is the most time-consuming fix on this list, and it’s often unnecessary. The majority of cases resolve at the CHKDSK or bootrec stage.
Force-shutting down repeatedly during Automatic Repair. It can look stalled on a black screen for 15–20 minutes; interrupting it mid-process can make the underlying corruption worse, not better.
Forgetting to check SATA mode after a BIOS update. This is the fix people miss most often because it looks identical to corruption but none of the file-repair tools will catch it.
Reinstalling Windows onto a drive without backing up first, even when the drive still appears to boot into recovery. A “reformat” step during setup can permanently wipe personal files that were otherwise recoverable.
Myth vs. Fact
Myth: “Unmountable boot volume always means my hard drive is dead.” Fact: In most cases it’s a file system or boot configuration issue, not a hardware failure. Hardware is the cause in only a minority of cases, usually confirmed by CHKDSK reporting unfixable bad sectors or SMART warnings.
Myth: “I have to reinstall Windows to fix this.” Fact: A reinstall is the last resort on this list, not the first. Most people resolve the error with Startup Repair, CHKDSK, or a bootrec/bcdboot rebuild without losing any files.
Myth: “If I can’t get into Windows, my files are gone.” Fact: Your personal files are almost always still on the drive and recoverable, either by connecting the drive to another PC or by copying them from Command Prompt in the recovery environment, even if Windows itself won’t boot.
How to Prevent It From Happening Again
- Keep a real backup, not just cloud sync of a few folders. A scheduled backup of your full user profile to an external drive or cloud service means a boot failure is an inconvenience, not a disaster.
- Let Windows Updates finish uninterrupted, especially feature updates, and avoid forcing a shutdown while one is installing.
- Avoid switching SATA/AHCI/RAID modes in BIOS after Windows is already installed, unless you’re prepared to reconfigure the storage driver to match.
- Watch for early warning signs of a failing drive like slow file access, freezing during large copies, or a clicking noise from a mechanical drive, and back up proactively rather than after a crash.
- Run periodic SMART checks on your drive using a tool like CrystalDiskInfo, so you catch a failing drive before it takes your boot volume down with it.
An external backup drive like the Seagate 2TB Portable Hard Drive (available on Amazon) with automatic Windows File History or a scheduled backup tool configured is the single change that turns an error like this from a stressful afternoon into a five-minute non-event.
Conclusion
The unmountable boot volume error looks alarming because it locks you out before Windows even loads, but it’s rarely the disaster it first appears to be.
Work through the fixes in order, such as restarting, Automatic Repair, bootrec, CHKDSK, SFC, and you’ll resolve the large majority of cases without losing a single file.
Reserve reinstalling Windows for when you’ve genuinely ruled everything else out, and if you ever suspect the drive itself is failing, prioritize copying your files off before running anything else.
If you’re still stuck after working through every step here, particularly if CHKDSK keeps reporting the same errors or your drive shows SMART warnings, it’s a reasonable point to bring in a professional data recovery service rather than risk further attempts on a failing drive.
Frequently Asked Questions
What does UNMOUNTABLE_BOOT_VOLUME mean?
It’s a Windows stop error (bug check code 0x000000ED) that occurs when Windows can’t read the partition it needs to start from, usually due to file system corruption, a boot configuration problem, or a failing drive.
Will I lose my data fixing this error?
Not usually. Startup Repair, CHKDSK, SFC, and bootrec/bcdboot all work without touching your personal files. Data loss is a risk mainly if you end up reinstalling Windows and choose to format the drive.
What’s the fastest fix to try first?
A simple restart, followed by letting Automatic Repair run if the error returns. If neither works, bootrec /rebuildbcd and chkdsk /r C: resolve most remaining cases.
Why does this error happen after a Windows Update?
Updates occasionally leave boot files in an inconsistent state, especially if the installation was interrupted by a power loss or forced restart. Uninstalling the most recent update from the recovery menu usually fixes it.
Can a BIOS setting really cause this error?
Yes. Switching your SATA controller between AHCI, RAID, and IDE mode after Windows is already installed is a common, often-overlooked cause, since the boot-time storage driver no longer matches the configuration Windows expects.
How do I know if it’s a hardware problem instead of software corruption?
If CHKDSK reports the same unrepairable bad sectors after multiple runs, if you hear clicking from a mechanical drive, or if a SMART diagnostic tool flags the drive as failing, treat it as hardware and prioritize backing up your files.
Do I need Windows installation media to fix this?
Only if Automatic Repair doesn’t launch on its own after a few failed boots. If it does launch, you can access most of the same recovery tools without a USB drive.
What’s the difference between fixing this on Windows 10 versus Windows 11?
The repair steps themselves are identical. The main difference is how you access Safe Mode without installation media. F8 is disabled by default on Windows 11, so use Shift + Restart instead.
Can I fix this without using Command Prompt?
Partially. Automatic Repair and System Restore run without any typed commands. But CHKDSK, SFC, and MBR/BCD repairs currently require Command Prompt, since Windows doesn’t offer a graphical version of these tools in the recovery environment.
What does the /r flag in chkdsk /r C: actually do?
It tells CHKDSK to locate bad sectors on the drive and attempt to recover any readable information from them, in addition to fixing file system errors. Without it, CHKDSK only reports problems rather than repairing them.
Is it safe to run bootrec commands if I’m not sure what caused the error?
Yes. The bootrec commands (fixmbr, fixboot, scanos, rebuildbcd) only rewrite boot-related data and don’t touch your personal files or installed programs, so they’re safe to try even if you’re not certain of the underlying cause.
My laptop won’t let me boot from USB; what do I do?
You likely need to disable Secure Boot or Fast Boot in BIOS/UEFI first, or explicitly select the USB drive from a one-time boot menu (often F12) rather than relying on the normal boot order.
Can malware cause an unmountable boot volume error?
Yes, though it’s less common than update issues or ordinary corruption. Malware that damages the file system or boot sector can trigger this error; running a scan from a bootable antivirus rescue disk before reinstalling is worth doing if you suspect this.
How long does CHKDSK take to run?
It depends heavily on drive size and how many errors it finds. Anywhere from a few minutes on a small SSD to well over an hour on a large, heavily fragmented hard drive. Let it run to completion rather than interrupting it.
Should I try System Restore before or after CHKDSK?
Either order works, but if you know roughly when the problem started (for example, right after an update), try System Restore or uninstalling the update first, since it’s faster. If you’re not sure of the cause, start with Startup Repair and CHKDSK instead.
What if bootrec /rebuildbcd says “0 Windows installations found”?
This usually means file system corruption is preventing the tool from reading your Windows folder. Run chkdsk /r C: first, then try bootrec /rebuildbcd again, or use bcdboot to rebuild the boot files directly from your Windows folder.
Can I recover files from a drive that shows the unmountable boot volume error?
Yes, in most cases. Removing the drive and connecting it to another PC via a USB enclosure is the most reliable method, since it lets a healthy operating system read the drive directly without going through the broken boot process.
Does reinstalling Windows guarantee the error won’t come back?
Only if the underlying cause was software corruption. If the real cause was failing hardware or a persistent driver conflict, a reinstall can temporarily “fix” it before the same symptoms return, which is why ruling out hardware first matters.
Is this error the same as Inaccessible Boot Device?
They’re related but distinct stop errors with overlapping causes (file corruption, driver mismatches, SATA mode changes), though Inaccessible Boot Device more often points specifically to a storage driver problem. If your repairs here don’t fully resolve things, it’s worth reading a dedicated Inaccessible Boot Device guide as a next step.
We hope you found this article helpful, and do like and follow us on Facebook and Twitter for regular updates. In addition, we ask that you bookmark this page for future reference.
Sign up for our free newsletter as well to receive fresh information right in your inbox and stay informed technically.
Disclosure: If you follow our links to a retailer’s website and make a purchase, we will get an affiliate commission on some, but not all, of the items or services we promote. This will cause no price change for you.
You May Be Interested in Reading:
- How to Resolve the Windows System_Service_Exception Error?
- How to Resolve the DISM Error 1910 in Windows?
- Simple [Solved] Fixes for the Kernel Mode Heap Corruption Error on Windows
- Easy Fix for Windows 10 Action Center Not Opening Problem
- Fixing the Windows Unexpected Kernel Mode Trap Error in Easy Steps



:%2012%20Real%20Fixes)