
How to Clean Dust Out of Your PC (Safely, Step by Step)
Quick answer: To clean dust out of a PC, shut it down fully, unplug it and flip the power supply switch off. Move it somewhere well ventilated, remove and wash the dust filters, then blow the dust out of the case with short bursts of compressed air or an electric duster while holding each fan still. Wipe what’s left, let everything dry, reassemble and check your temperatures.
Usually, I do my PC cleanup in the following way:
- Power down, unplug, and take the PC outside or near an open window.
- Pull the dust filters and wash them.
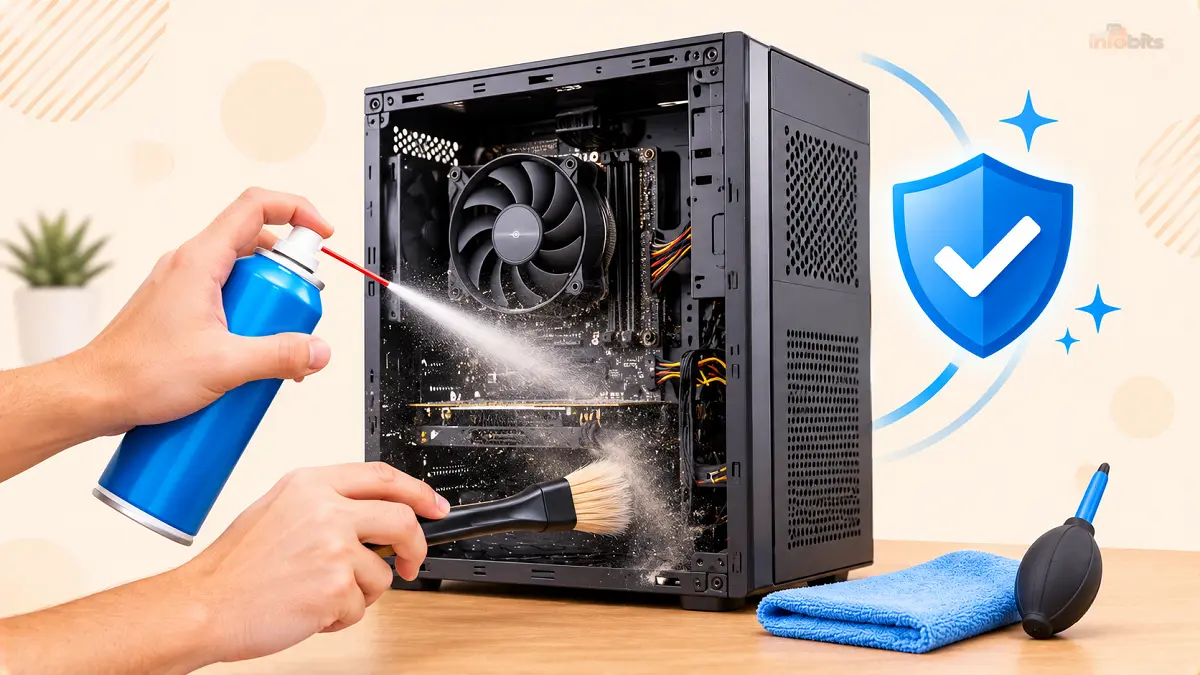
- Open the case, photograph the cable layout, and use a soft brush to loosen stuck-on dust.
- Blow dust out from top to bottom in short bursts, holding every fan still.
- Clean the graphics card, CPU cooler, radiator, and power supply grille.
- Wipe, reassemble, boot up, and compare temperatures.
Open the side panel of a PC that’s been running for a year or two, and you’ll often find a grey, felt-like layer on the fans, heatsink fins, and filters. It doesn’t look dramatic, but it’s working against you. Dust acts like a blanket on parts that need to shed heat, choking the airflow your fans are trying to create.
The good news is that cleaning it out is one of the cheapest and most effective bits of PC maintenance you can do. It takes roughly 20 to 30 minutes and a few inexpensive tools. The problem is that there are several easy ways to get it wrong, such as letting fans spin freely, vacuuming inside the case, or cleaning with the power still connected.
This guide covers the safe way to do it, what to use, what to avoid, and what to check if your PC still runs hot afterwards.
Why Dust Is Bad for Your PC
Dust rarely kills a PC overnight. What it does is slowly push your hardware toward higher temperatures, and that shows up in three ways.
- Heat: A layer of dust on heatsink fins insulates them, so the cooler can’t pass heat to the air as efficiently.
- Restricted airflow: Clogged filters and fan blades move less air, so the components inside cook in their own warmth.
- Noise and wear: Fans ramp up to compensate, which means more noise and more hours at high speed.
When temperatures climb far enough, your CPU and GPU slow themselves down (thermal throttling) to protect themselves. You’ll notice it as stutter, lower frame rates, or a PC that feels sluggish after an hour of heavy use.
Dust can also turn sticky in humid rooms or around smokers, which makes it harder to remove the longer you wait.
Signs Your PC Needs a Clean
Not sure whether it’s time? These are the usual giveaways:
- Fans get loud during light tasks like browsing or watching video
- Temperatures are higher than they used to be at the same workload
- Games or renders slow down after a while (throttling)
- The PC shuts down or restarts under load
- Warm air from the vents feels weak, or the case feels unusually hot
- You can see a visible layer of dust through a mesh panel or glass side window
- The dust filters look like grey carpet
Tip: Rhythmic clicking is a different story. If the noise is a repeating click rather than a whir, suspect a drive, not a fan. Our guide on hard drive clicking noises explains what to check.
How Often Should You Clean Your PC?
There’s no single schedule, because it depends on your room, your habits, and whether you share the house with pets. As a rule of thumb, use this table and then let the dust on your filters tell you if you need to adjust.
| Your situation | Dust filters | Full interior clean |
|---|---|---|
| Clean home, no pets, light use | Every 1 to 2 months | About every 6 months |
| Typical home, daily use or gaming | About monthly | Every 3 to 6 months |
| Pets, carpet, smoking or a dusty/humid room | Every 2 to 4 weeks | Every 2 to 3 months |
| Workshop, building work, or a very dusty environment | Check weekly | Monthly, and consider an enclosed filtered setup |
Here’s a simple way to decide. If the filters are barely dirty, the inside will be too, and you can stretch the interval. If they’re already caked, the inside needs attention soon.
What You Need (Tools Checklist)
You don’t need a workshop. Gather these before you open anything:
- Compressed air or an electric duster
- Soft, anti-static brush
- Microfiber cloths and cotton swabs
- 90% or higher isopropyl alcohol (for sticky residue only)
- Screwdriver that fits your case screws
- Anti-static wrist strap (optional but sensible)
- Dust mask
- Phone or camera to photograph cable routing
- Good light and a clear table
The air source is the main decision. If you’ll be doing this a few times a year, an electric air duster (see on Amazon) is worth considering, because you charge it once and skip the recurring cost of cans, and it doesn’t get icy or lose pressure halfway through the job.
An anti-static wrist strap (available on Amazon) costs very little and gives you a simple safeguard against static discharge. Clip it to an unpainted metal part of the case before you touch anything inside.
For heatsink fins and tight corners, a set of soft anti-static brushes made for electronics (view on Amazon) beats a stiff paintbrush every time, because it loosens packed-on dust without scratching or snagging small parts.
If your PC lives in a house with pets or smokers, keep some 90% or higher isopropyl alcohol and lint-free microfiber cloths nearby (both are available on Amazon), since sticky residue won’t blow away and needs a gentle wipe.
A precision screwdriver set with magnetic tips (available on Amazon) saves you from dropping tiny screws into the case, especially if you plan to remove the graphics card.
And please wear a decent dust mask. Even outdoors, a cloud of fine dust is not something you want to breathe in, and a well-fitting N95-style mask is inexpensive and easy to wear.
Before You Start: Safety Checklist
- Shut down completely. Don’t use sleep or hibernate.
- Unplug the power cable and all peripherals. Then flip the power supply (PSU) switch at the back to off.
- Drain leftover charge. With the cable unplugged, press and hold the case power button for a few seconds.
- Take it outside or to a ventilated spot. A garage, balcony, or open window keeps the dust from just settling back into the case.
- Ground yourself. Avoid working on thick carpet, and touch the bare metal of the case often, or wear a wrist strap clipped to unpainted metal.
- Photograph the cables. A quick photo of how everything is routed makes reassembly painless.
- Never open the power supply. It can hold a dangerous charge even when unplugged.
How to Clean Dust Out of Your PC: Step by Step
Step 1: Power down, unplug, and move it
Follow the safety checklist above. Lay the PC on a stable surface (or stand it upright, whichever gives you easy access). If it’s heavy, check that cables aren’t pulling on anything as you carry it.
Step 2: Pull the dust filters and wash them
The dust filters are the easiest and most satisfying part. Most cases have them at the front intake, on the bottom under the power supply, and sometimes on top or on the side. Your case manual shows where they are, and many simply slide out or pop off magnetically.
Shake or brush off the loose dust, then rinse mesh filters under lukewarm water. Let them dry completely before they go back in. Putting a damp filter back is how you end up with moisture and dust glued together. Foam or magnetic filters can usually be rinsed or wiped clean in the same way.
Step 3: Open the case and take a before photo
Remove the side panel (and the front panel if your case allows). Take a quick photo of the inside. It helps you remember the layout and gives you a satisfying before-and-after comparison.
Step 4: Loosen stuck-on dust with a brush
Use a soft anti-static brush to gently sweep stubborn dust off heatsink fins, fan blades, and case edges. Brush along the fins rather than against them. Skip brushing right around small surface-mounted components on the motherboard, and let air handle those.
Step 5: Blow the dust out, top to bottom
This is the core step, and technique matters more than force.
- Hold a canned air can upright. Tilting it can cause it to spit out cold liquid propellant.
- Use short bursts of one to two seconds from a few inches away instead of one long blast.
- Work from the top of the case downward, so dust falls toward areas you haven’t cleaned yet.
- Hold each fan still with a finger or a soft tool while you blow air at it. Air can spin a fan much faster than its motor was designed for, which strains the bearings.
- Blow dust out of the case, not around inside it. Keep the exhaust openings clear so it has somewhere to go.
Tip: Do one quick pass before you start the detailed work and another at the end. Cleaning one part always kicks dust onto another, and the final pass catches whatever settled.
Step 6: Clean the graphics card
The GPU usually has the most fins and the biggest fans, so it traps a lot of dust. If you can lay the PC on its side so the card’s fans face upward, you can often clean it in place: hold each fan still, brush the fins, and blow air through the heatsink.
For heavy buildup, you can remove the card. Unplug its PCIe power cables, undo the bracket screws, release the latch at the end of the PCIe slot, and lift the card straight out. Clean it outside the case, then reinstall it until it clicks, and reconnect the power cables. Don’t take the card’s cooler apart, since that exposes thermal paste and pads and may affect your warranty.
Don’t be surprised if a little dust puffs out when you first power the PC back on. That’s normal, and a quick burst of air takes care of it.
Step 7: Clean the CPU cooler, radiator, and PSU grille
- Air tower cooler: Brush the fins gently, then blow air through them while holding the fan still.
- Liquid cooler radiator: The fins bend easily, so use a soft brush along them and short bursts of air. Often the best direction is the opposite way to normal airflow, which pushes dust back out the way it came in.
- Power supply: Leave it in the case, hold the fan still if you can see it, and blow from outside through the intake and exhaust grilles. Never open the PSU. If you’re unsure which part is which, our guide on finding your PC’s power supply helps.
Step 8: Wipe, reassemble and test
Wipe the inside of the case, the glass panel, and the exterior vents with a slightly damp microfiber cloth. For sticky residue, put a little isopropyl alcohol on the cloth, not on the part itself, and let everything dry fully.
Put the filters back, close the case, reconnect cables, flip the PSU switch on, and boot up. Run a demanding game or benchmark for a few minutes and watch your temperatures. The next sections cover what to expect.
Cleaning Each Part Safely
| Component | Best method | Avoid |
|---|---|---|
| Dust filters | Rinse mesh filters, let them dry fully | Reinstalling while damp |
| Case fans | Hold blades still, brush, then short air bursts | Letting them free-spin |
| CPU air cooler | Soft brush along the fins, then air | Removing the cooler unless re-pasting |
| Liquid cooler radiator | Soft brush and gentle air through the fins | Bending fins, squeezing tubes |
| Graphics card | Clean in place, or remove for heavy dust | Opening the cooler shroud |
| Motherboard and RAM | Short air bursts | Hard brushing, wiping with wet cloths |
| M.2 SSD heatsinks and drives | Light air bursts, leave heatsinks on | Prying heatsinks off just to clean |
| Power supply | Air through the grilles from outside | Opening the PSU |
| Glass and case panels | Slightly damp microfiber cloth | Spraying liquid into the case |
If you’re curious about the drive heatsink question, we explain whether an M.2 SSD needs a heatsink.
Compressed Air vs Electric Duster vs Brush vs Vacuum
Each tool has its place, and the best approach is often a combination.
| Tool | Pros | Cons | Best for |
|---|---|---|---|
| Canned compressed air | Cheap to start, no setup | Runs out, gets cold, ongoing cost, tilting can spray liquid | One-off cleans |
| Electric duster | Reusable, steady airflow, no propellant | Upfront cost, needs charging, can be loud | Regular cleaning, heavy dust |
| Soft brush | Gentle, precise, nothing spins | Slower, only loosens dust | Heatsink fins, caked-on dust |
| Household vacuum | Great for floors and removed filters | Static risk, strong suction, can tug cables or spin fans | Filters and the floor, not inside the case |
| ESD-safe computer vacuum | Collects dust instead of scattering it | Cost, still needs care | Cleaning indoors |
For most people, a brush plus either compressed air or an electric duster is all you need.
Can You Clean a PC Without Compressed Air?
Yes. It takes a little longer, but it works:
- Soft brush: Sweep dust off fins, fans, and the case.
- Microfiber cloth: Wipe flat surfaces and fan blades.
- Cotton swabs: Reach between fan blades and vent slots.
- Rubber bulb blower: The kind used for camera lenses gives you gentle puffs of air with no propellant.
- ESD-safe vacuum: Collects loosened dust, so it doesn’t end up back in the room.
What you shouldn’t do is reach for a hair dryer. It can create static, and the hot air is bad for sensitive electronics. A regular household vacuum is also best kept away from the inside of the case.
What About Laptops and Prebuilt PCs?
The same principles apply, but the margin for error is smaller. Laptops pack parts tightly, and many are sealed or covered by warranty terms that discourage opening them.
For a laptop, shut it down, unplug it, and use short bursts of air into the vents while avoiding a violent fan spin. If it overheats badly, a service centre or a careful teardown with a guide for your exact model is safer than improvising.
Overheating is also linked to battery stress, which we cover in should you leave a laptop plugged in all the time.
For prebuilt desktops from big brands, check the warranty terms before removing coolers or breaking any seals. Basic filter cleaning and blowing out dust from the outside is generally fine.
Common Mistakes to Avoid
- Cleaning with the power connected. Always unplug and switch off the PSU.
- Letting fans free-spin. Hold the blades still.
- Using a household vacuum inside the case. Static and suction are both risks.
- Tilting the air can. It can spray cold liquid onto components.
- Long continuous blasts. Use short bursts instead.
- Putting damp filters back. Let them dry completely.
- Opening the power supply. Leave this to professionals.
- Spraying cleaner into the case. Apply liquid to a cloth, never to the parts.
- Forgetting the exterior. Clogged vents and a dirty bottom filter cause as many problems as the inside.
- Skipping the test. Always boot up and check temperatures afterwards.
Myth vs Fact
| Myth | Fact |
|---|---|
| Dust filters mean I never need to open my PC. | Filters slow buildup but don’t stop it, and clogged filters restrict airflow themselves. |
| A vacuum is the safest way to clean inside a PC. | Household vacuums can build up static, and their suction can tug cables or spin fans. They’re fine for filters and floors. |
| Compressed air can’t hurt anything. | Blasting a free-spinning fan can strain its bearings, and a tilted can can spray cold liquid. |
| Cleaning my PC will void the warranty. | Opening a standard desktop case usually won’t, but removing coolers or breaking seals can. Check your manufacturer’s terms. |
| More cleaning is always better. | Frequent handling adds risk. Clean filters often and the interior every few months or when needed. |
| Dust is only cosmetic. | It raises temperatures, noise, and wear over time. |
After You Clean: Check That It Worked
Boot the PC and use a free monitoring tool such as HWiNFO to check your CPU and GPU temperatures while idle and under load.
Compare them with what you saw before, if you checked. Results vary a lot: a badly clogged system can improve noticeably, while a PC that was already fairly clean may barely change.
If you’re unsure what counts as normal, our guide on ideal GPU temperature while gaming gives you a benchmark to compare against.
Still Running Hot or Acting Strange? Troubleshooting
| Symptom | Likely cause | What to try |
|---|---|---|
| Temperatures barely changed | Dust wasn’t the main issue | Check fan curves, fan direction, and whether the cooler is seated firmly |
| Still hot on an older CPU | Dried-out thermal paste | Consider re-applying paste, covered below |
| A fan rattles or grinds after cleaning | Worn bearing or loose blade | Replace the fan; see PWM vs DC fans |
| CPU fan error at startup | Fan not connected or detected | See fixing the CPU fan error on boot |
| PC turns on but shows nothing | GPU or RAM not seated, cable loose | See PC turns on but no display |
| Brief burning smell after boot | Residual dust burning off a warm component | Power off if it persists or smells like burning plastic |
| Won’t boot or random errors | Loose connector or seating problem | Re-check cables; see motherboard diagnostic tests |
If your CPU cooler is several years old and temperatures are still high after cleaning, dried thermal paste could be the culprit. A small tube of quality thermal paste is cheap, but re-applying it means removing the cooler, so only attempt it if you’re comfortable and have a guide for your socket.
How to Keep Dust Out in the First Place
Cleaning is easier when less dust gets in. A few habits make a big difference.
- Filter every intake. Any open intake without a filter is a direct highway for dust. If your case lacks filters in some spots, magnetic mesh filters available on Amazon that cut to fit are an easy fix.
- Aim for positive pressure. Running slightly more intake airflow than exhaust pushes air out through gaps instead of pulling dust in through them.
- Lift it off the carpet. A desk or stand keeps the bottom intake away from floor dust and pet hair.
- Keep the side panel on. An open case collects dust fast.
- Control the room. Regular vacuuming, grooming pets, and avoiding smoking near the PC all help.
- Put it somewhere with clean airflow. Pushed up against a wall or in a closed cabinet, it will run hotter and pull in more debris.
DIY or Get Help? A Quick Decision Guide
Do it yourself if:
- You have a standard desktop with accessible filters and panels
- You’re comfortable using a screwdriver
- The dust is typical household buildup
Get help if:
- It’s a sealed laptop or all-in-one under warranty
- You see signs of a coolant leak from a liquid cooler
- The PC won’t boot after cleaning, and you’ve already re-checked the basics
- You’re not comfortable removing the graphics card or cooler
Conclusion
Cleaning dust out of your PC isn’t complicated, but doing it carefully matters.
Power everything off, work somewhere ventilated, hold the fans still, use short bursts of air, and keep the vacuum away from the inside of the case.
Do that every few months and you’ll keep your temperatures down, your fans quieter, and your hardware healthier for longer.
Key takeaways:
- Clean the dust filters first; they’re the easiest win
- Unplug the PC and switch the PSU off before you start
- Always hold fans still when using air
- Use short bursts and keep the air can upright
- Avoid household vacuums, hair dryers, and opening the PSU
- Check temperatures afterwards and troubleshoot if they stay high
- Clean every 3 to 6 months, more often with pets, smoke, or dust
Frequently Asked Questions
How often should I clean dust out of my PC?
Clean the dust filters every month or so, and do a full interior clean every 3 to 6 months. If you have pets, carpet, a smoker in the house, or a dusty room, shorten that to every 2 to 3 months. The dust on your filters is the best guide.
Can I clean my PC without opening it?
Partly. You can remove and wash the external dust filters, wipe the vents, and blow short bursts of air through the grilles from outside. That helps a lot, but it won’t reach dust packed into the GPU, CPU cooler, or radiator, so open the case for a proper clean.
Is compressed air safe to use on a PC?
Yes, if you use it correctly. Keep the can upright, use short bursts from a few inches away, and hold fans still so they don’t over-spin. Tilting the can can spray cold liquid propellant, which you don’t want on your components.
Can I use a vacuum cleaner to clean my PC?
Not inside the case. A household vacuum can build up static, and its suction and nozzle can tug cables or spin fans. It’s fine for washed filters and the floor around the PC. An ESD-safe computer vacuum is a safer option if you want suction.
Why do I need to hold the fans still when cleaning?
Air blown at a free fan can spin it much faster than its motor is designed for, which stresses the bearings and can shorten its life. Holding the blades still with a finger or soft tool while you clean avoids that.
How do I clean a PC without compressed air?
Use a soft anti-static brush, microfiber cloth, and cotton swabs to remove dust by hand. A rubber bulb blower, like the ones used for camera lenses, gives gentle puffs of air. An ESD-safe vacuum can collect loosened dust.
How do I clean dust from a graphics card?
If you can lay the PC on its side, hold each fan still, brush the fins, and blow air through the heatsink without removing the card. For heavy buildup, unplug the power cables, release the PCIe latch, take the card out, and clean it outside the case.
Will cleaning dust make my PC faster?
It can, but only if heat was holding it back. A clogged PC may throttle its CPU or GPU, so cleaning can restore performance and quieten the fans. If your PC wasn’t overheating, you’ll mostly see a cleaner, cooler-running system.
How do I know if my PC is overheating because of dust?
Look for louder fans, higher temperatures than before, stuttering after long sessions, random shutdowns, and dust visibly coating filters or heatsinks. Monitoring software such as HWiNFO shows your temperatures so you can compare them before and after cleaning.
Can I use a hair dryer to blow out dust?
No. Hair dryers can create static electricity, and the hot air isn’t good for sensitive electronics. Use compressed air, an electric duster, or a soft brush instead.
How do I clean PC dust filters?
Slide or pop the filters out, shake off loose dust, then rinse mesh filters under lukewarm water or wipe magnetic filters with a damp cloth. Let them dry completely before putting them back in the case.
Can I clean the power supply?
You can clean the outside. Leave the PSU in the case, hold the fan still if visible, and blow air through the grilles. Never open the power supply, since it can store dangerous electrical charge even when unplugged.
Is it okay to use isopropyl alcohol on PC parts?
Only in small amounts and only for sticky residue on things like fan blades and case surfaces. Use 90% or higher alcohol on a cloth or swab, not sprayed on the parts, and let everything dry fully before powering on.
How do I clean a PC with a liquid cooler?
Treat the radiator fins gently, since they bend easily. Brush along the fins and use short bursts of air, often in the opposite direction to normal airflow so the dust exits the way it came in. Don’t squeeze the tubes or open the pump.
How do I clean dust from a laptop?
Shut it down, unplug it, and use short bursts of air into the vents without letting the fan spin hard. Opening a laptop is riskier than opening a desktop, so check your warranty and follow a guide for your exact model first.
Does cleaning my PC void the warranty?
Opening a standard desktop case and cleaning it generally doesn’t, but removing coolers or breaking warranty seals might. Prebuilt and branded systems differ, so check your manufacturer’s warranty terms before doing anything beyond basic cleaning.
How can I stop my PC from getting so dusty?
Fit filters on every intake, aim for slightly positive air pressure, keep the PC off the carpet, leave the side panel on, and keep the room clean. Pets and smoking make a big difference, so extra filter cleaning helps in those homes.
How long does it take to clean a PC?
A basic filter wash and blow-out takes around 20 to 30 minutes. A deeper clean that includes removing the graphics card and tackling a radiator can take about an hour, plus drying time for the filters.
Found this guide useful? Share it with someone interested in tech-related tips, tricks, solutions, and news. Follow us on Facebook and Twitter for more tips, tricks, and guides.
We also ask that you bookmark this page for future reference, as we are constantly updating our articles with new information.
Sign up for our free newsletter as well to receive fresh information immediately in your inbox and stay up to date.
Disclosure: If you follow our links to a retailer’s website and make a purchase, we will get an affiliate commission on some, but not all, of the items or services we promote. This will cause no price change for you.
You May Be Interested in Reading:
- How Long Do PC Power Supplies Last? PSU Lifespan Guide
- How to Check If Your RAM Is DDR3, DDR4, or DDR5 in Windows?
- What Are Motherboard Standoffs? What They Do & How to Install Them
- PC Upgrade Guide 2026: What to Upgrade First for Better Performance
- Installing Linux on Old PCs: Complete Step-by-Step Guide