
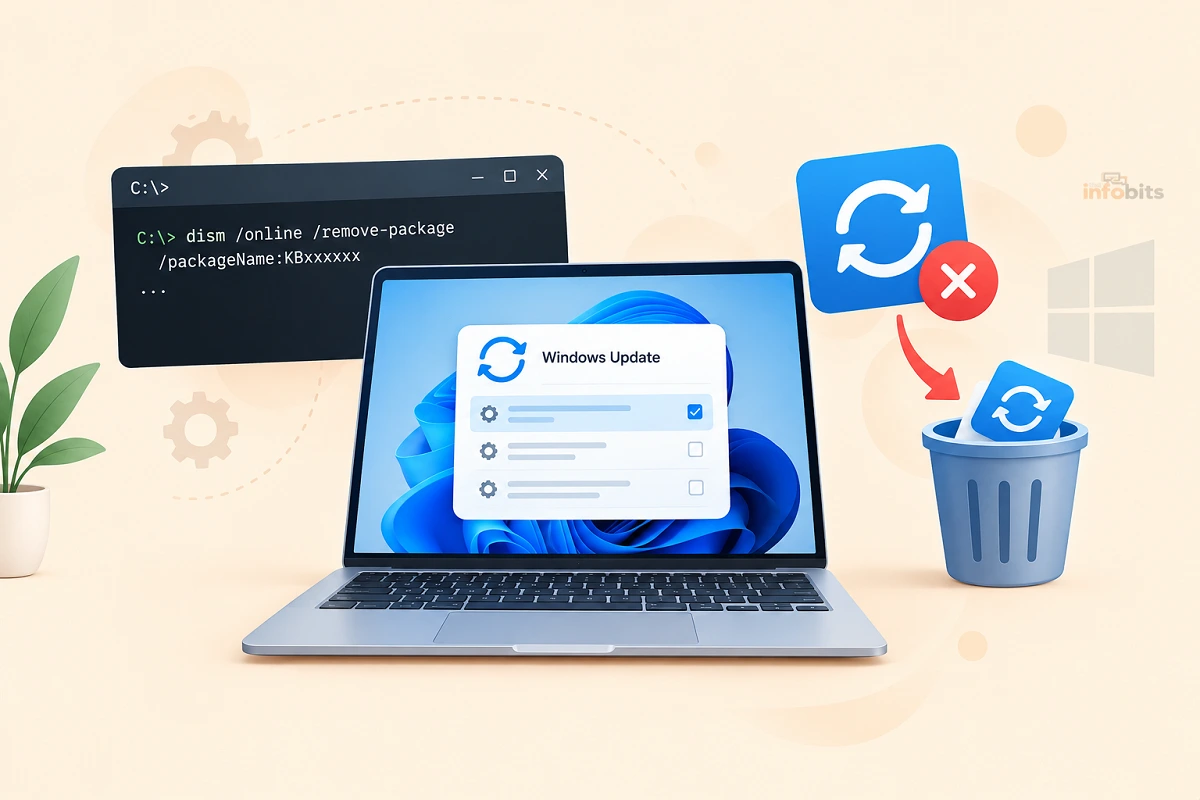
How to Use DISM to Remove a Windows Update (Step-by-Step Guide)
Quick answer: Open an elevated Command Prompt and run
dism /online /get-packagesto find the exact package name of the update, then rundism /online /remove-package /packagename:PACKAGE_NAMEto remove it. If Windows won’t boot at all, do the same thing from Windows Recovery Environment (WinRE) usingdism /image:D:\ /remove-package /packagename:PACKAGE_NAME, replacingD:\with whatever drive letter WinRE assigns to your Windows installation.
If you’ve ever tried to uninstall a Windows update through Settings and gotten an error, or worse, had an update leave your PC unable to boot at all, DISM is the tool that gets you out of it.
Unlike the Settings app, wusa.exe, DISM (Deployment Image Servicing and Management) can remove update packages directly, on a running system or an offline one, which makes it the one method that still works when everything else has failed.
This guide covers the exact commands for both situations: removing an update from a normally booting Windows install, and removing one offline from WinRE when the update itself is what’s keeping Windows from starting.
Why Use DISM Instead of Settings or WUSA
Settings → Windows Update → Update History → Uninstall Updates is the easiest method when it works, and it should be your first stop for a recently installed update on a PC that still boots normally.
wusa.exe /uninstall /kb:1234567 is the command-line equivalent, and it works for standalone update packages. But there’s an important limitation as of Windows 11 and recent Windows 10 builds: modern cumulative updates bundle the Servicing Stack Update (SSU) and the Latest Cumulative Update (LCU) into a single combined package.
Because of this, wusa.exe /uninstall no longer works on these combined packages; it will report the update as “not installed” or refuse to remove it even though it clearly is installed.
DISM works at the package level rather than the KB level, which means it can remove components that WUSA refuses to touch. It’s also the only method of the three that works from Windows Recovery Environment, which matters enormously if the update in question is the reason Windows won’t start in the first place.
Related: DISM Error 1910 Fix: “The Object Exporter Specified Was Not Found”
Before You Start: Things to Know
- Removing a security update reopens whatever vulnerability it patched. Only remove an update to fix a specific, confirmed problem, and plan to reinstall a corrected version once one is available.
- Not everything is removable. Servicing Stack Updates and Microsoft Defender definition updates cannot be removed through DISM; this is by design, not a bug in your command.
- DISM cannot restore an update after its rollback files have been deleted. Windows keeps the previous version’s files for a limited window after an update installs specifically so it can be rolled back; once that window closes (or the files are manually cleaned up), DISM removal is no longer possible for that package.
- Package names are long and exact. A typical package name looks like
Package_for_KB5044384~31bf3856ad364e35~amd64~~19045.5679.1.1. Copy it directly from the/get-packagesoutput rather than typing it from memory.
Method 1: Remove a Windows Update with DISM (Windows Boots Normally)
Use this method when Windows starts fine, but a specific update is causing a problem (driver conflict, printing issue, performance regression, and so on) that you want to undo.
- Open Command Prompt as Administrator. Search for
cmdin the Start menu, right-click Command Prompt, and choose Run as administrator. - List every installed update package:
dism /online /get-packages /format:tableThis returns every installed package along with its state and install time. It can take a minute or two depending on how many updates are on the system. - Identify the package you want to remove. Match it against the KB number causing the issue. If you don’t already know the KB number, run
wmic qfe list brief /format:table(orGet-HotFixin PowerShell on systems wherewmichas been removed) to list installed updates by KB number and install date, which makes it easy to spot the one that landed right before your problem started. - Copy the full package name exactly as shown in the
/get-packagesoutput, for example:Package_for_KB5044384~31bf3856ad364e35~amd64~~19045.5679.1.1 - Remove the package:
dism /online /remove-package /packagename:Package_for_KB5044384~31bf3856ad364e35~amd64~~19045.5679.1.1 - Restart when prompted. The removal typically isn’t complete until Windows restarts, even if the command reports success immediately.
- Confirm it’s gone. Run
dism /online /get-packages /format:tableagain, or check Settings → Windows Update → Update History to verify the package no longer appears as installed.
If you’d rather stay in PowerShell, the equivalent cmdlet wraps the same DISM functionality:
Remove-WindowsPackage -Online -NoRestart -PackageName "Package_for_KB5044384~31bf3856ad364e35~amd64~~19045.5679.1.1"
Related: Unmountable Boot Volume Error (Windows 10/11): Real Fixes
Method 2: Remove a Windows Update with DISM from WinRE (Windows Won’t Boot)
This is the method that matters most: if a cumulative or feature update has left your PC unable to boot into Windows at all, this is how you remove it from outside the running OS.
- Get into the Windows Recovery Environment. If Windows fails to boot three times in a row, it should automatically drop into WinRE. If not, boot from Windows installation media and choose Repair your computer, or interrupt startup and select Troubleshoot.
- Navigate to the command prompt. Go to Troubleshoot → Advanced options → Command Prompt. (If you booted from installation media, press Shift + F10 on the setup screen instead.)
- Find out which drive letter your Windows installation actually has. In WinRE, drive letters are frequently reassigned; your Windows partition is often not
C:\. Run:bcdeditLook at theosdeviceline to identify the correct drive, or manually check withdir D:,dir E:, and so on, looking for aWindowsfolder. - List the installed packages on the offline image, substituting the correct drive letter (this example uses
D:\):dism /image:D:\ /get-packages - Identify the recently installed package that’s likely causing the boot failure, typically the most recently installed one, or the one matching the KB you already suspect.
- Remove it:
dism /image:D:\ /remove-package /packagename:Package_for_KB5044384~31bf3856ad364e35~amd64~~19045.5679.1.1 - Exit and reboot. Type
exitto close the command prompt, then restart normally (removing any installation media first) and see whether Windows boots.
If more than one recent update might be responsible, you can repeat steps 5–6 for each candidate package, removing and testing one at a time rather than all at once, so you know exactly which one was the actual cause.
Related: Windows 11 25H2 vs 24H2: Which Update Should You Install?
Alternative: Revert All Pending Updates at Once
If an update installation was interrupted or left the system in a partially updated, unbootable state, there’s a faster first attempt before manually hunting for the specific package:
dism /image:D:\ /cleanup-image /revertpendingactions
This tells DISM to roll back any update actions that were still pending when the system failed to complete them. Try booting normally after this completes; if it doesn’t resolve the issue, fall back to the manual package-removal steps above.
DISM vs. WUSA vs. Settings: Which Should You Use?
| Method | Works When Windows Won’t Boot | Works on Combined SSU+LCU Packages | Ease of Use |
|---|---|---|---|
| Settings (Update History) | No | Yes | Easiest |
wusa.exe /uninstall /kb: | No | No (as of modern cumulative updates) | Easy |
DISM (/online) | No | Yes | Moderate |
DISM (/image: from WinRE) | Yes | Yes | Advanced |
The practical rule: start with Settings if Windows boots and the update is recent. Move to DISM’s online mode if Settings fails or the update won’t uninstall through the normal UI.
Use DISM’s offline /image: mode only when Windows can’t boot at all; it’s the more advanced option, but it’s also the only one that works in that scenario.
Common DISM Errors and What They Mean
- Error 87 (invalid syntax): Almost always a typo or mismatch in the package name. Re-copy it exactly from
/get-packagesoutput; even a single missing character will trigger this. - Error 740 / “requires elevation”: You didn’t open Command Prompt as Administrator. Close it and reopen with Run as administrator.
- Error 5 (Access is denied): Similar to Error 740, usually resolved by ensuring you’re running an elevated prompt. In rare cases, this can also indicate a permissions issue on the system files themselves.
- “The package does not apply to this image”: The KB may have been superseded by a later cumulative update, integrated into another package, or already removed. Run
/get-packagesagain to confirm the exact current state. - 0x800f0806 or a “pending operation” error: The image has an update action that hasn’t been committed yet. Try the
revertpendingactionscommand covered above before attempting individual package removal again.
Related : Fix SYSTEM_SERVICE_EXCEPTION Error in Windows 10/11
Myth vs. Fact: Removing Windows Updates with DISM
| Myth | Fact |
|---|---|
| “DISM can remove any update, no matter how old.” | DISM can only remove a package while its rollback files still exist on disk. Once those are cleaned up (automatically after a certain time, or manually), that specific removal path closes. |
| “WUSA and DISM do the same thing, just different syntax.” | They work differently under the hood. WUSA operates at the KB level and can’t touch modern combined SSU+LCU packages; DISM operates at the package level and can. |
| “If Windows won’t boot, I have to reinstall from scratch.” | Not necessarily. DISM’s offline /image: mode can remove the specific update causing the failure without touching your files or requiring a reinstall. |
| “Removing a security update is always safe once the immediate problem is fixed.” | It reopens the vulnerability that update patched. Reinstall a corrected version as soon as one becomes available; don’t leave the removal in place indefinitely. |
| “DISM and PowerShell’s Remove-WindowsPackage are unrelated tools.” | Remove-WindowsPackage is a PowerShell cmdlet that wraps the same underlying DISM functionality; they accomplish the same removal, just through a different interface. |
After You Remove the Update
- Reinstall a corrected version once available. Microsoft frequently re-releases a fixed update days or weeks after pulling a problematic one. Check Windows Update or the Microsoft Update Catalog periodically for the same KB or its successor.
- Pause updates temporarily if needed, rather than leaving the system permanently on an old patch level, to avoid the same issue reinstalling itself automatically before a fix is out.
- Document which KB caused the problem. If you manage multiple machines, this saves you from repeating the same diagnostic process on every affected device.
- Check for a related known issue. Some problematic updates get broad enough attention that Microsoft publishes a known-issue rollback or a dedicated fix. If you’re dealing with a BitLocker recovery loop specifically, see our guide on fixing the Windows 11 KB5094126 BitLocker recovery loop for that specific case.
Related: KERNEL_MODE_HEAP_CORRUPTION (0x13A) Fix: 12 Proven Ways to Stop This BSOD
Expert Tips Checklist
- Always run
/get-packagesfirst to get the exact, correctly formatted package name before attempting removal - Use
wmic qfe list brieforGet-HotFixto match a KB number to a recent install date if you’re not sure which update caused the issue - In WinRE, confirm your Windows partition’s drive letter with
bcdeditbefore running any/image:command; it’s frequently notC:\ - Try
revertpendingactionsfirst if the failure happened mid-update, before manually removing individual packages - Reinstall a corrected version of the update once Microsoft releases one; don’t leave a security patch permanently removed
- If DISM reports a package as “not applicable,” check whether it’s already been superseded before assuming the command failed
Conclusion
DISM is the tool of last resort for Windows updates, and that’s exactly why it’s worth knowing how to use. Settings and WUSA cover the easy cases, but when an update won’t uninstall through the normal UI, or worse, has left your PC unable to boot at all, dism /online /remove-package and its offline counterpart dism /image:D:\ /remove-package are what actually get you unstuck.
The process is the same in both cases: list the packages, find the exact name of the one causing trouble, and remove it; the only difference is whether you’re doing it from a running Windows install or from Windows Recovery Environment on one that won’t start.
Keep the exact commands from this guide handy, and a bad update stops being a reason to reinstall Windows from scratch.
Related: Fix UNEXPECTED_KERNEL_MODE_TRAP (0x7F) in Windows 11/10
Frequently Asked Questions
What is DISM used for?
DISM (Deployment Image Servicing and Management) is a Windows command-line tool for managing Windows images, both the one currently running on your PC and offline images like WIM files. It can add, remove, and repair update packages, drivers, and Windows features.
How do I find the exact package name of a Windows update?
Run dism /online /get-packages /format:table from an elevated Command Prompt. This lists every installed package; match the one you want by its KB number and installation date.
Can DISM remove an update if Windows won’t boot?
Yes. Boot into Windows Recovery Environment (WinRE), open a command prompt there, and use dism /image:D:\ /remove-package /packagename:PACKAGE_NAME, replacing D:\ with the correct drive letter for your Windows installation as shown by WinRE.
Why won’t wusa.exe uninstall my update, but DISM can?
Modern Windows cumulative updates bundle the Servicing Stack Update and the Latest Cumulative Update into a single combined package. WUSA can’t remove these combined packages; it reports them as not installed, but DISM can, since it works at the package level rather than relying on the older KB-based removal mechanism.
What drive letter should I use in WinRE for the /image: command?
Don’t assume it’s C:. Run bcdedit and check the osdevice line, or manually browse drives with dir D:, dir E:, and so on, looking for the one containing a Windows folder.
Is it safe to remove a Windows update with DISM?
Mechanically, yes, but removing a security update reopens the vulnerability it patched, leaving the system less secure until a corrected version is reinstalled. Only remove an update to resolve a specific, confirmed problem.
What does “Error 87” mean when running a DISM removal command?
It almost always indicates invalid syntax, most commonly a typo or mismatch in the package name. Copy the exact name directly from /get-packages output rather than typing it manually.
Can I remove a Servicing Stack Update (SSU) with DISM?
No, Servicing Stack Updates cannot be removed once installed. This is intentional; SSUs are designed to be permanent once applied, since later updates depend on them.
What’s the difference between DISM/online and DISM/image:?
/online Targets the currently running Windows installation. /image: Targets an offline Windows image, either a mounted WIM file or, in a recovery scenario, the Windows partition of a PC that isn’t currently booted into that OS.
How do I know which update caused my problem in the first place?
Run wmic qfe list brief /format:table (or Get-HotFix in PowerShell on systems where wmic has been removed) to see installed updates sorted by date. The update installed right before your problem started is the most likely candidate.
Can DISM undo a Windows feature update, not just a monthly cumulative update?
Yes, the same /remove-package approach works for feature updates as well as cumulative updates, provided the rollback files for that specific update still exist on the system.
What if DISM says the package “does not apply to this image”?
This usually means the update has already been superseded by a later cumulative update, was integrated into another package, or has already been removed. Run /get-packages again to check its current listed state before trying again.
Does removing an update with DISM delete my personal files?
No. DISM package removal only affects the specific update component you target; it doesn’t touch personal files, installed applications, or other system settings.
How long do I have before I can no longer remove an update with DISM?
Windows keeps rollback files for a limited window after an update installs, generally around 10 days for most updates, though this varies. After that window closes, or if the files are manually cleaned up, DISM removal is no longer possible for that specific update.
Can I use PowerShell instead of Command Prompt for this?
Yes. Remove-WindowsPackage -Online -NoRestart -PackageName "PACKAGE_NAME" performs the same removal as the DISM command and wraps the same underlying functionality.
Found this guide useful? Share it with someone who is suffering from networking-related issues. Follow us on Facebook and Twitter for more tips, tricks, and guides.
We also ask that you bookmark this page for future reference, as we are constantly updating our articles with new information.
Sign up for our free newsletter as well to receive fresh information immediately in your inbox and keep technically up to date.
Disclosure: If you follow our links to a retailer’s website and make a purchase, we will get an affiliate commission on some, but not all, of the items or services we promote. This will not change the price for you.


)