

Fix UNEXPECTED_KERNEL_MODE_TRAP (0x7F) in Windows 11/10
Quick answer: UNEXPECTED_KERNEL_MODE_TRAP is a Blue Screen of Death caused almost exclusively by faulty or mismatched RAM, or a corrupted/incompatible driver, most commonly a GPU driver. It still occurs regularly on Windows 11 (frequently reported after upgrading from Windows 10, and often triggered specifically when the screen wakes from sleep or a game is minimized). The single fastest way to narrow down the cause is checking your crash dump, which usually names the exact faulting driver.
What Is UNEXPECTED_KERNEL_MODE_TRAP?
This is a BSOD that occurs when the CPU hits a condition, a “trap”, that the Windows kernel isn’t equipped to handle safely, forcing an immediate shutdown as a protective measure rather than letting the system continue in a corrupted state.
It’s officially labeled stop code 0x0000007F and displays as UNEXPECTED_KERNEL_MODE_TRAP on the blue screen.
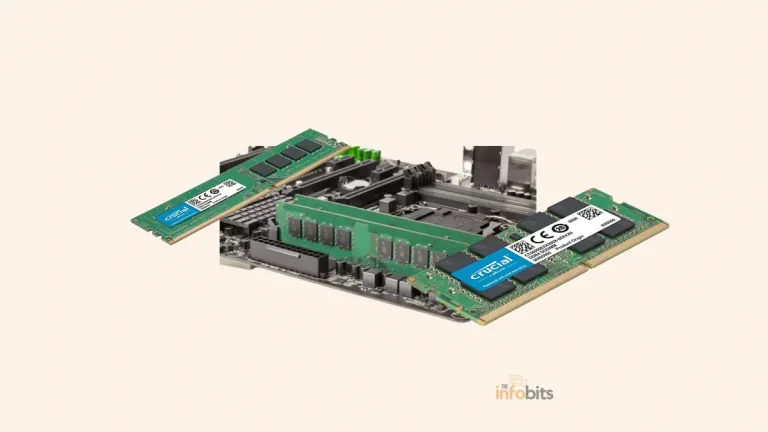
According to Microsoft’s own documentation, this bug check typically follows the installation of faulty or mismatched memory hardware, or occurs when installed hardware fails outright.
A related cause is a kernel stack overflow, which can happen when multiple drivers attach to the same stack and one of them causes a recursive loop back into it.
In practice, based on current user reports across Microsoft’s own support forums, the two most common real-world triggers in 2026 are:
- Faulty, incompatible, or mismatched RAM
- A corrupted or incompatible driver; very frequently the GPU driver, especially after upgrading from Windows 10 to Windows 11, or specifically when the screen wakes from sleep or you alt-tab out of a game
Related: Simple [solved] fixes for the Kernel Mode Heap Corruption Error on Windows
Find the Cause First: Check Your Crash Dump
Before working through fixes blind, it’s worth spending five minutes identifying what’s actually causing the crash. Windows almost always records this information automatically, and it can save you from testing fixes that don’t apply to your situation.
- Search Reliability Monitor in the Start menu and open it
- Find the red “X” marking your most recent crash and click on it
- Look for a View technical details or Check for a solution option, which may point to a specific driver or file
For a more definitive answer, check the actual crash dump file:
- Open File Explorer and go to
C:\Windows\Minidump - If dump files exist, note the most recent one (filenames are timestamped)
- Download a free tool like WhoCrashed or BlueScreenView, point it at that folder, and let it scan
- Look for a MODULE_NAME or IMAGE_NAME field in the result. This is very often the exact driver responsible
Common results people report for this specific error include nvlddmkm.sys (NVIDIA graphics driver) and other third-party filter drivers (backup software, antivirus, and storage drivers are frequent repeat offenders).
If your dump folder is empty after a crash, dump generation may be disabled. Check System Properties > Advanced > Startup and Recovery > Settings and confirm Write debugging information is set to at least Small memory dump.
Once you know the likely culprit, jump straight to the relevant fix below instead of working through every step in order.
Related: How to Resolve the Windows 10 System Service Exception Error?
Quick Fixes to Try First
1. Restart Your Computer
If this is the first time you’ve seen the error, a restart alone resolves a fair number of one-off crashes tied to temporary system state. If it recurs, move on to the steps below.
2. Undo Any Recent Hardware or Software Changes
If the crash started shortly after installing new hardware (especially RAM) or software, that’s the most likely cause. Remove the new RAM module and test, or uninstall the recently added software/driver and restart. If the crash disappears, you’ve found your cause.
3. Run the Windows Blue Screen Troubleshooter
The menu path has changed since Windows 10:
- Open Settings
- Go to System > Troubleshoot > Other troubleshooters
- Find Blue Screen and click Run (this option is generally only available if a BSOD has occurred recently)
- Follow the on-screen guidance
4. Check and Install Pending Windows Updates
- Open Settings > Windows Update
- Install any pending updates, including optional driver updates listed separately
- Restart
Related: How to Resolve the DISM Error 1910 in Windows?
Driver-Related Fixes (Most Common Cause)
5. Update or Roll Back Your Graphics Driver
Given how often the GPU driver is the actual cause, this is worth prioritizing:
- Open Device Manager, expand Display adapters
- Right-click your GPU, select Update driver
- If the crash started right after a driver update, instead select Properties > Driver tab > Roll Back Driver (only available if a previous version is stored)
- If rolling back isn’t available, uninstall the driver entirely (check Delete the driver software for this device if offered) and reinstall a stable version directly from NVIDIA, AMD, or Intel’s website rather than relying solely on Windows Update
6. Check Device Manager for Other Faulty Drivers
- Open Device Manager
- Look for any device with a yellow warning icon
- Right-click and select Update driver, or Uninstall device if updating doesn’t resolve it (Windows will typically reinstall a generic driver on restart)
If your crash dump pointed to a specific non-GPU driver (backup software, storage drivers, and VR software are common repeat offenders in current reports), prioritize updating or removing that specific one first.
7. Temporarily Disable or Uninstall Third-Party Antivirus
Third-party antivirus software has a long history of contributing to kernel-mode crashes through their file system filter drivers, which sit directly in the kernel stack this error involves.
Disable it temporarily to test; if the crash stops, uninstall it completely using the vendor’s dedicated removal tool (a simple uninstall often leaves driver remnants behind) and consider switching to Windows Defender, which is built-in and doesn’t carry the same third-party filter driver risk.
Related: Why Does the Mic Keep Cutting Out in Windows? [Simple Fixes]
Hardware Checks
8. Reseat RAM and Check Physical Connections
Since faulty or loosely seated memory is one of the two leading causes:
- Power off and unplug your PC
- Open the case, remove each RAM stick, and reseat it firmly in its slot
- Check other internal connectors for looseness while you’re in there
- If dust has built up, use compressed air to clear it away from components and connectors before closing the case back up
9. Run Windows Memory Diagnostic
- Search Windows Memory Diagnostic in the Start menu and run as administrator
- Choose to restart and check for problems immediately, or check at next restart
- After it completes and Windows restarts, open Event Viewer, go to Windows Logs > System, and search for “MemoryDiagnostic” to see the results
10. Run MemTest86 for a More Thorough Check
The built-in tool can miss issues that a longer, more rigorous test catches:
- Download MemTest86 and create a bootable USB drive using a tool like Rufus
- Boot from the USB drive
- Let the test run. A full pass across all your RAM can take several hours depending on capacity, so it’s worth running overnight
- If it reports errors, the affected RAM module needs to be replaced. MemTest86 can often narrow down which specific module or slot is at fault
Deeper System Fixes
11. Run SFC and DISM
These built-in tools repair corrupted system files, which can independently contribute to kernel-level crashes:
- Open Command Prompt as Administrator (or Windows Terminal as Administrator)
- Run:
DISM /online /cleanup-image /restorehealth. This can take up to 20 minutes; let it finish even if it appears stuck - Once complete, run:
sfc /scannow - Restart afterward and monitor for the crash recurring
12. Check for BIOS Updates, and Disable Overclocking
Overclocked CPU or RAM settings running outside stable parameters are a known contributor to this specific error:
- Restart and enter BIOS (commonly F2 or Del during boot . Check your motherboard manual for the exact key)
- If you’ve manually overclocked, either revert to default clock speeds or use the BIOS’s Load Setup Defaults / Optimized Defaults option
- While in BIOS, check your motherboard manufacturer’s website for a pending BIOS update. This can resolve compatibility issues with newer hardware, but proceed carefully, since an interrupted BIOS update can leave a motherboard unusable
Last-Resort Fixes
13. Reset This PC
If the crash persists after the above, resetting Windows gives you a clean OS install without needing full reinstallation media:
- Back up your data first
- Go to Settings > System > Recovery
- Under Reset this PC, click Reset PC
- Choose to keep or remove your files, and follow the prompts
14. Clean Reinstall Windows
If a reset doesn’t resolve it, the Windows installation itself may be corrupted beyond what a reset can repair. Back up everything first, then perform a clean install using Windows 11 installation media from Microsoft’s own site.
15. Suspect a Motherboard or CPU Issue
If none of the above resolves the crash, especially if Memory Diagnostic and MemTest86 both come back clean and driver updates don’t help, the remaining possibility is a motherboard, CPU, or power supply fault.
At this point, professional diagnostics or a visit to an authorized service center is the more reliable next step than continuing to try software-level fixes.
Related: How to Test a PC Motherboard: Signs of Failure, Diagnostic Tools
Summary
UNEXPECTED_KERNEL_MODE_TRAP almost always traces back to one of two causes: faulty or mismatched RAM, or a corrupted/incompatible driver.
GPU drivers are the single most frequently reported culprit in current 2026 reports, especially after a Windows 10-to-11 upgrade or when the crash coincides with waking from sleep.
Checking your crash dump with a tool like WhoCrashed before diving into fixes will usually point you directly at the responsible driver, saving significant troubleshooting time compared to working through every fix in sequence.
If drivers check out clean, move to RAM diagnostics, then system file repair, and reserve a full Windows reinstall or hardware diagnostics for when everything else has been ruled out.
Frequently Asked Questions
What causes UNEXPECTED_KERNEL_MODE_TRAP in Windows 11?
The two leading causes are faulty or mismatched RAM and a corrupted or incompatible driver, most commonly a GPU driver. It’s frequently reported after upgrading from Windows 10 to Windows 11, and often triggers specifically when the screen wakes from sleep or a game is minimized.
How do I know which driver is causing the crash?
Check C:\Windows\Minidump for crash dump files and analyze them with a free tool like WhoCrashed or BlueScreenView, which will typically identify the responsible driver by name in a MODULE_NAME or IMAGE_NAME field.
Can antivirus software cause this error?
Yes. Third-party antivirus programs install kernel-mode filter drivers that sit directly in the same kernel stack involved in this error, and they’re a documented, recurring cause of 0x7F crashes. Temporarily disabling or uninstalling third-party antivirus is a reasonable early troubleshooting step.
Do I need to replace my RAM if MemTest86 finds errors?
Yes, generally. If MemTest86 or Windows Memory Diagnostic report consistent errors on a specific module, that module has a hardware fault and needs to be replaced rather than repaired.
Will resetting or reinstalling Windows definitely fix this error?
Not necessarily, if the underlying cause is a hardware fault (RAM, motherboard, or CPU) rather than a software or driver issue. Resetting or reinstalling Windows resolves software-side corruption but won’t fix a hardware problem. That’s why hardware diagnostics are worth ruling out even if you’re already planning a reinstall.
Is it safe to update my BIOS to fix this?
A BIOS update can resolve compatibility issues that contribute to this error, but it should be done carefully and only from your motherboard manufacturer’s official site. An interrupted BIOS update can leave a motherboard unusable. It’s usually worth trying driver and RAM fixes first before considering a BIOS update.
Why does this crash only happen when my PC wakes from sleep?
This pattern is frequently linked to a GPU or power-management driver that doesn’t handle the sleep/wake cycle correctly. Updating your graphics driver to the latest version, or reinstalling it cleanly, resolves this pattern for many users.
We hope you found this post informative, and do like and follow us on Facebook and Twitter for regular updates.
We also ask that you bookmark this page for future reference. Sign up for our free newsletter as well to receive fresh information immediately in your inbox and keep technically up to date.




%20in%20Windows%2011/10)