DISM Error 1910 Fix: “The Object Exporter Specified Was Not Found”
You ran DISM /Online /Cleanup-Image /RestoreHealth to repair a corrupted Windows image. Maybe because sfc /scannow couldn’t fix something on its own, and instead of a clean repair, you got this:
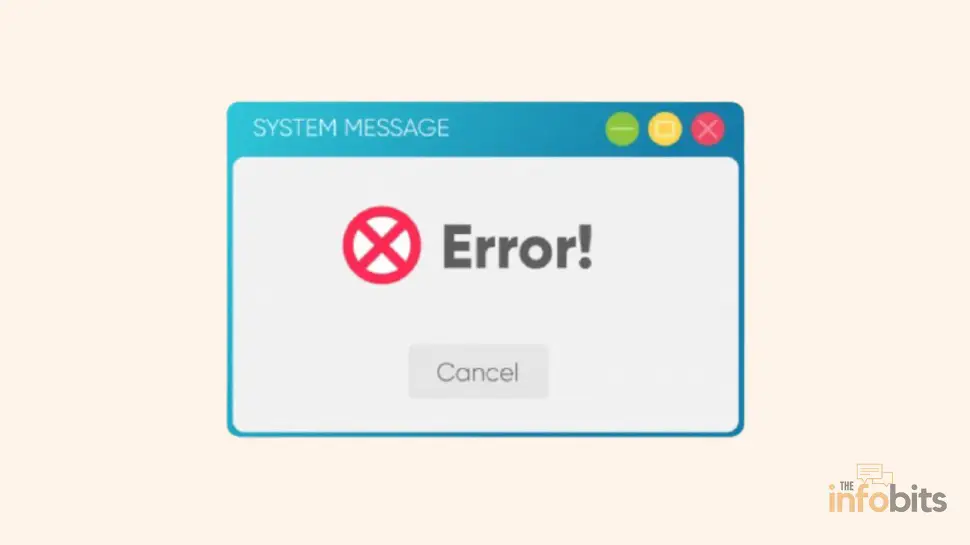
Error: 1910
The object exporter specified was not found.
The DISM log file can be found at C:\WINDOWS\Logs\DISM\dism.log
It’s a frustrating error precisely because it shows up while you’re trying to fix something else. The good news: this specific error has a well-documented cause and a specific command sequence that resolves it for most people, without needing a full reinstall.
Quick answer: DISM error 1910 usually means the Windows Component Store itself is damaged enough that DISM can’t complete its own repair, or that a related Windows service (most often the Windows Modules Installer) isn’t running. Running
DISM /Online /Cleanup-Image /StartComponentCleanup, followed by ansfc /scannow, before retrying/RestoreHealthresolves it in most cases. If that doesn’t work, checking the required background services and, as a last resort, doing a repair install with fresh Windows installation media will.
This error appears on Windows 10 and Windows 11 alike, and the fix is the same on both.
What Causes DISM Error 1910?
DISM (Deployment Image Servicing and Management) relies on a set of underlying Windows services and a healthy Component Store.
The repository of files DISM pulls from to repair a damaged Windows image to do its job. Error 1910 shows up when something in that chain is broken before DISM even gets to the actual repair step. The most common specific causes are:
- A partially corrupted Component Store, often from an interrupted update or a previous failed repair attempt, that DISM can’t process in its current state.
- The Windows Modules Installer service (TrustedInstaller) is stopped or set to a startup type DISM can’t work with. This service handles installing, modifying, and removing Windows updates and optional components; DISM depends on it being available.
- Underlying system file corruption severe enough that DISM’s own internal check fails before it can reach the repair phase.
- A stuck or corrupted previous DISM session, particularly if an earlier DISM run was interrupted (power loss, forced shutdown, or closing the window mid-scan).
- Antivirus or third-party security software interference, which can block DISM’s access to the files or services it needs mid-scan.
Related: KERNEL_MODE_HEAP_CORRUPTION (0x13A) Fix: 12 Proven Ways
Before You Start
A couple of quick notes that will save you time:
- Every command below needs an elevated (administrator) Command Prompt or PowerShell window. Right-click the Start button and choose Terminal (Admin), Windows PowerShell (Admin), or search “cmd,” right-click, and choose Run as administrator.
- DISM needs an active internet connection by default, since it pulls replacement files from Windows Update. If you’re on a metered or unstable connection, these steps can take longer or may need a retry.
- Don’t close the window mid-scan. Interrupting DISM or SFC partway through can leave your Component Store in a worse state than before you started, which is itself a common cause of repeat errors.
How to Fix DISM Error 1910
Step 1: Confirm the Error With StartComponentCleanup
Before jumping to fixes, run this command to see exactly how your system responds. It also happens to be the first real step in the actual fix:
DISM /Online /Cleanup-Image /StartComponentCleanup
If this returns “Error: 2, The system cannot find the file specified,” that confirms the Component Store itself has damage DISM can’t resolve on its own yet. Proceed to Step 2.
Step 2: Run SFC First
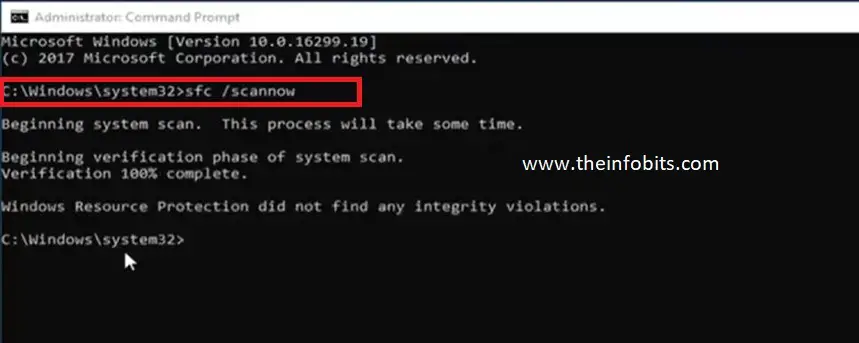
This is the step most guides skip, and it’s the one that resolves error 1910 for the majority of affected users. System File Checker repairs individual protected system files, and DISM’s repair often depends on those files being intact first.
sfc /scannow
Let it run to completion. This can take 10–20 minutes. Don’t close the window or interrupt it partway through, since a partial SFC run can leave files in a worse state than before.
Once it finishes, run the component cleanup command again:
DISM /Online /Cleanup-Image /StartComponentCleanup
Then run the analysis command to check the Component Store’s condition directly:
DISM /Online /Cleanup-Image /AnalyzeComponentStore
Once that completes, run SFC one more time:
sfc /scannow
Restart your computer, then try the original repair command again:
DISM /Online /Cleanup-Image /RestoreHealth
For most people affected by error 1910, this sequence- SFC, component cleanup, analysis, SFC again, restart, then RestoreHealth – resolves it completely.
Step 3: Check That the Windows Modules Installer Service Is Running
If error 1910 persists, confirm the service DISM depends on is actually active:
- Press Windows key + R, type
services.msc, and press Enter. - Scroll down to Windows Modules Installer.
- Right-click it and select Properties.
- Set Startup type to Manual (not Disabled), and if the Service status shows “Stopped,” click Start.
- Click Apply, then OK, and retry the DISM RestoreHealth command.
Step 4: Perform a System Restore (If the Error Started Recently)
If error 1910 began appearing right after a Windows update, a driver update, or a new software installation, restoring to a point before that change can resolve it, since the underlying corruption is often tied to whatever just changed.
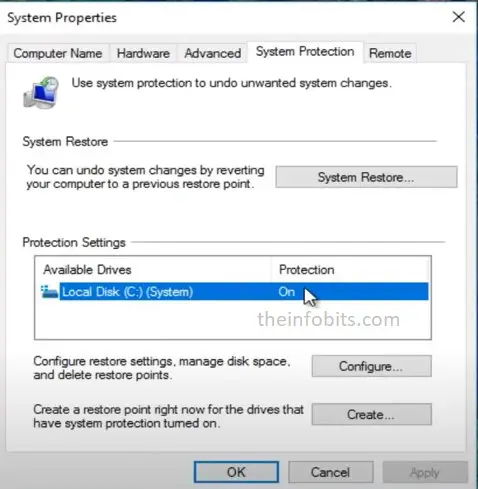
- Search “Create a restore point” in the Start menu and open it.
- In the System Properties window, go to the System Protection tab and click System Restore.
- Click Next, choose a restore point dated before the problem started, and follow the prompts to complete the restore.
Keep in mind: a System Restore reverts installed apps, drivers, and updates made after that point. It won’t touch your personal files, but any software installed since the restore point will need reinstalling. This only works if System Protection was enabled and restore points exist; if none are available, skip to the next step.
Step 5: Repair Install Using Windows Installation Media
If none of the above resolves the error, the Component Store corruption is likely too extensive for DISM to self-heal, even with a healthy source. A repair install replaces every Windows system file while keeping your apps, files, and settings intact.
- Download the Media Creation Tool from Microsoft’s official Windows 10 download page (or the Windows 11 installation media page if you’re on Windows 11).
- Use it to create a bootable USB drive, or simply mount the downloaded ISO directly on your current installation.
- Run
setup.exefrom the mounted ISO or USB drive while Windows is running normally (not from a boot menu). - When prompted, choose Keep personal files and apps.
- Follow the on-screen prompts to complete the in-place upgrade/repair.
This process typically takes 30–60 minutes and requires roughly 20GB of free disk space, but it resolves essentially any Component Store corruption that a targeted DISM/SFC repair couldn’t, without wiping your data.
Related: Can’t Upgrade to Windows 11? Here’s What to Do
Step 6: Specify a Different Repair Source (Advanced)
If you have access to a Windows installation ISO matching your exact build, you can point DISM directly at it instead of relying on Windows Update, which sometimes resolves error 1910 when the issue is related to Windows Update connectivity rather than pure file corruption:
- Mount your Windows ISO (right-click it and choose Mount), noting the drive letter it’s assigned (for example,
E:). - Run:
DISM /Online /Cleanup-Image /RestoreHealth /Source:E:\sources\install.wim:1 /LimitAccess
Replace E: with your actual mounted drive letter. The /LimitAccess flag tells DISM to use only the specified source rather than also reaching out to Windows Update.
Note: this only works reliably if the ISO’s build number matches your currently installed Windows build closely. A significant version mismatch can produce different errors rather than resolving this one.
Related: How to Resolve the Windows System Service Exception Error?
Common Mistakes That Make This Harder to Fix
- Skipping SFC and jumping straight to RestoreHealth repeatedly: running the same failing command over and over doesn’t change the outcome; the SFC-first sequence in Step 2 exists because it addresses the actual root cause.
- Closing the Command Prompt mid-scan because it “looks stuck”: both DISM and SFC can appear to pause at certain percentages for several minutes; this is normal, especially at 20% and 60% during SFC.
- Not checking Windows Modules Installer before assuming the problem is unfixable: a stopped service is one of the more common causes and takes 30 seconds to check.
- Attempting a repair install with mismatched installation media: using a Windows 10 ISO to repair a Windows 11 install (or vice versa) won’t work and can create new errors.
- Ignoring antivirus interference: if you run third-party antivirus software, temporarily disabling real-time protection during the DISM/SFC sequence can rule out a common source of false interruptions.
Preventing DISM Error 1910 From Recurring
- Let Windows Updates complete fully rather than force-restarting during an update.
- Run
sfc /scannowperiodically as routine maintenance, especially after major Windows feature updates. - Keep antivirus software updated and configured to avoid interfering with core Windows servicing operations.
- Avoid interrupting any DISM or SFC scan once started. Let it finish or fail on its own.
Final Thoughts
DISM error 1910 looks intimidating because of how it’s worded, but it’s really just Windows telling you that its own repair tool needs a repair first.
Work through the SFC-then-DISM sequence in Step 2 before anything more drastic. It clears the error for most people.
If it doesn’t, checking the Windows Modules Installer service and, if needed, running an in-place repair install will resolve essentially any remaining Component Store corruption without touching your files.
Frequently Asked Questions
What does DISM error 1910 mean?
It means DISM’s repair process was interrupted by a problem it couldn’t resolve on its own, usually damage to the Windows Component Store or the Windows Modules Installer service not being available. The literal message, “The object exporter specified was not found,” refers to an internal Windows component DISM expected to be available and wasn’t.
Does DISM error 1910 mean my Windows installation is badly damaged?
Not necessarily. In most cases, it’s a Component Store issue that resolves with an SFC scan followed by a retry of the DISM command, rather than deep or unrecoverable corruption.
Why does running sfc /scannow before DISM actually help?
DISM’s repair process depends on certain underlying system files being intact to complete successfully. SFC repairs those individual files first, which frequently clears the specific blockage causing error 1910.
Which Windows versions does error 1910 affect?
It has been documented on Windows 7, Windows 8.1, Windows 10, and Windows 11. The fix ( SFC followed by a DISM retry) is the same across all of them.
How long does the SFC and DISM fix sequence take?
Plan for 30–45 minutes total, since both sfc /scannow and DISM /Online /Cleanup-Image /StartComponentCleanup can each take 10–20 minutes to complete, especially on a slower drive.
Do I need an internet connection to fix DISM error 1910?
Yes, in most cases, since DISM’s default repair source is Windows Update. If you have a matching Windows ISO, you can point DISM to it directly using the /Source flag instead, which works offline.
What if sfc /scannow itself fails or can’t fix everything?
Run the DISM RestoreHealth command first to repair the underlying image, then run SFC again afterward. DISM and SFC are complementary, and running them in the right order sometimes matters more than which one you try first.
Is it safe to interrupt DISM or SFC if it looks frozen?
No. Both tools can appear to pause at specific percentages for several minutes, which is normal. Interrupting a scan mid-process can leave your system in a worse state and make the original error harder to fix.
Will a System Restore fix DISM error 1910?
It can, if the error started right after a specific Windows update, driver, or software installation. Restoring to a point before that change often resolves the underlying inconsistency. It won’t help if the corruption predates any restore point you have available.
Do I need to reinstall Windows to fix this error?
Usually not. A full reinstall is a last resort. An in-place repair install (using installation media and choosing “Keep personal files and apps”) resolves all remaining cases essentially without erasing your data, and should be tried well before a clean install.
Can antivirus software cause DISM error 1910?
Yes, in some cases. Third-party antivirus software can interfere with DISM’s access to system files or services mid-scan. Temporarily disabling real-time protection during the repair sequence can rule this out.
What’s the difference between a repair install and a clean install?
A repair install (in-place upgrade) replaces Windows system files while preserving your installed apps, settings, and personal files. A clean install wipes the drive entirely and starts fresh, requiring you to back up and reinstall everything yourself. Always try a repair install first.
Can I specify a different source for DISM to fix error 1910 without using Windows Update?
Yes. Mount a Windows ISO matching your installed build and use DISM /Online /Cleanup-Image /RestoreHealth /Source:X:\sources\install.wim:1 /LimitAccess, replacing X: with your mounted drive letter. This works fully offline if the ISO’s build matches your system closely.
Should I check Windows services if the SFC/DISM sequence doesn’t fix it?
Yes. Confirm the Windows Modules Installer service is set to Manual startup and isn’t stopped, since DISM depends on it. This is a fast check and a genuinely common overlooked cause of persistent error 1910.
We hope you found this article helpful, and do like and follow us on Facebook and Twitter for regular updates.
Sign up for our free newsletter as well to receive fresh information right in your inbox and stay informed technically.
Disclosure: If you follow our links to a retailer’s website and make a purchase, we will get an affiliate commission on some, but not all, of the items or services we promote. This will cause no price change for you.
You May Be Interested in Reading:
- Why Is “Your Location Is Currently in Use” Displayed on Windows?
- How to Address [pii_email_a427253221614b6547d5] Error Code in Outlook Mail?
- Why Does the Mic Keep Cutting Out in Windows
- Fixing the Windows Unexpected Kernel Mode Trap Error in 15 Easy Steps
- Easy Fix for Windows 10 Action Center Not Opening Problem